Check out Part 1 for the start of the story.
Hotend Replacement
The objective of this hotend replacement is to be able to accommodate a E3D V6 hotend and to improve the efficacy of the part cooling fan. Why a E3D V6? In my opinion the E3D's V6 is the best value/performance option on the market. I prefer to use genuine E3D parts, but the market is full of super low cost clones, which potentially offer a even better value/performance ratio. I actually use some clones for general sizing an positioning as they are a perfect mock up of the final parts.
Measuring
The first step of a project like this is sizing and understanding the constraints. The existing Mini Delta hotend was removed from the effector plate by removing just 3 screws.
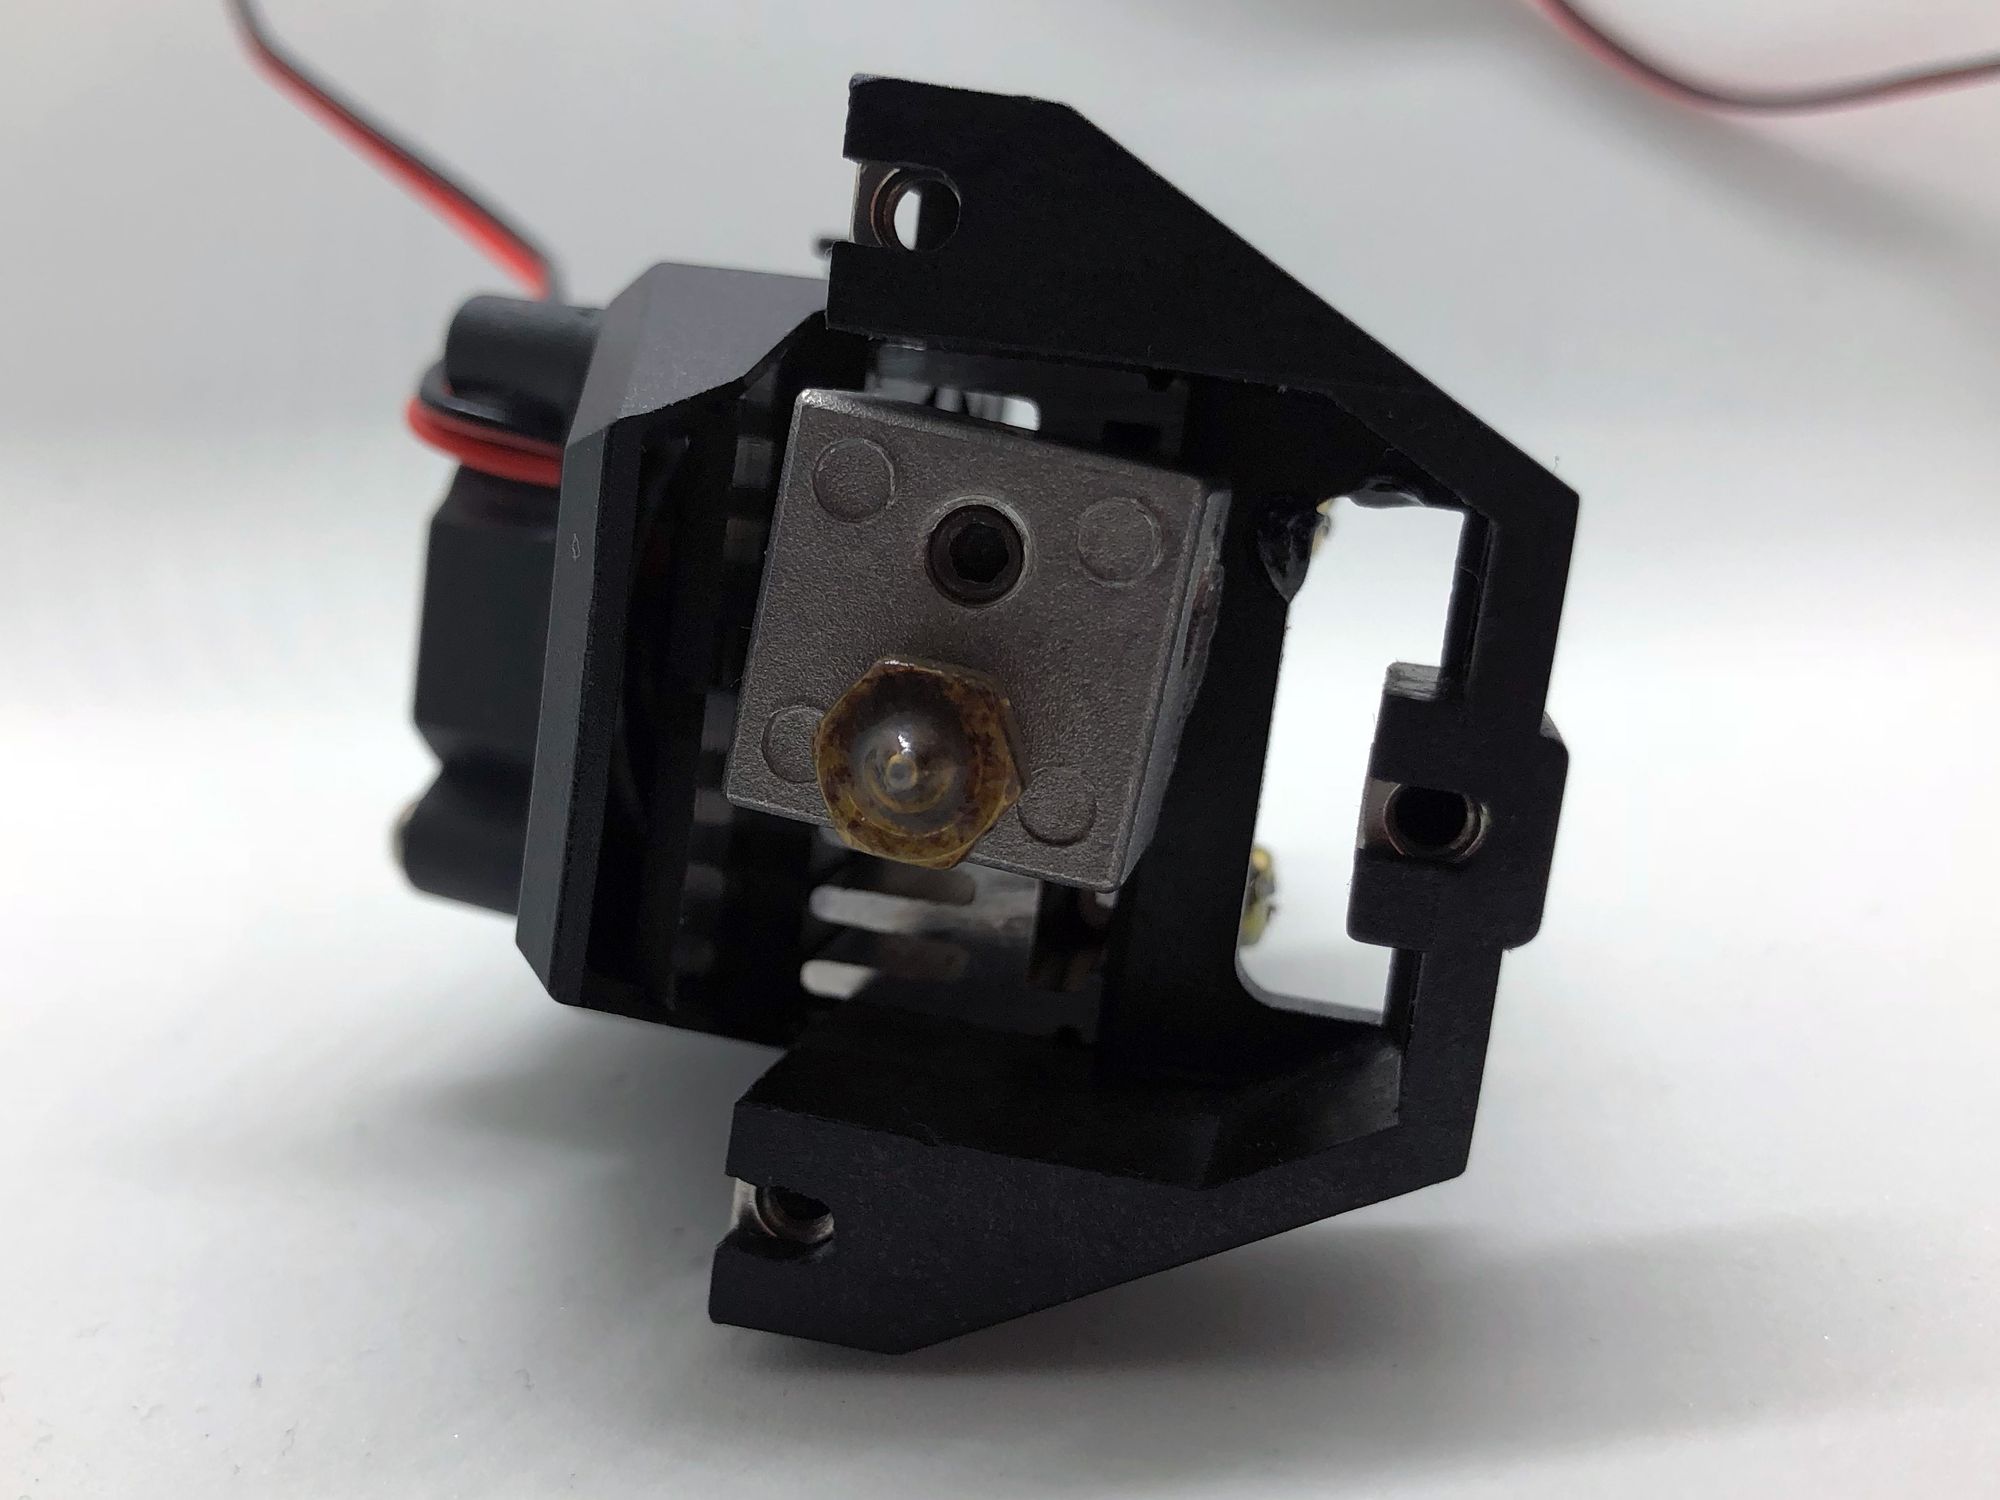
A single 30mm fan provides cooling to the heat sink and acts as a part cooler. With not much airflow to start with, the fan really isn't capable of being a good part cooler in this configuration. There isn't much space to work with to get air down to the part, as the effector arms range of motion severely limits this. Best bet to reduce sizing problems was to stay inside the existing footprint of the old mount.
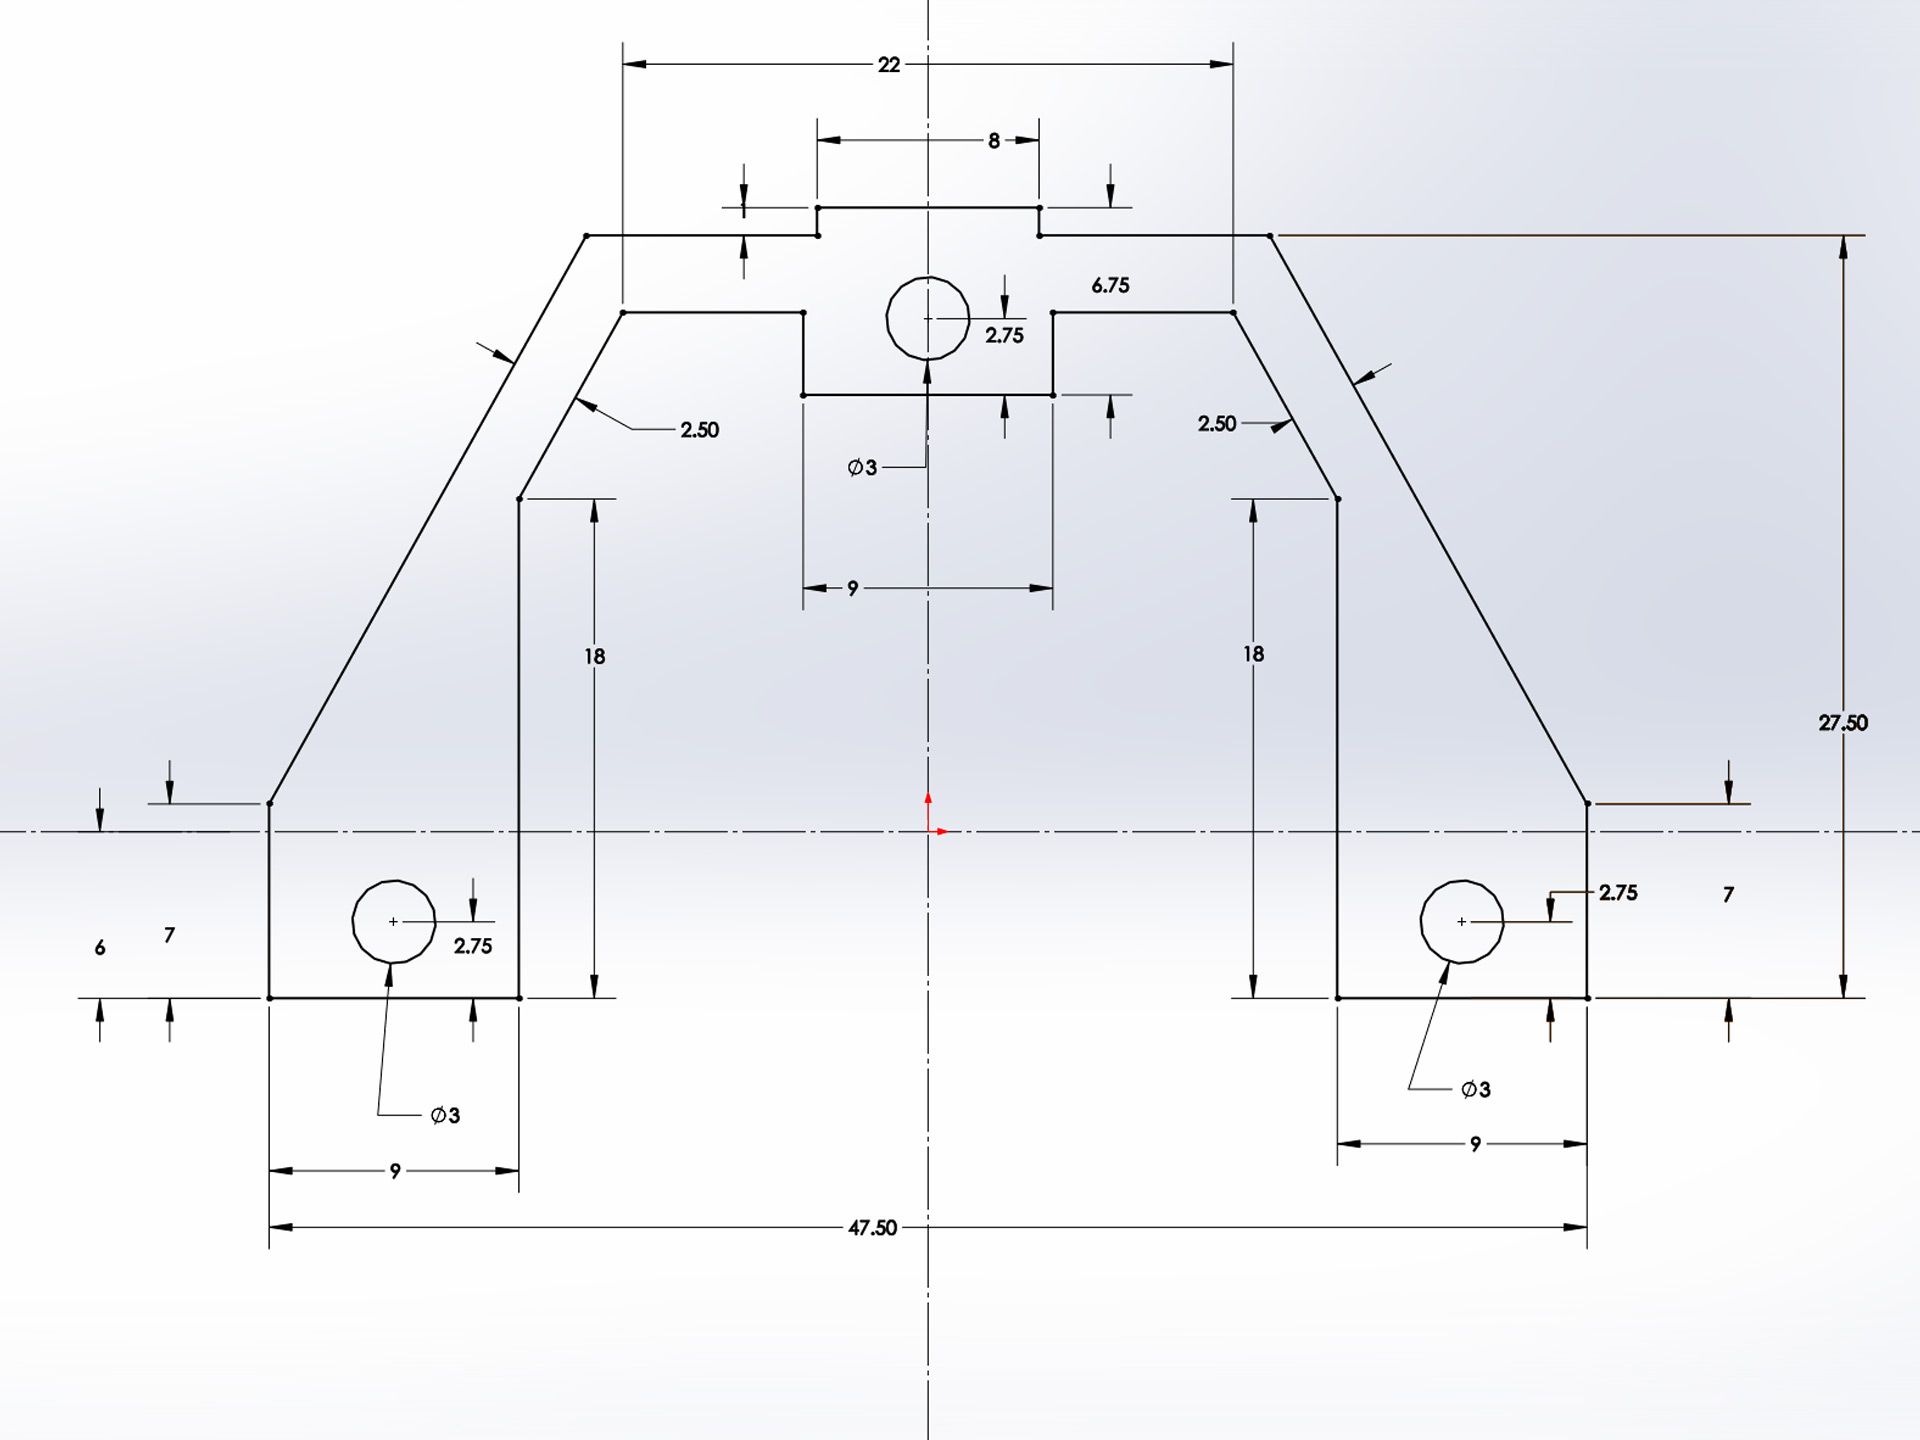
The footprint is pretty straight forward to work from, but it was also important to get the measure of the effector plate to see what could be done routing air to the part.

With all the measurements done, the design work can be moved into CAD.
Design
The highest priority requirement was to get a E3D V6 mounted and in the exact same nozzle position of the stock hotend. I had done some design work for the V6 for another earlier project, so I was able to reused the groove mount design.
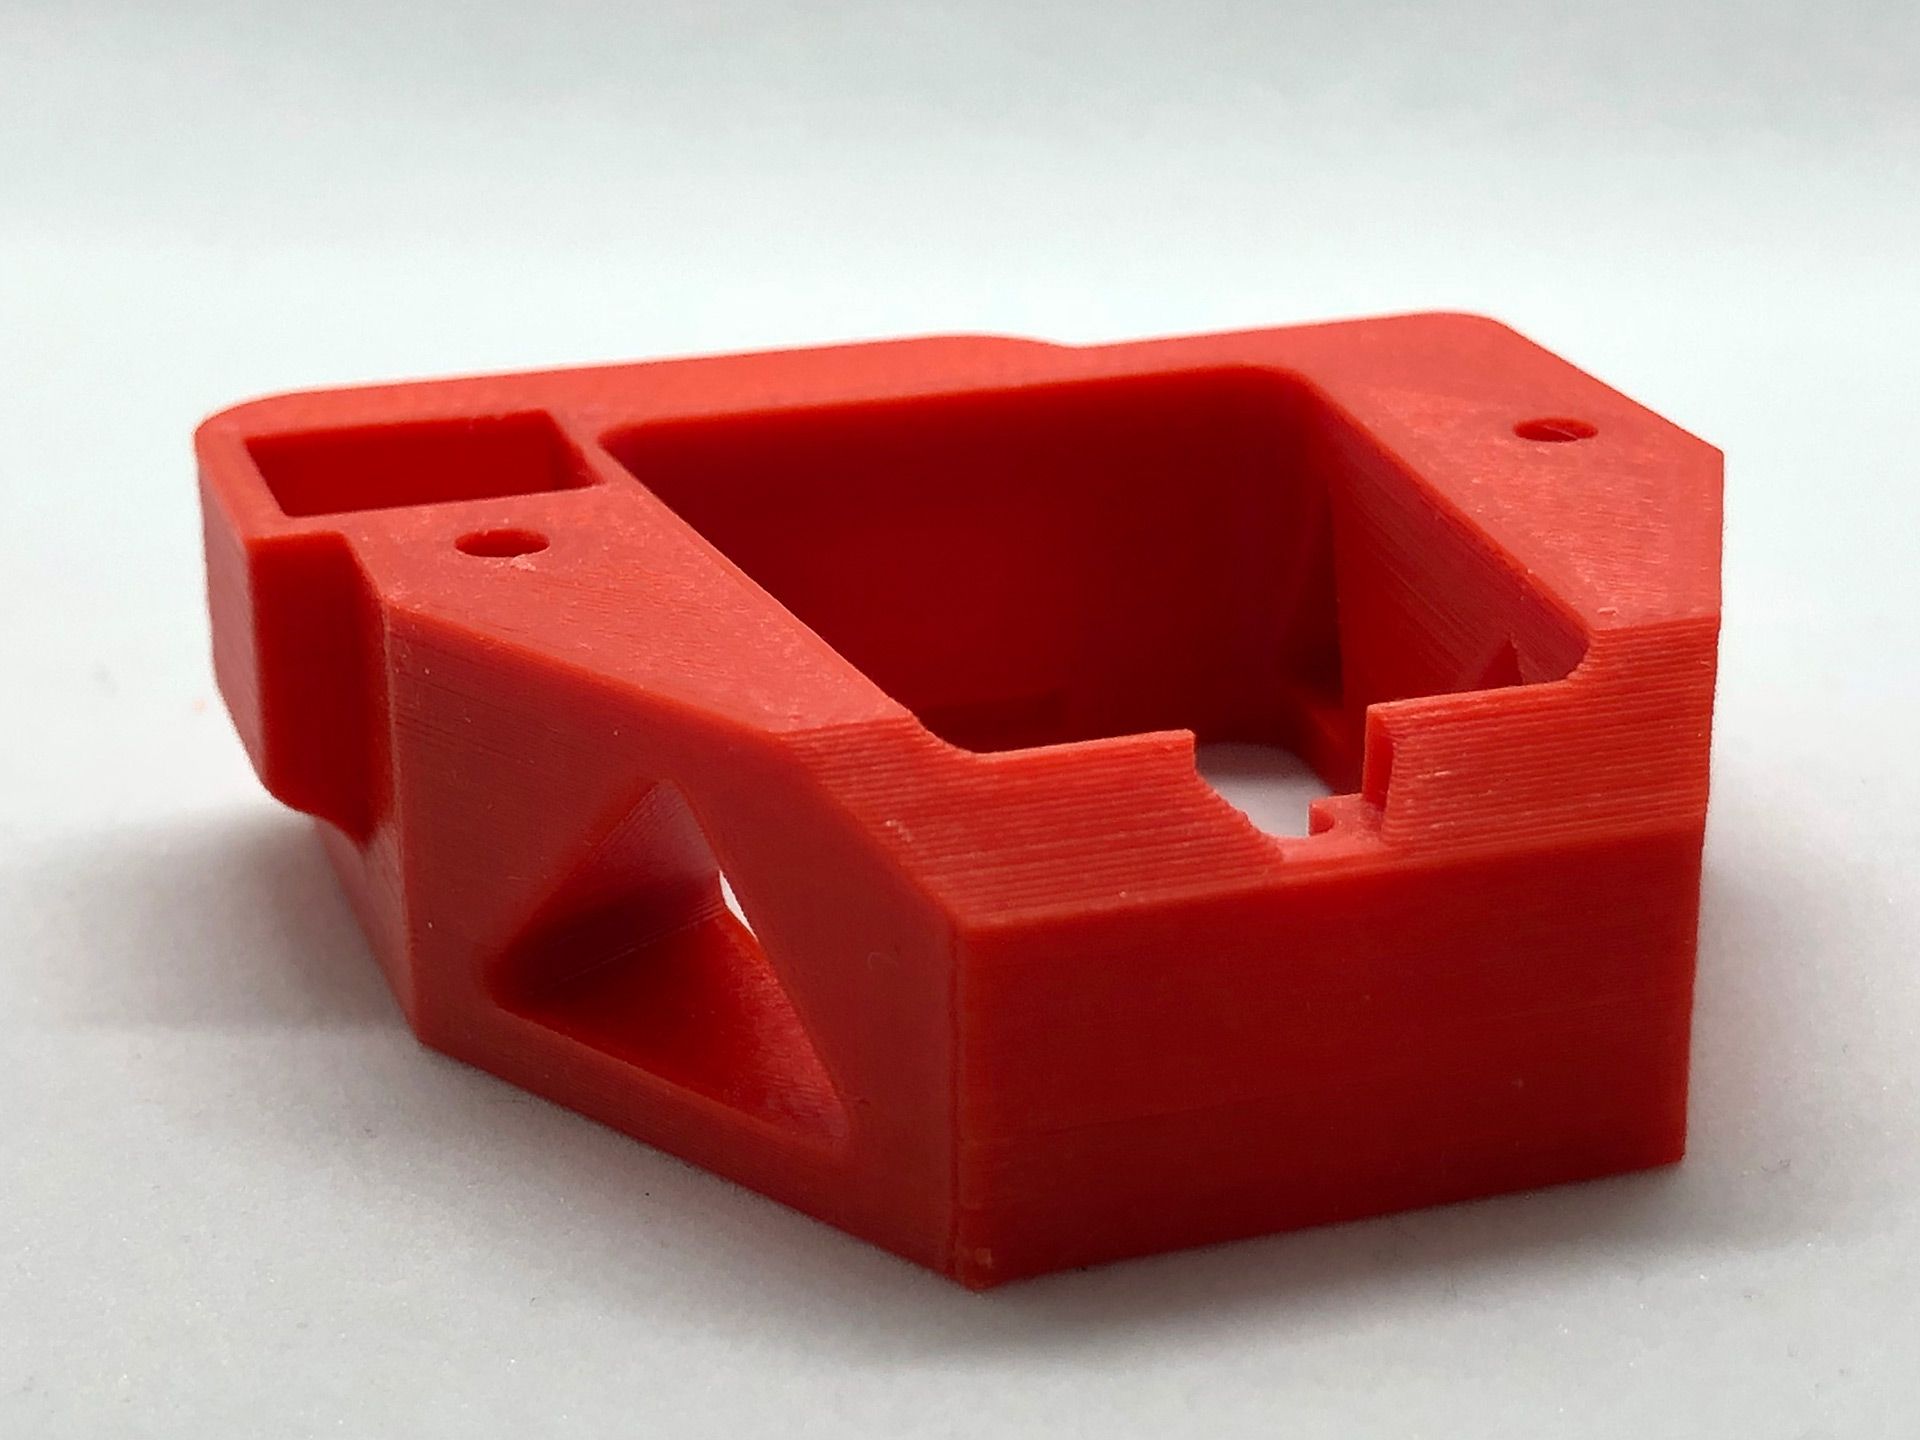
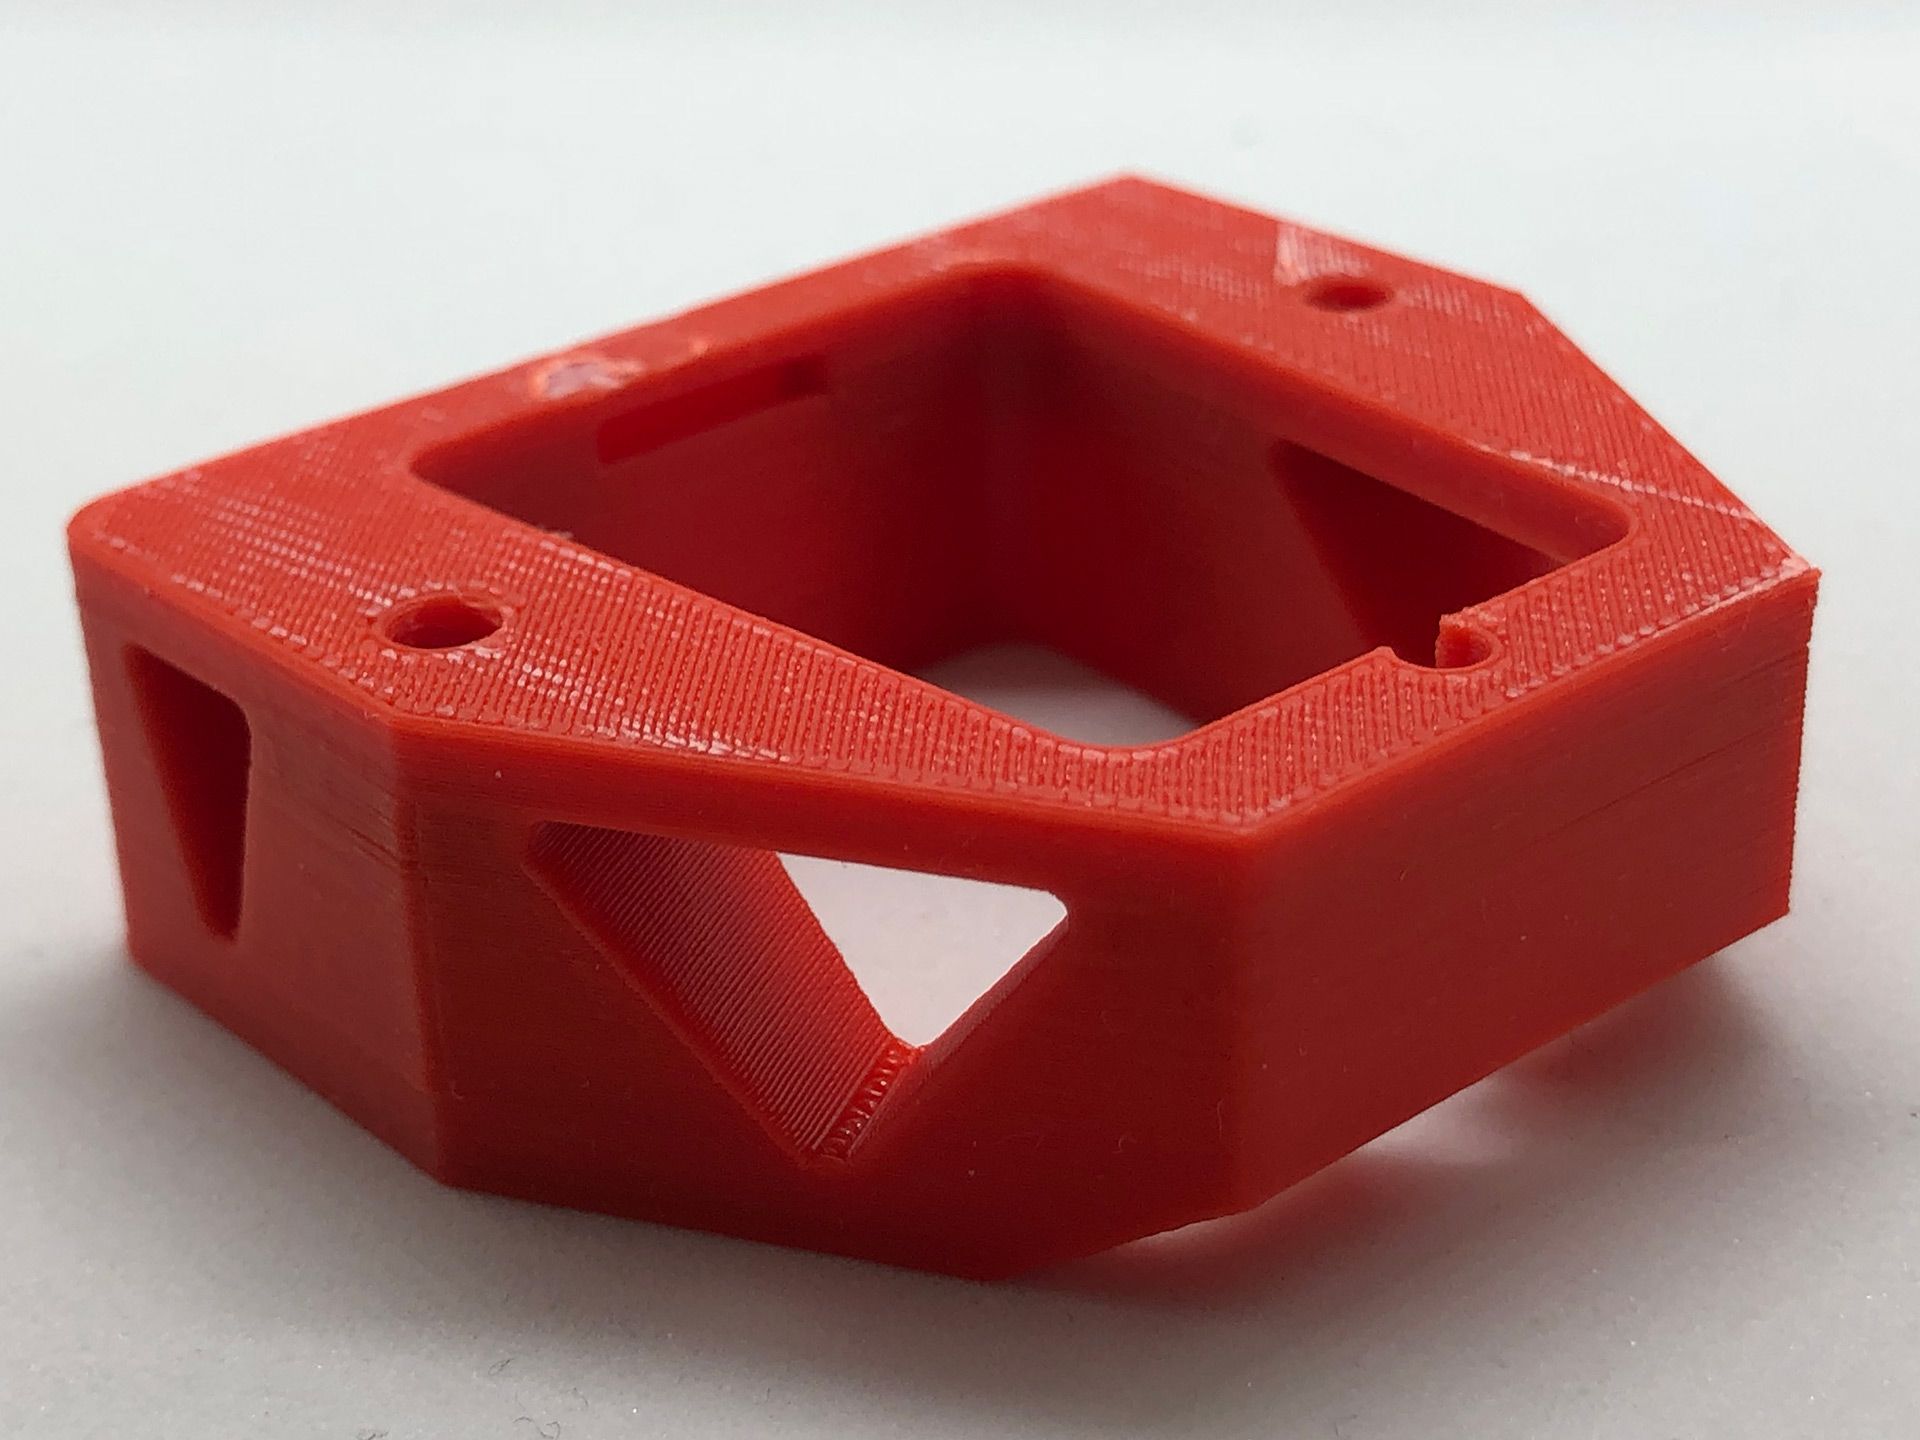
This was the first iteration of the design. It consists of three parts, the base, heat sink mount, and grove mount. Both the base and heat sink mount parts contains embedded 3mm hex nuts. I opted for the embedded nut over a heat set insert because of the depth required for the fasteners. Due to space constraints the front mount point would have to be tapped directly into the plastic, not ideal, but the loads involved are low.
The triangular cut out in the base provides wire pass-through and access for the heater and thermistor cartridges. The heat sink mount can accommodate a 30mm fan and channels the airflow across the V6 heat sink. There's is mount feature on this section for the part cooling fan for later design iterations.
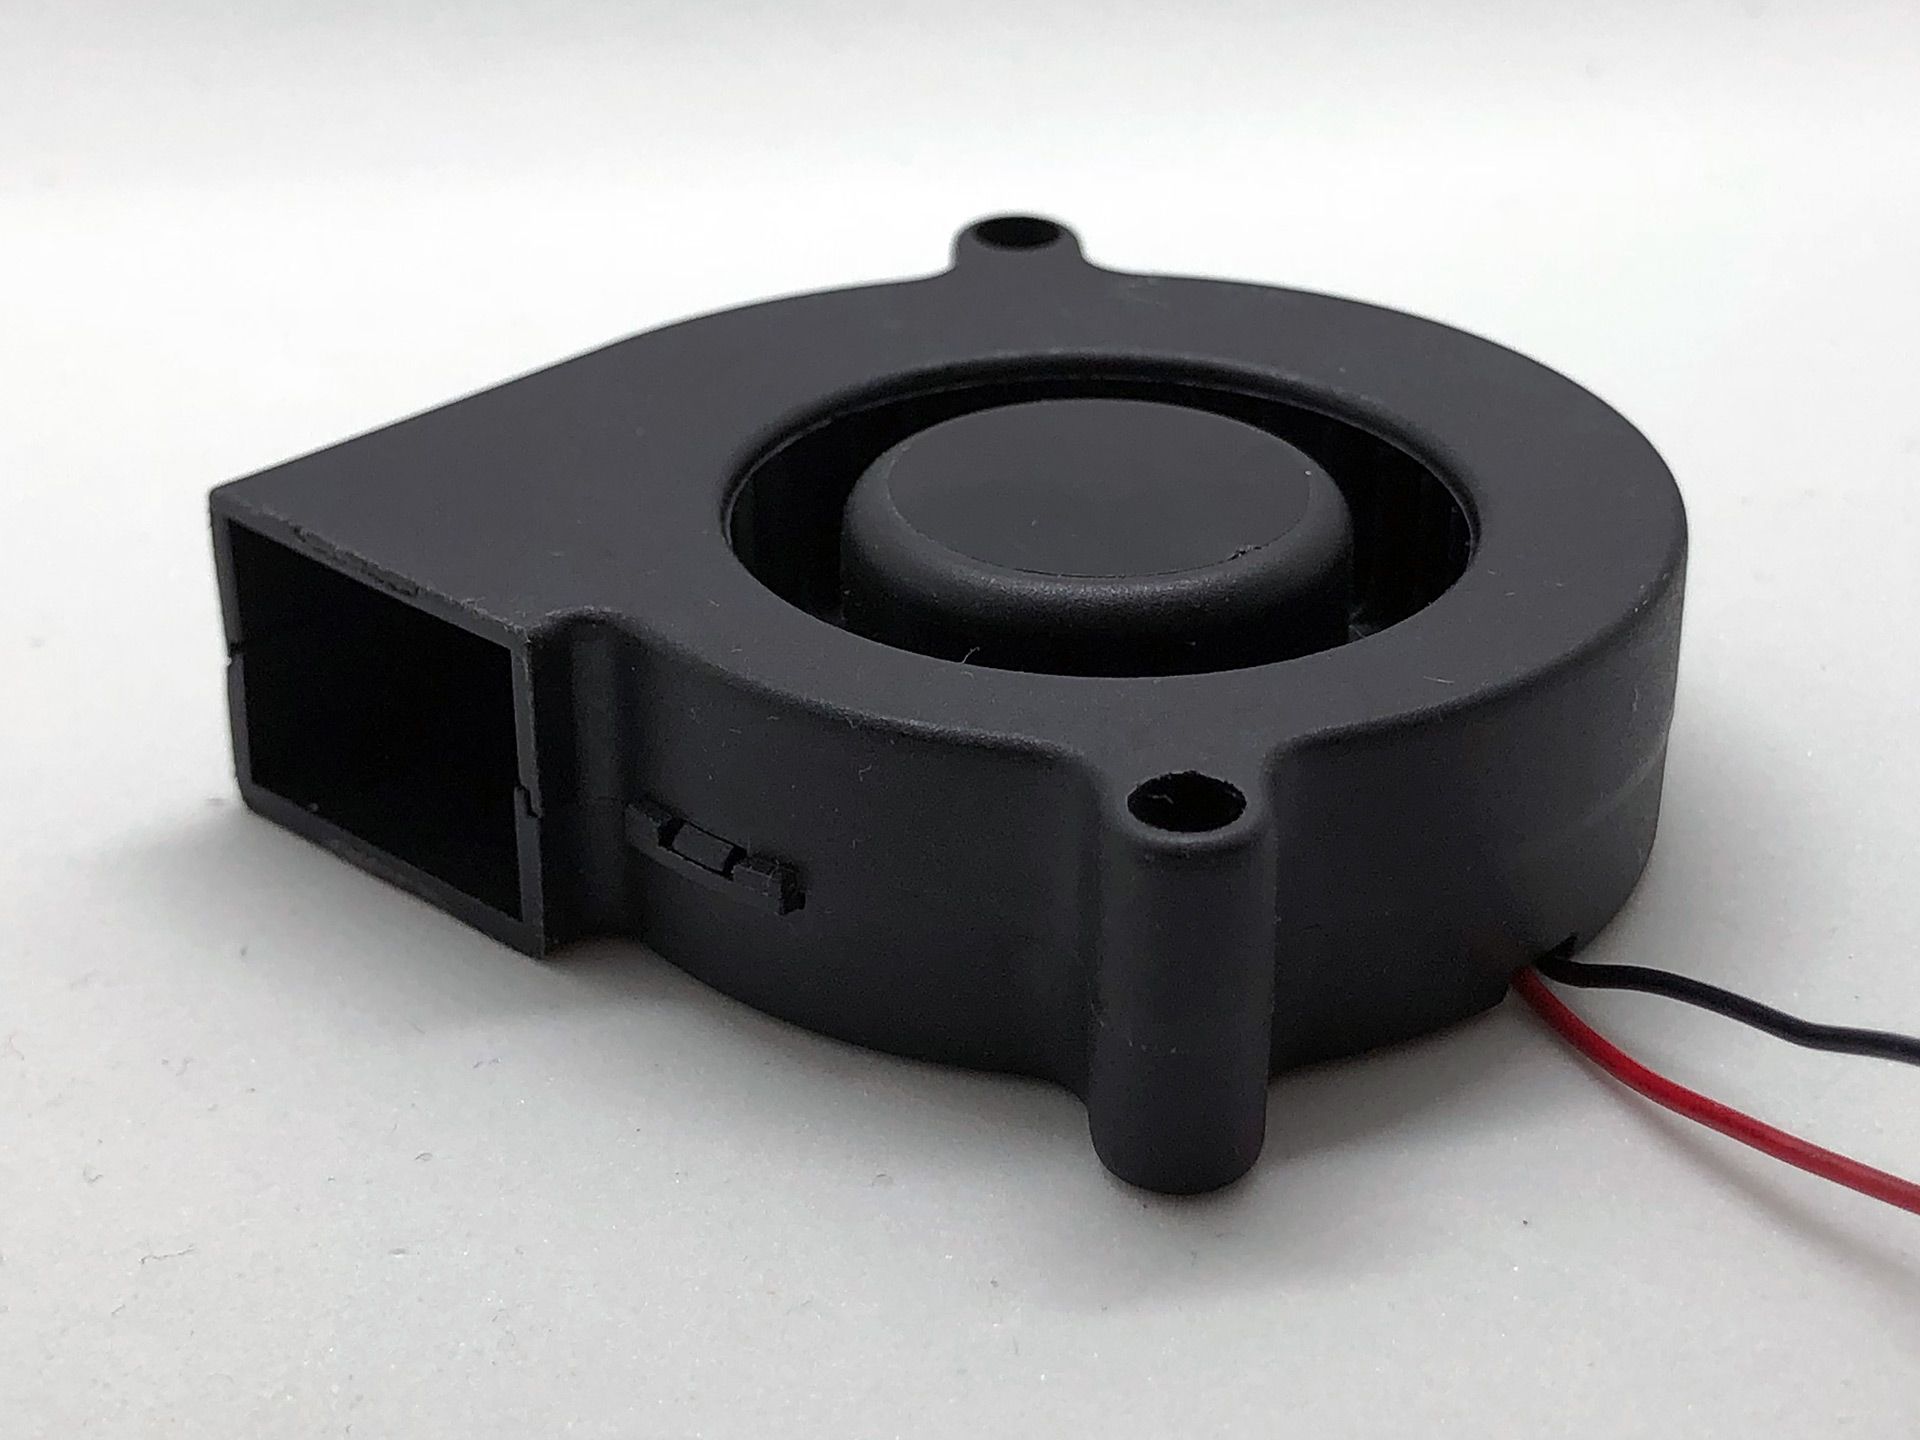
I happen to have a bunch of old blower fans in my parts inventory from a previous project. It's a Sunon Fans GB1205PHVX-8AY.GN, which is a blower style 50X50x15 Maglev fan running at 12V. Although this particular part is obsolete, Sunon has a direct replacement available. It can deliver 4.7 CFM of airflow, which should be more than enough for a part cooler.
After a few failed and dead end iterations of trying to route airflow from the fan to the part, I decided to change strategies. This lead to the second major revision to the design.
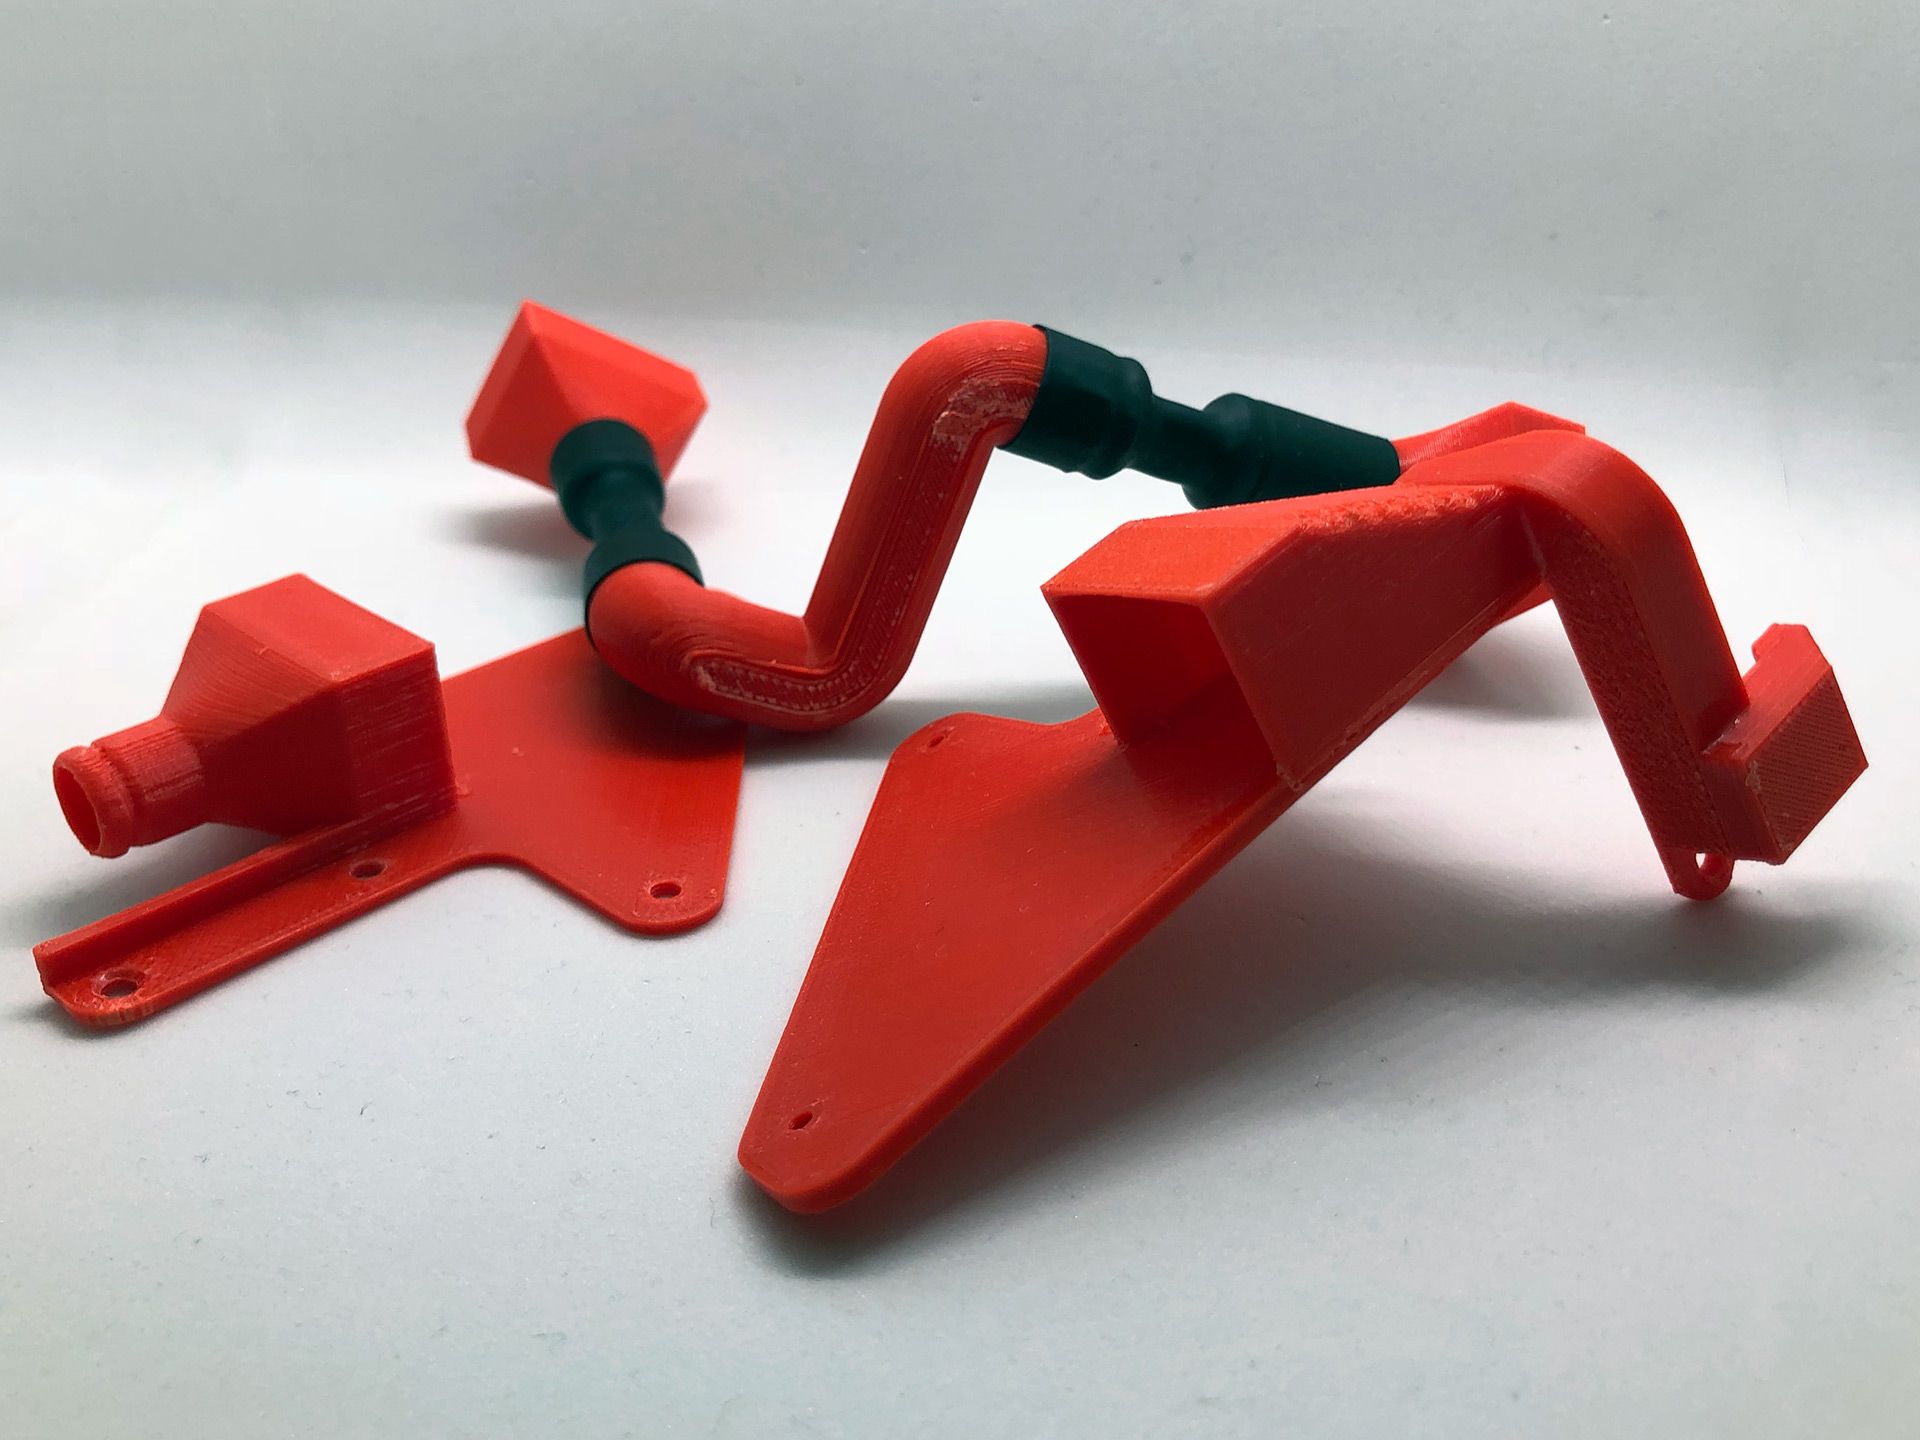
The ducting for the part cooling fan was integrated into the base and heat sink mount. This reduce the parts count and increased space efficiency. This design also reduces the complexity of the fan mount. The air exits the base via an integrate nozzle that is aimed toward the hotend nozzle. This was the most promising iteration and was worth further refinement.
Version 1.0
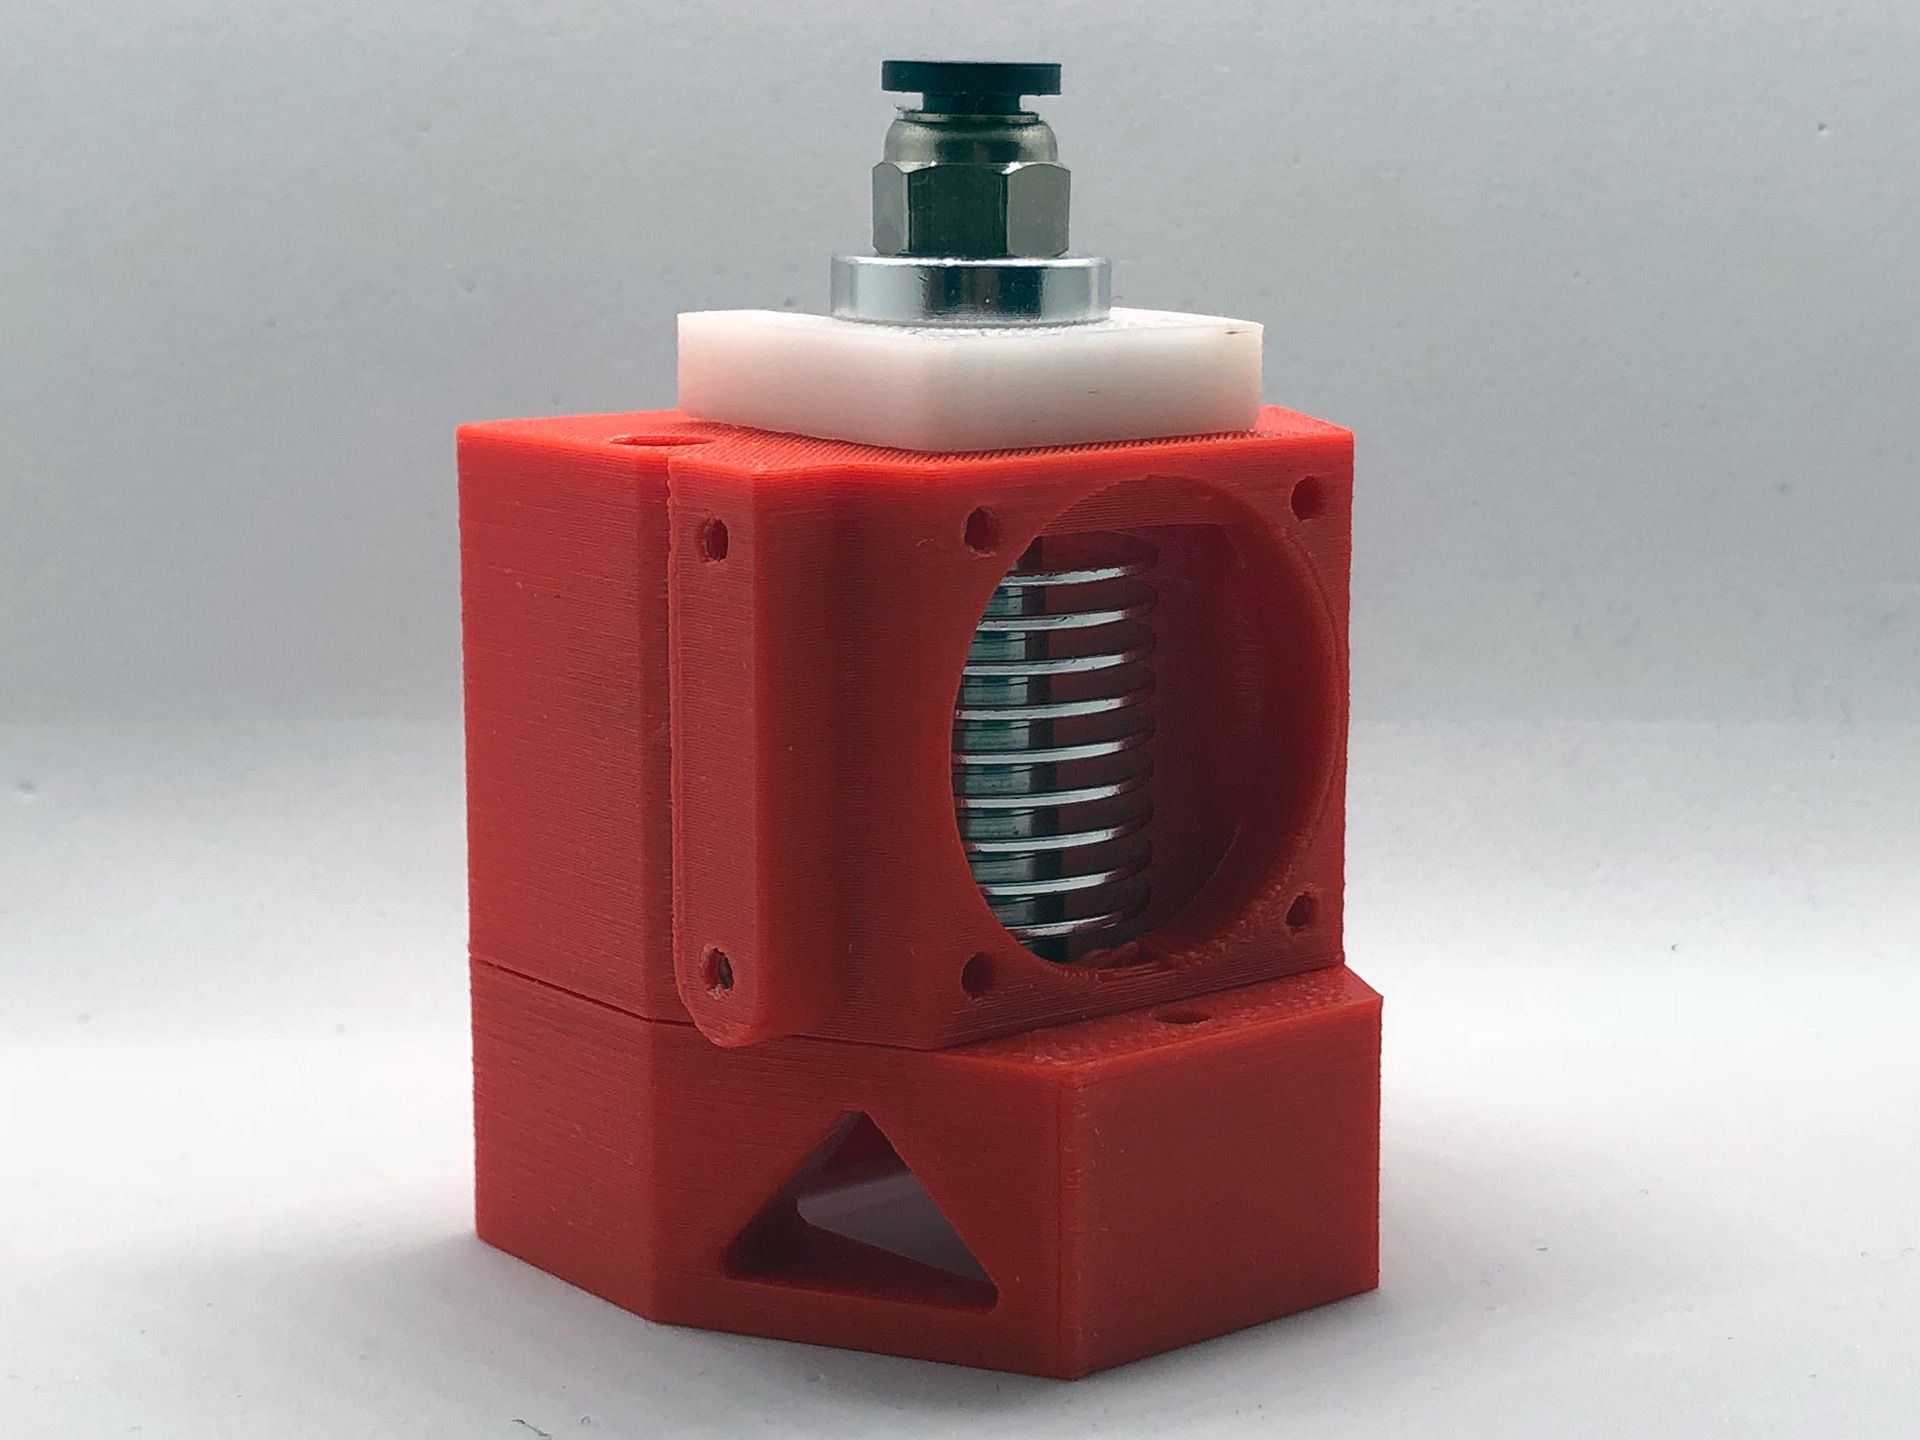
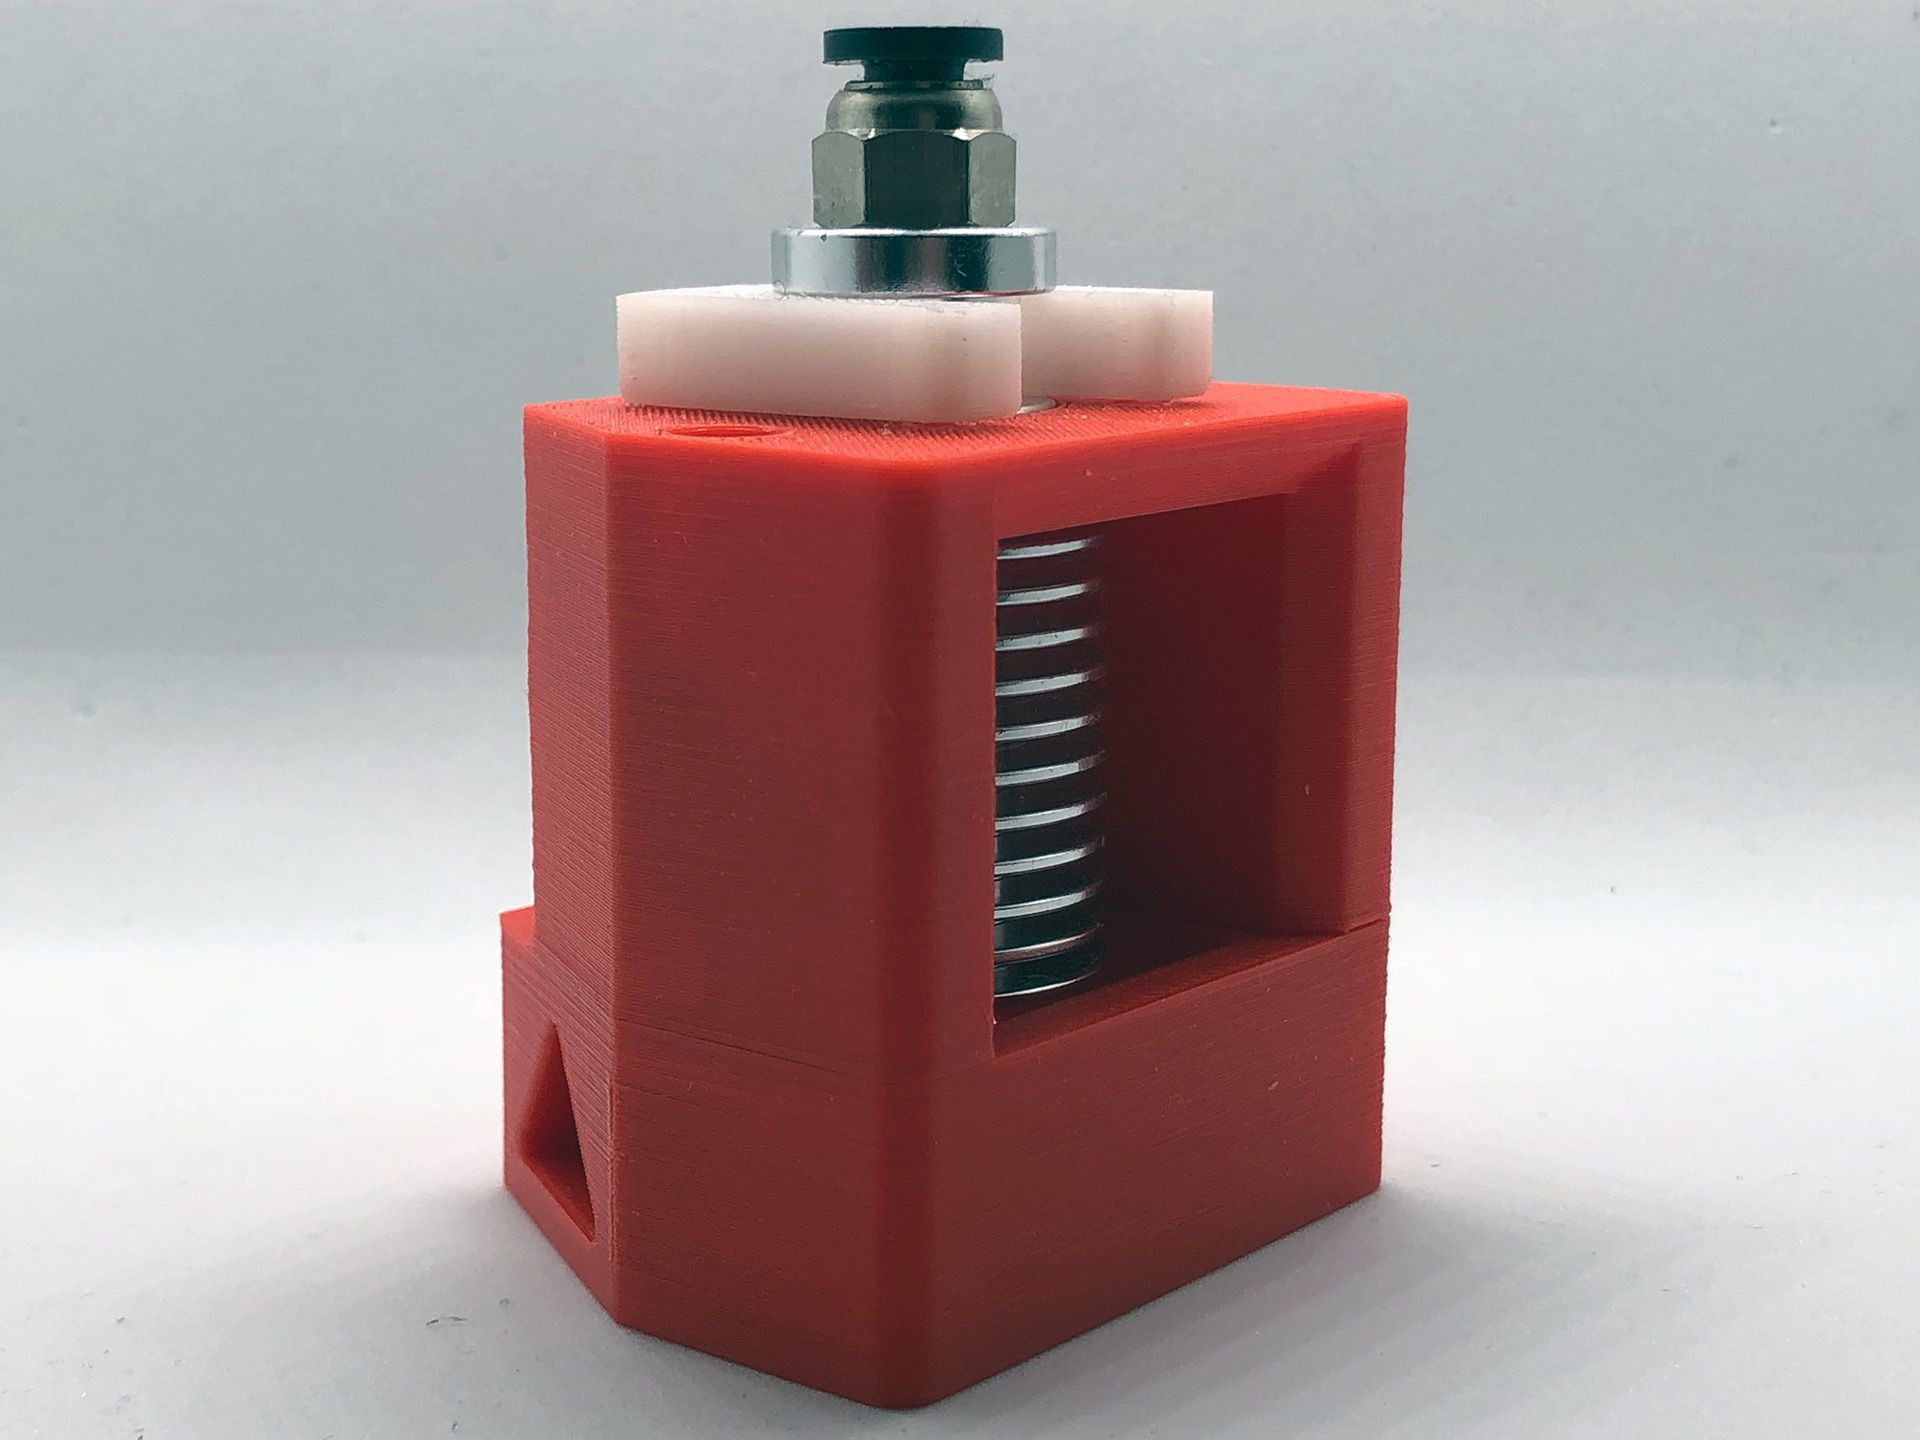
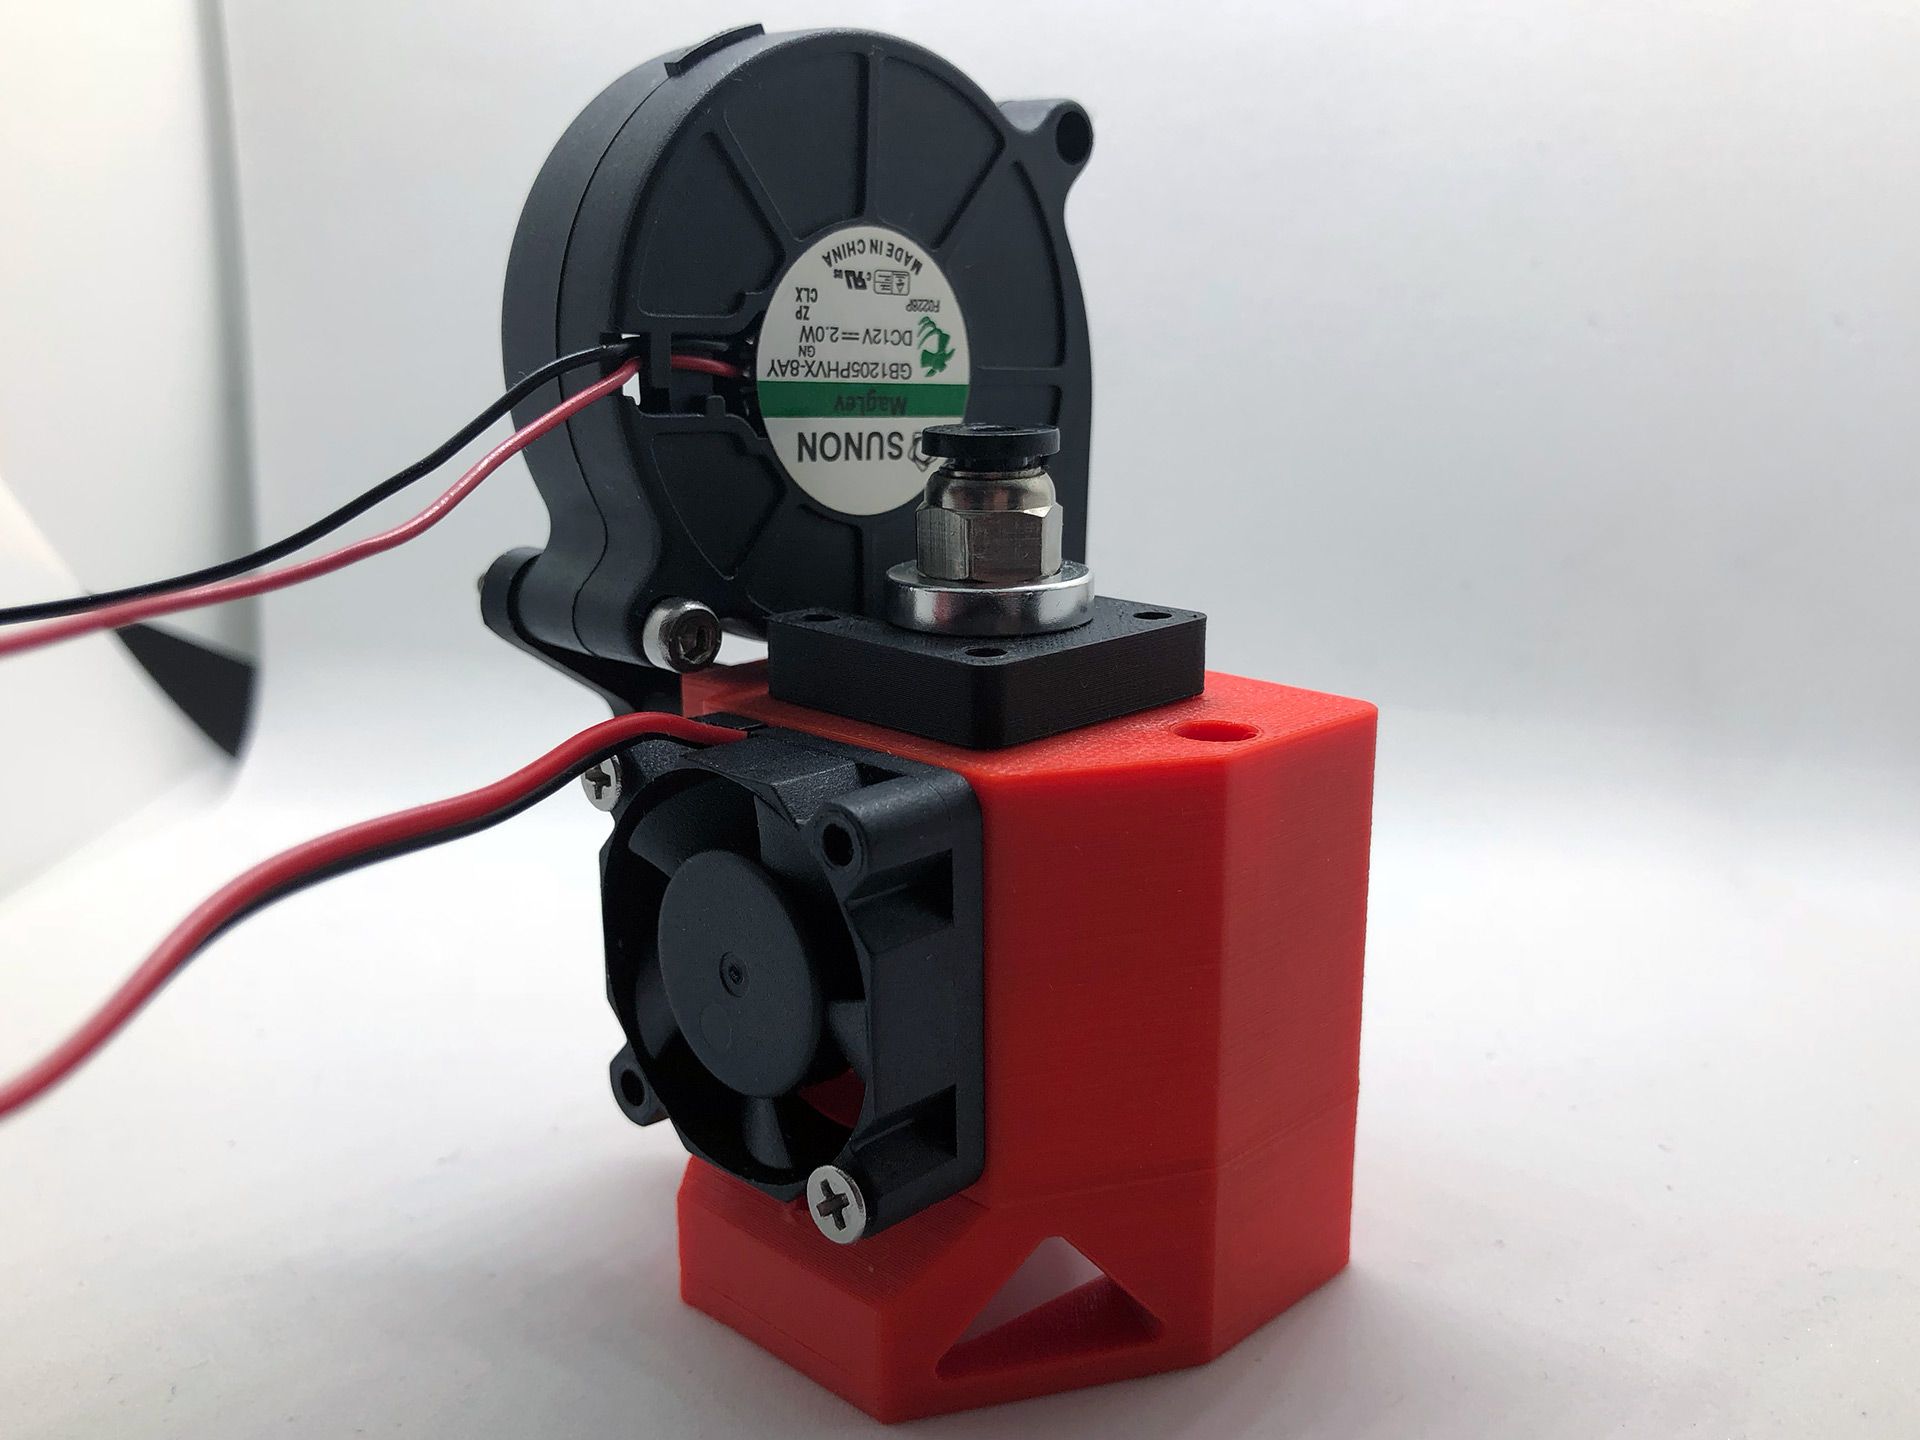
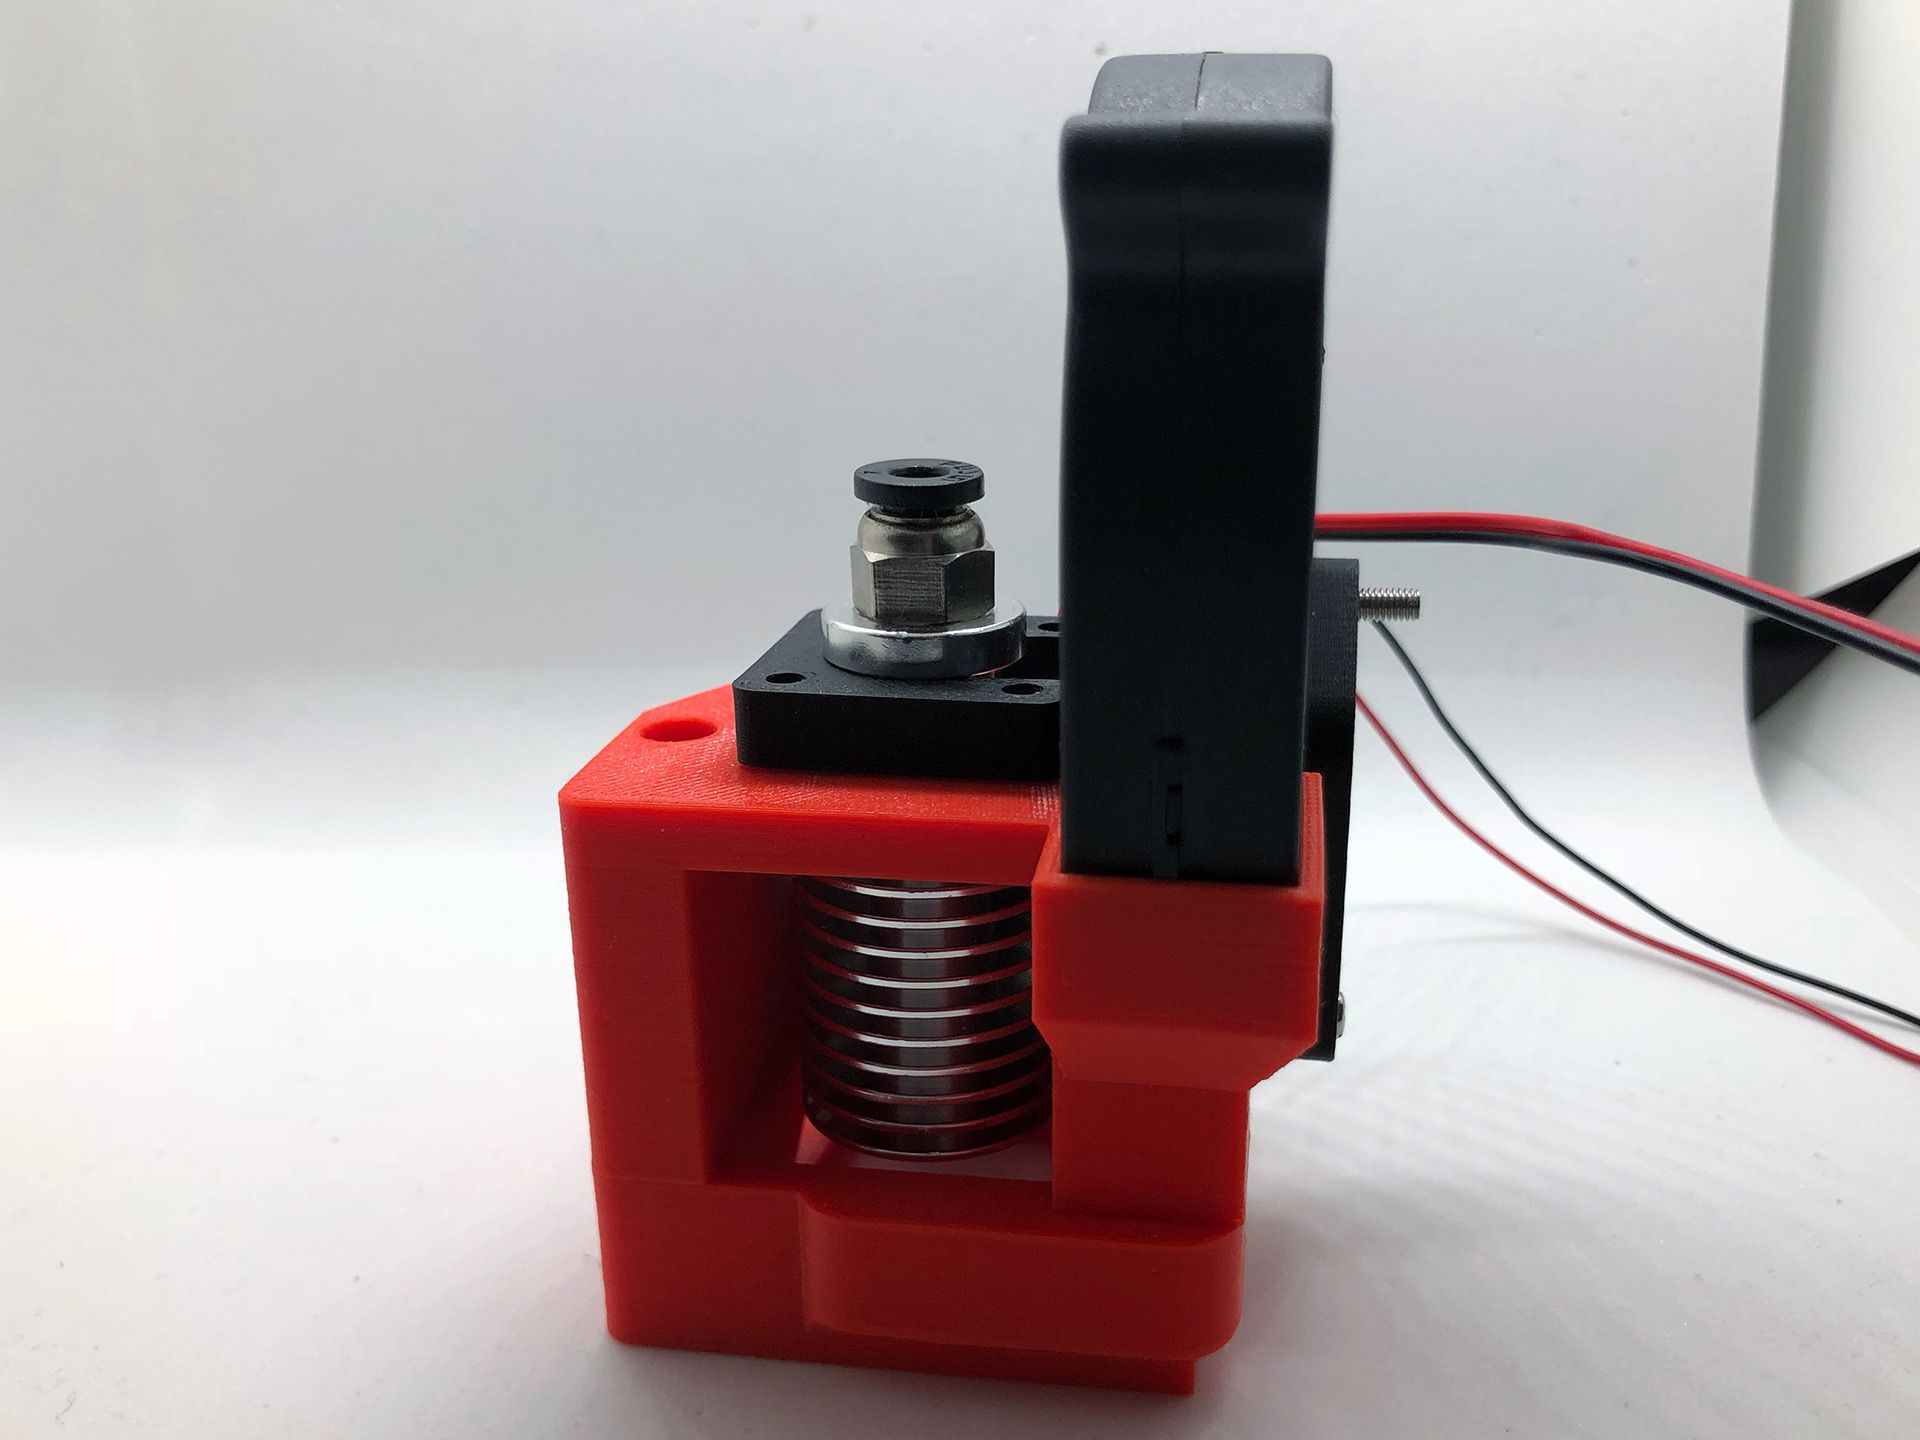
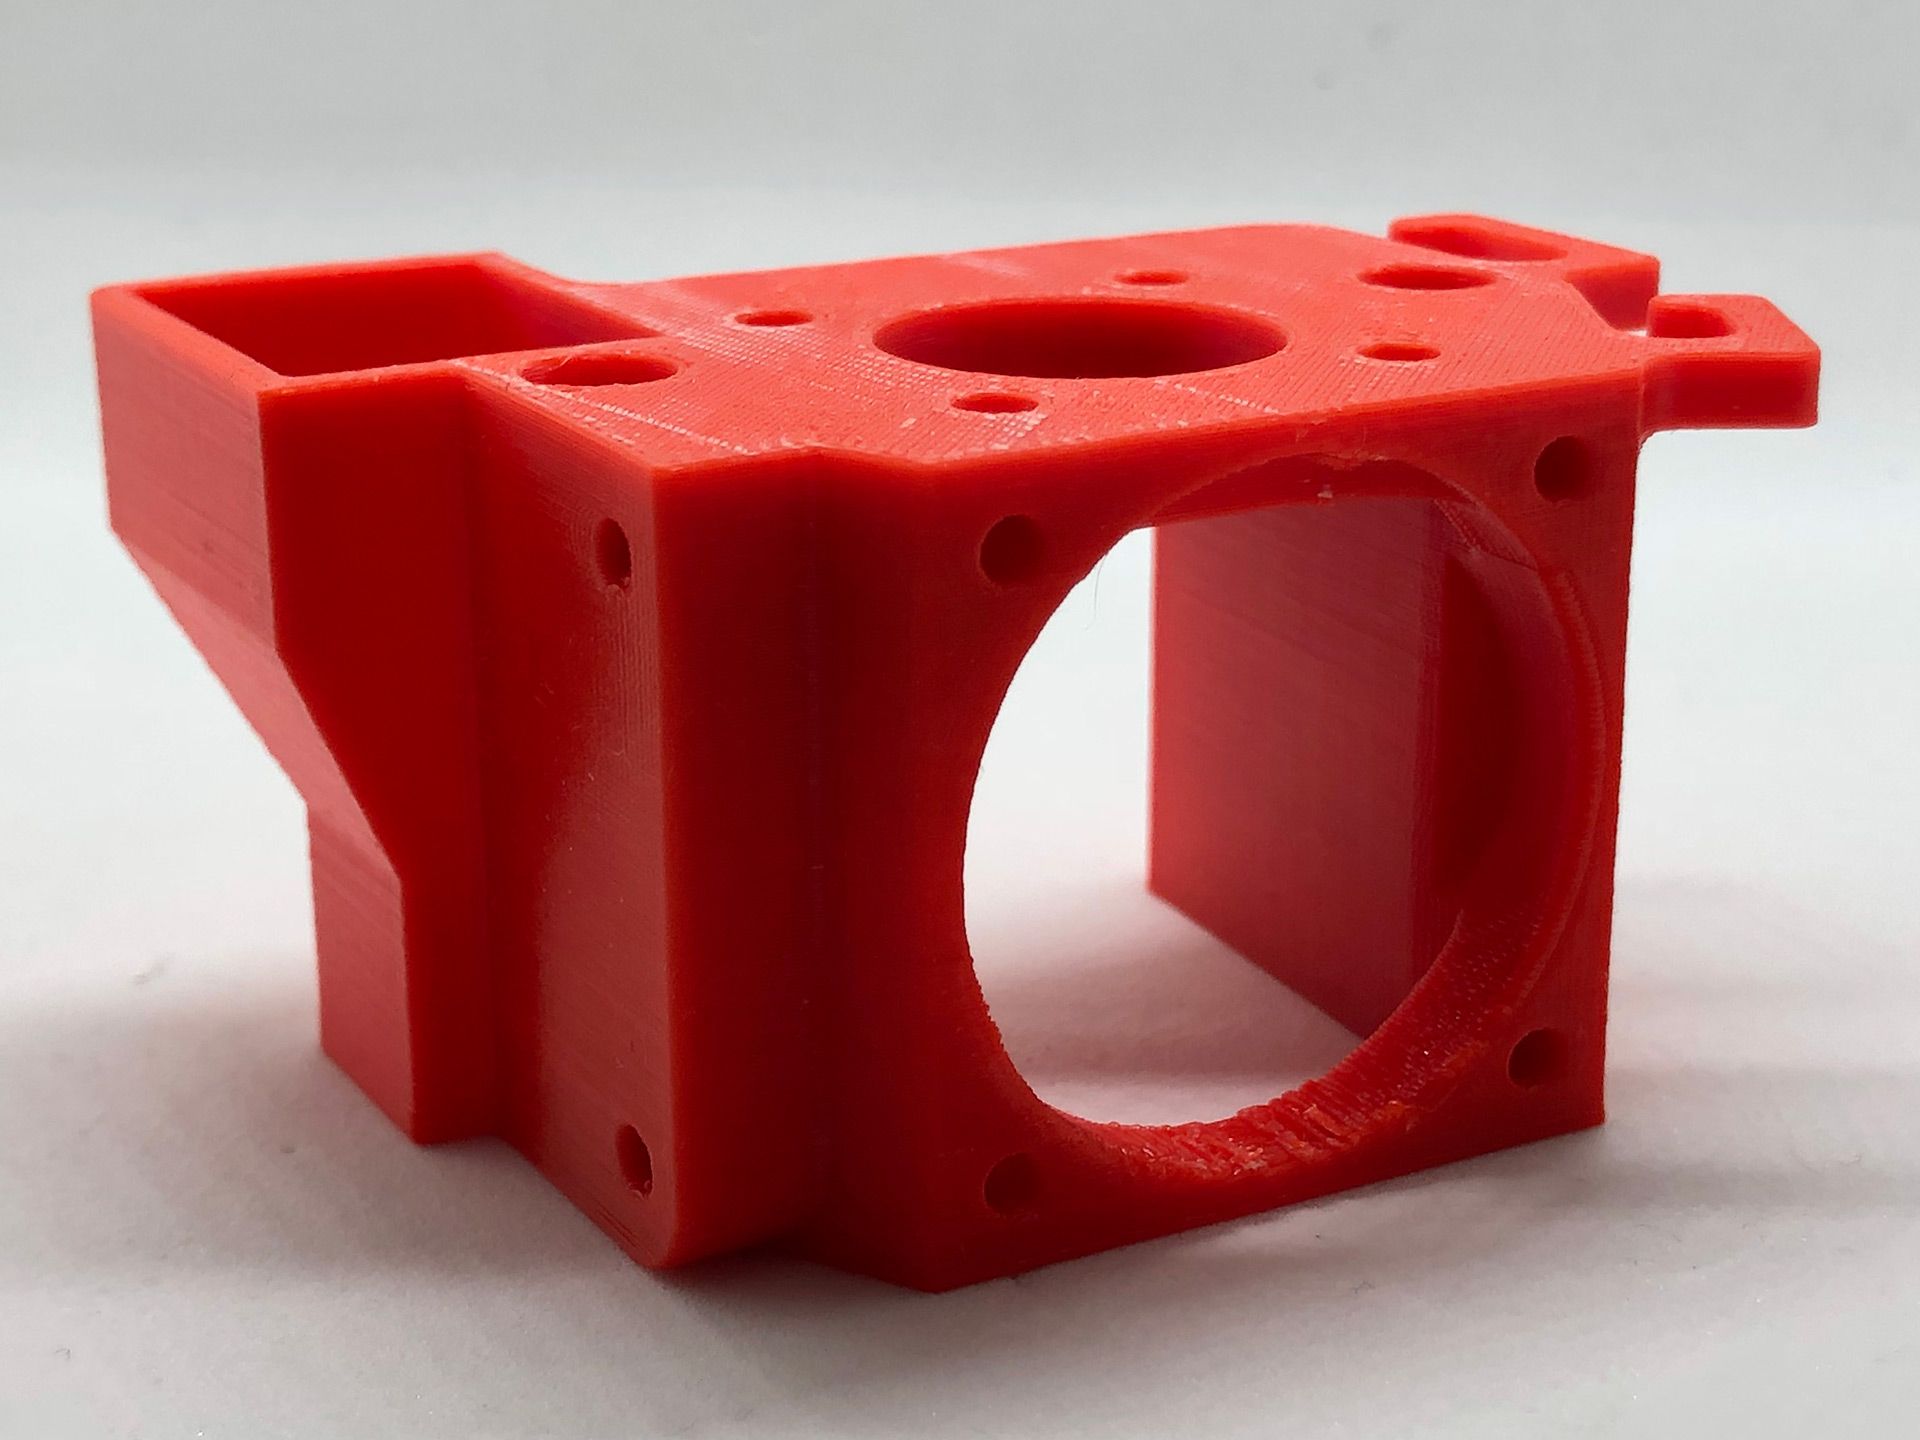
This will likely be the final version that will make on to the printer.
A hole to capture a hex nut was added to the base for the front mount hole. There wasn't space lower down close the effector plate, but higher up it would fit.
The cooling nozzle, visible in the back, was adjusted to improve flow to the target area near the nozzle. Another triangular cut out was added to ease the installation of the thermistor cartridge. The hole for the heat sink was pushed forward a few mm to allow the use of a silicone cover on the heater block.
Cable management hooks were added to help with the wires for the heater and thermistor cartridge. The geometry was improved on this part to decrease the print time.
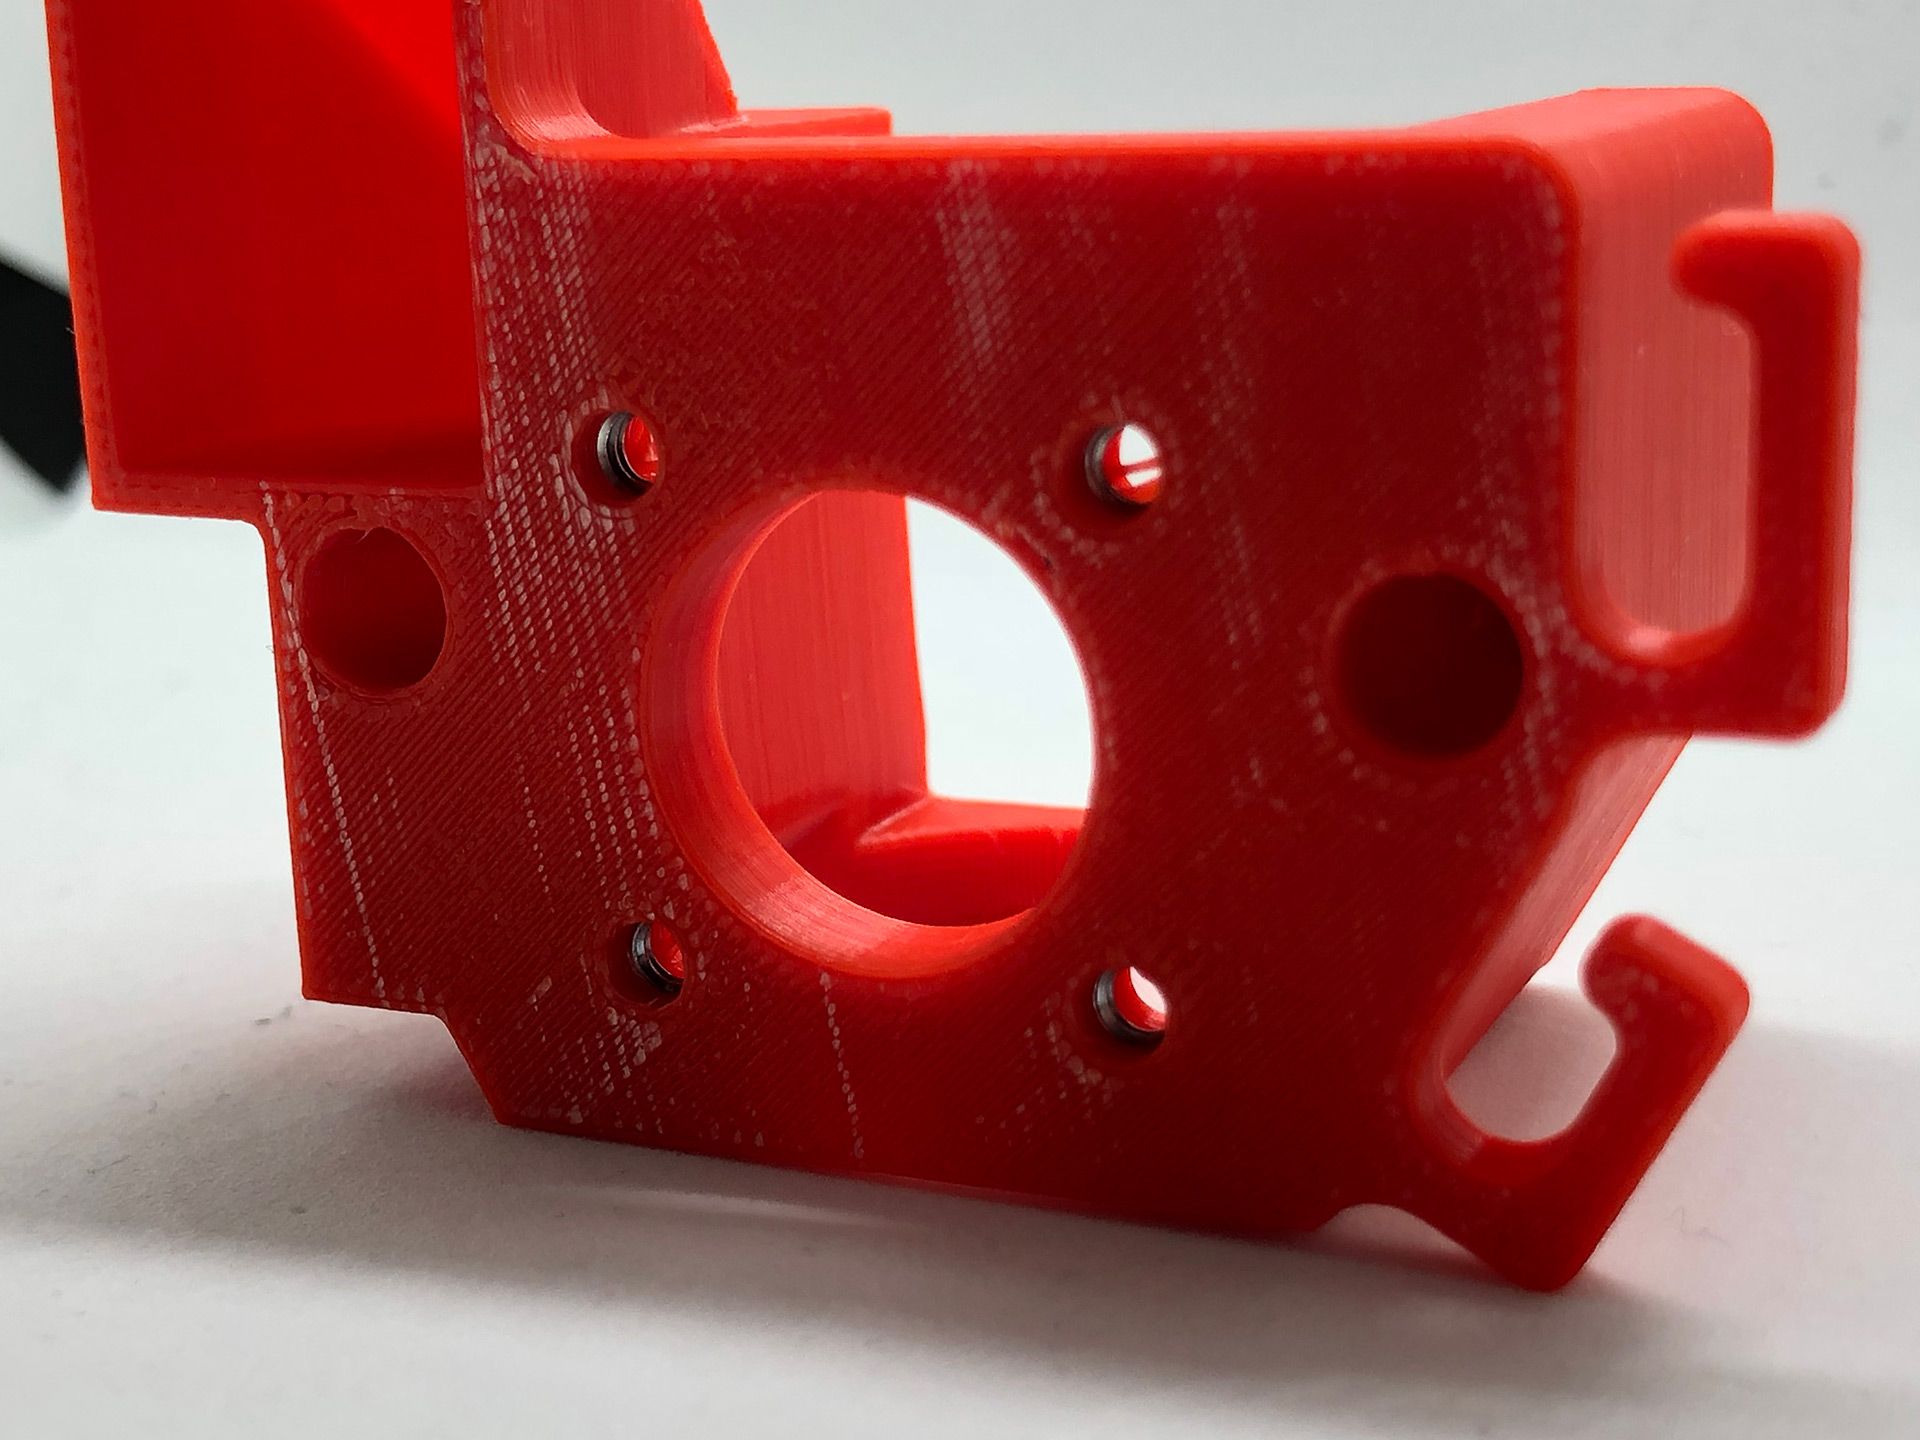
The embedded hex nuts are visible for the V6 groove mount. Overall, I'm pretty happy with this design. It's compact and relatively easy to print without needing supports.
Integration
Since the stock hotend used a single fan for the heat sink and parts cooling, there is only a single fan connector in the wiring harness. This wire is on a PWM line so it works fine as a parts cooler fan controller. The heat sink fan really just need a straight 12 volts. The stock hotend also used a glass bead thermistor which is a pain to mount on the newer V6 blocks. Some rewiring will be need to swap that to use the standard thermistor cartridge.
The models for this hotend mount will be released with a Attribution-NonCommercial 3.0 United States (CC BY-NC 3.0 US) license after this series is completely published.
The STL and CAD files can be found on Thingiverse.
Thingiverse
Since I need to do some rewiring anyways, I opted to reevaluate the use of the external power brick and the lack of a power switch. More to follow in Part 3 of this series.