Next in my series on builds for my new desk, is a under desk mounted USB hub. During the planning phase for my desk setup, one requirement was easily accessible USB 3.1 ports with at least one type C port. This proved to be much more complicated than I originally thought. The search for a regular USB 3.1 hub ended with a single candidate. Coincidentally, Linus Tech Tips had reached the same conclusion in their Project Zero Cables desk.
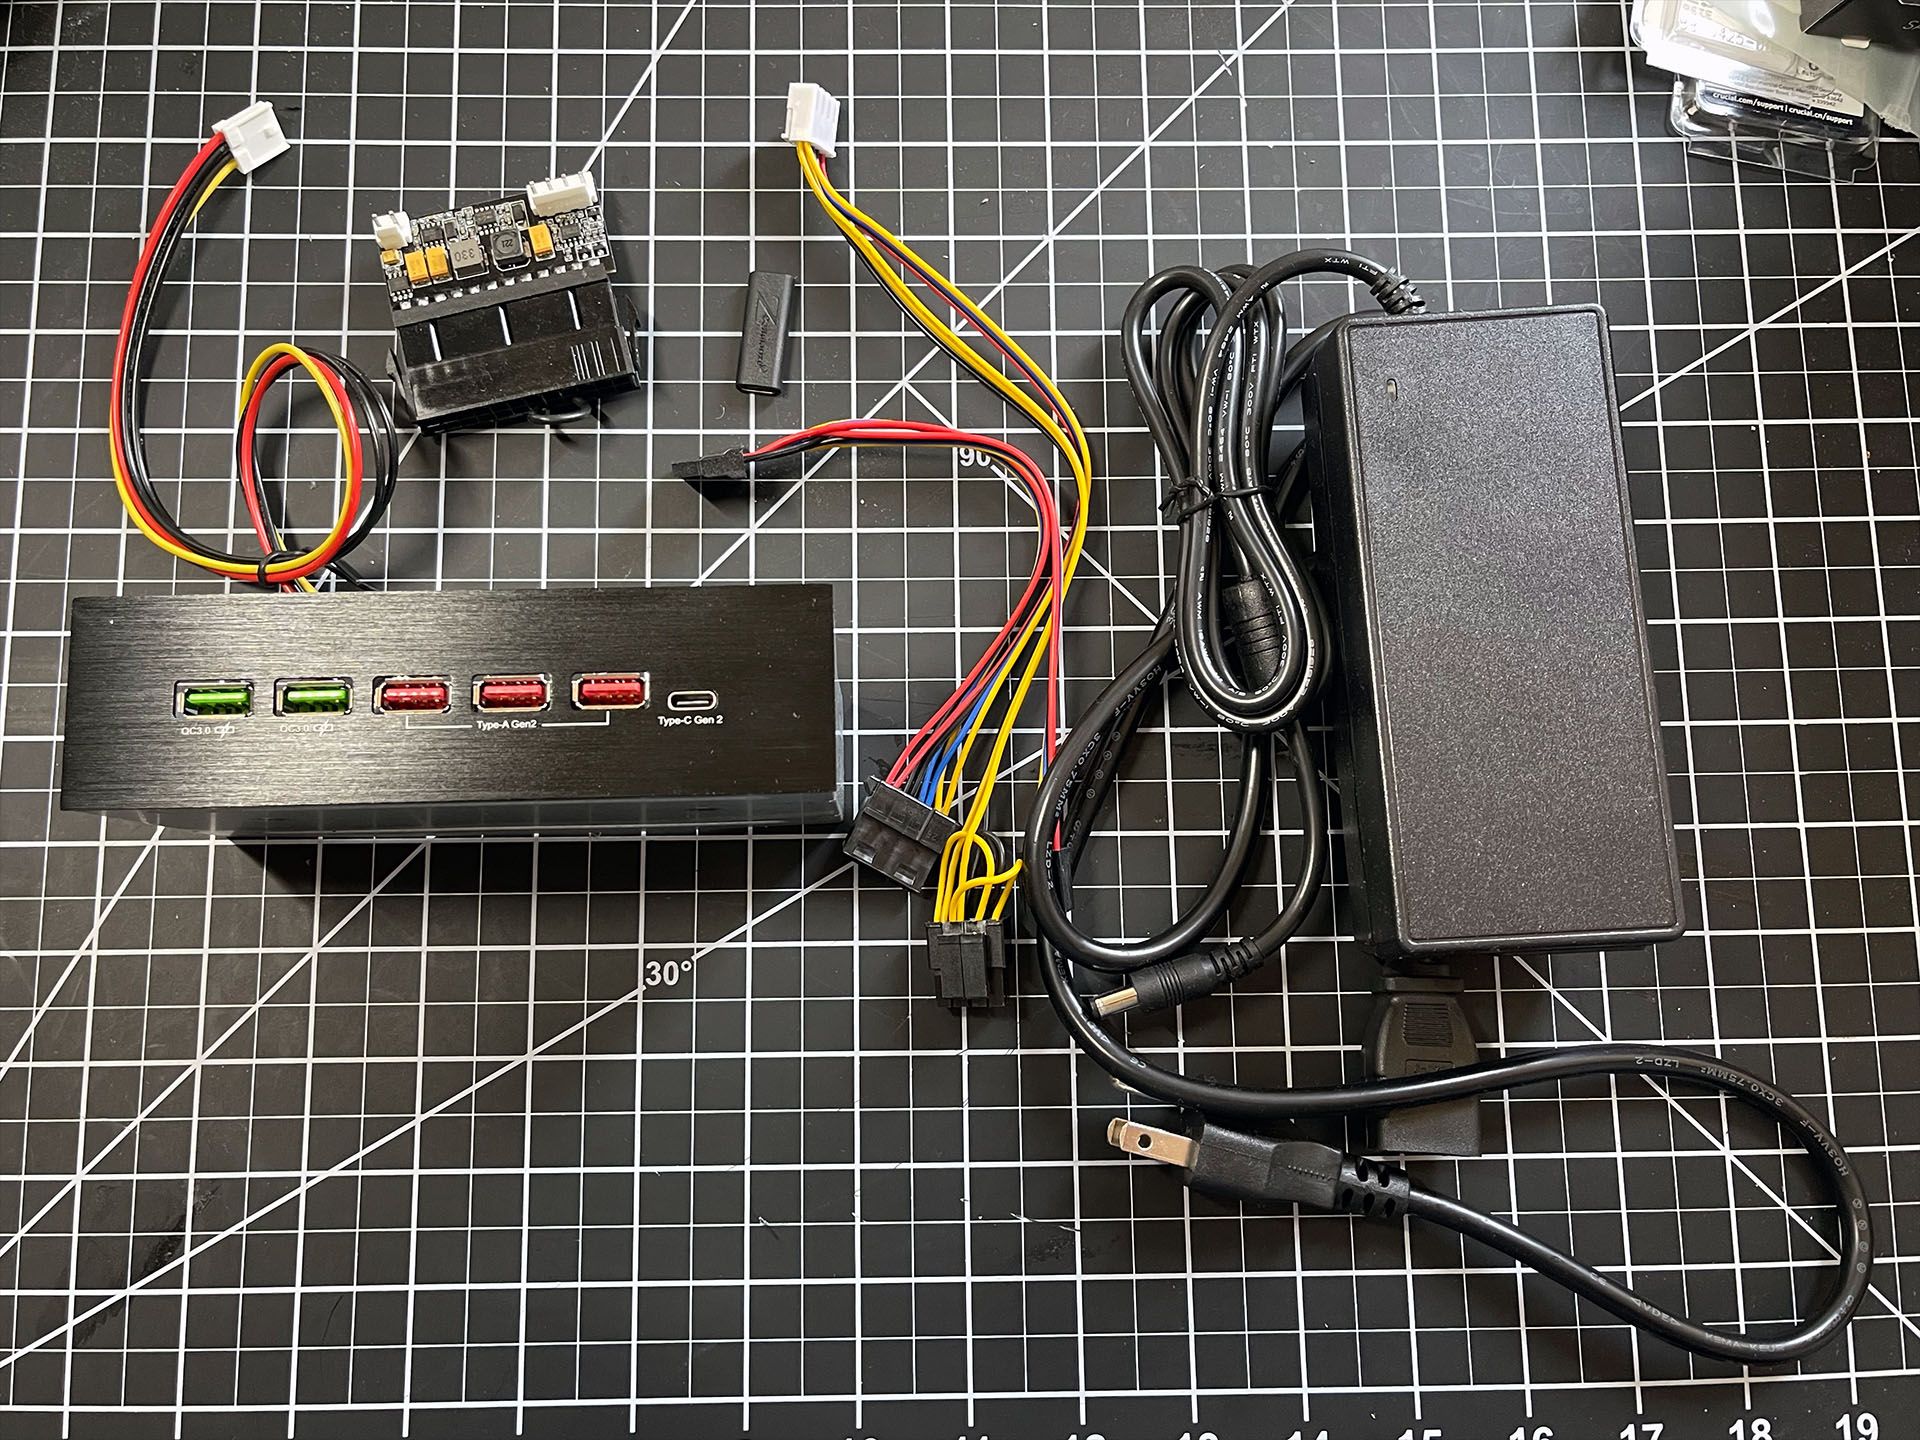
The EZDIY-FAB USB 3.1 Gen2 Hub and Type-C Port Front Panel USB Hub is meant to be mounted in a 5.25" drive bay and powered by an floppy connector, but was the only real solution I could find. To power this hub externally with +5V and +12V, I found a 12V 150W Pico ATX PSU and a generic 12V wall adapter. A female to female USB type C adapter would also be used to connect to the host computer.
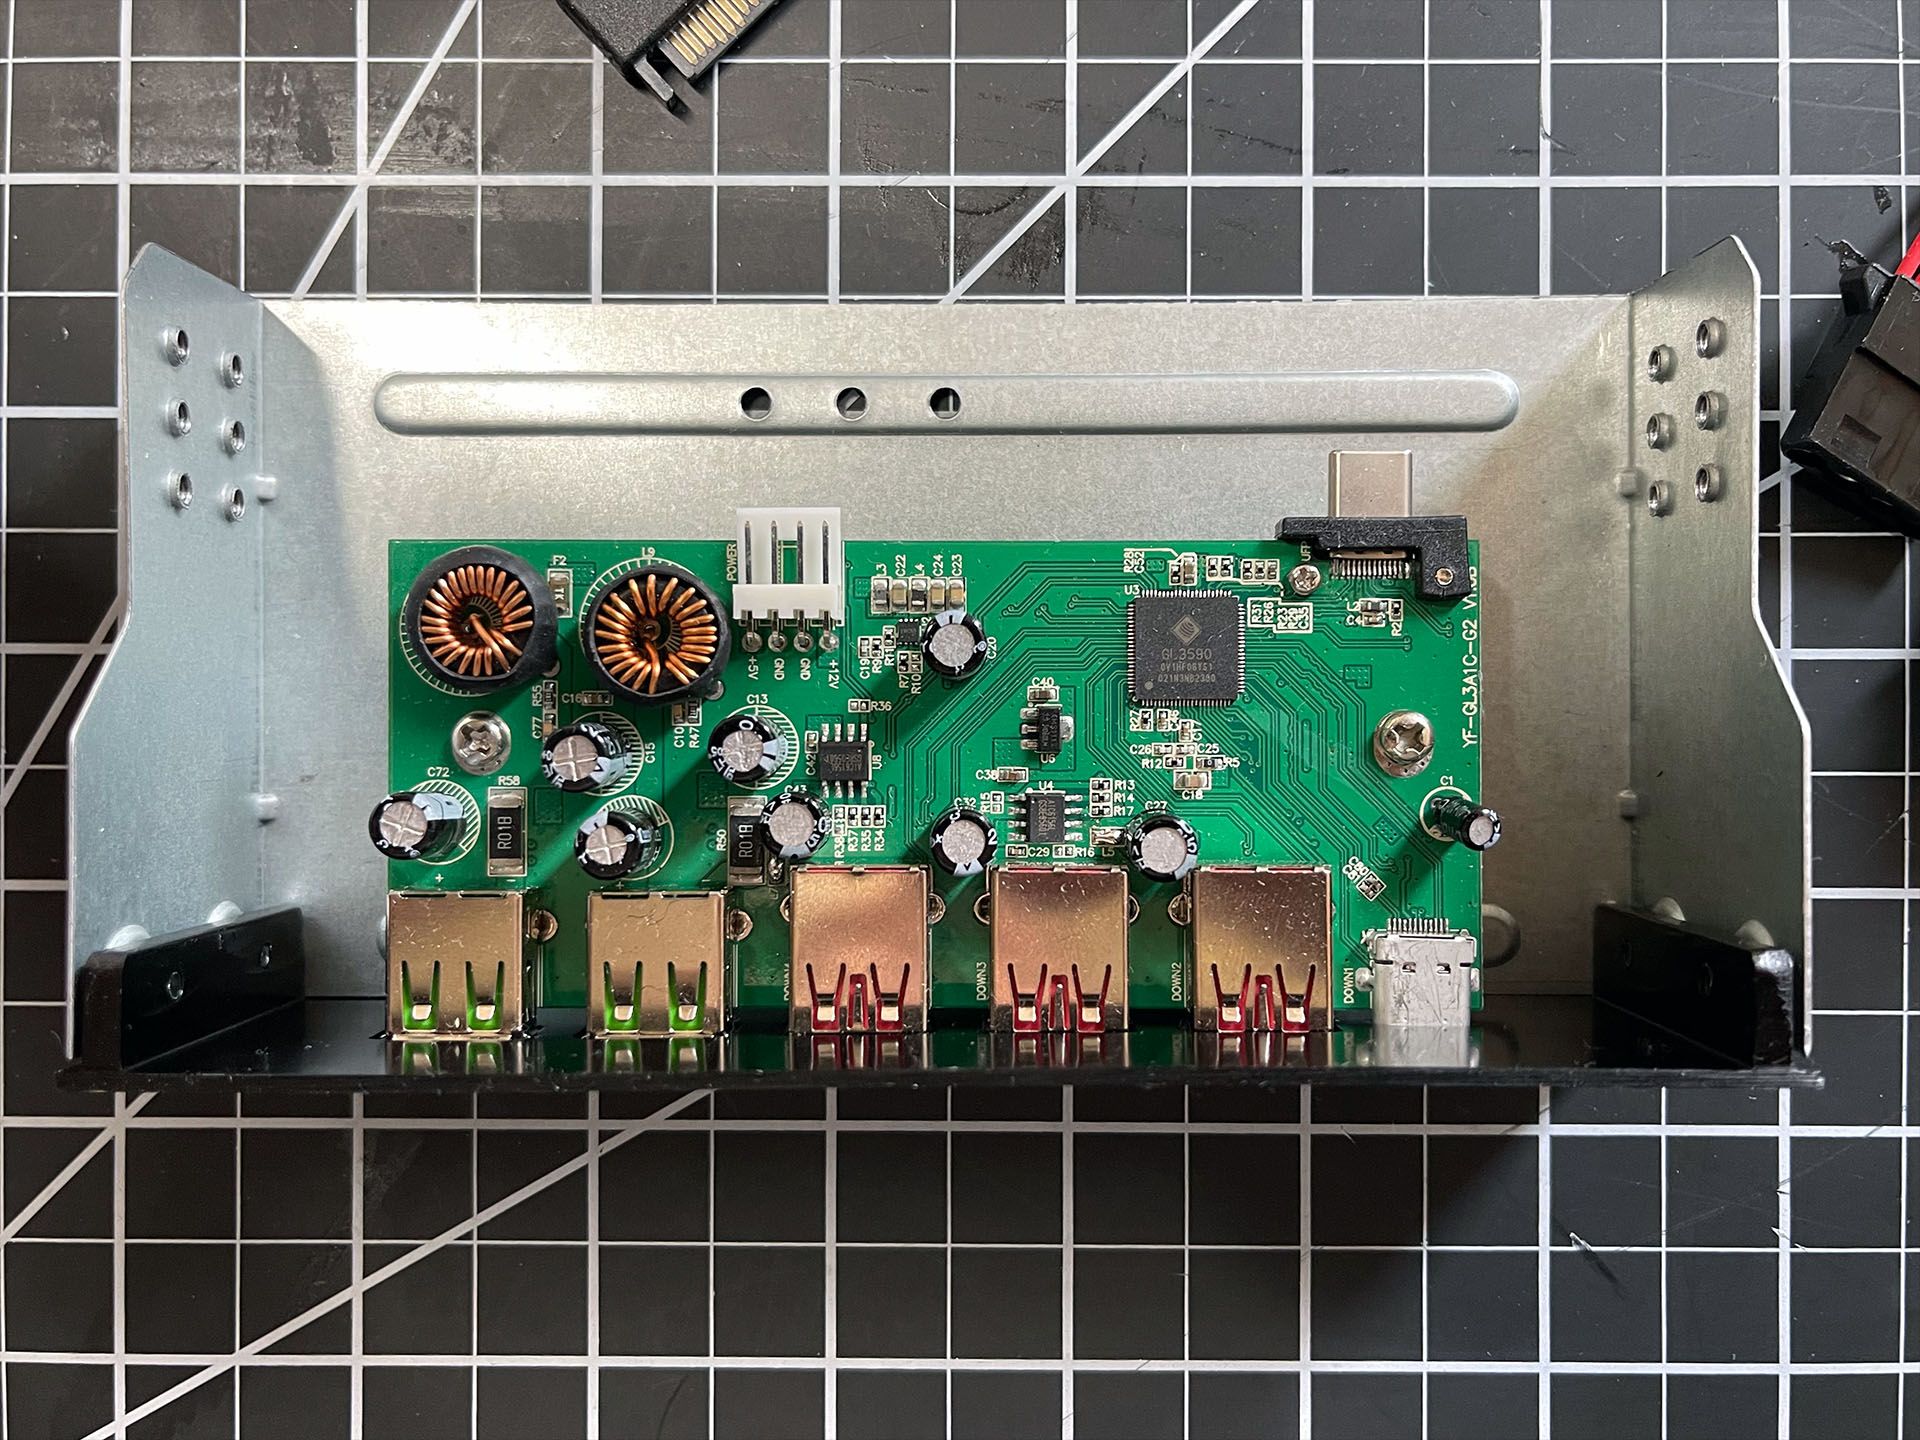
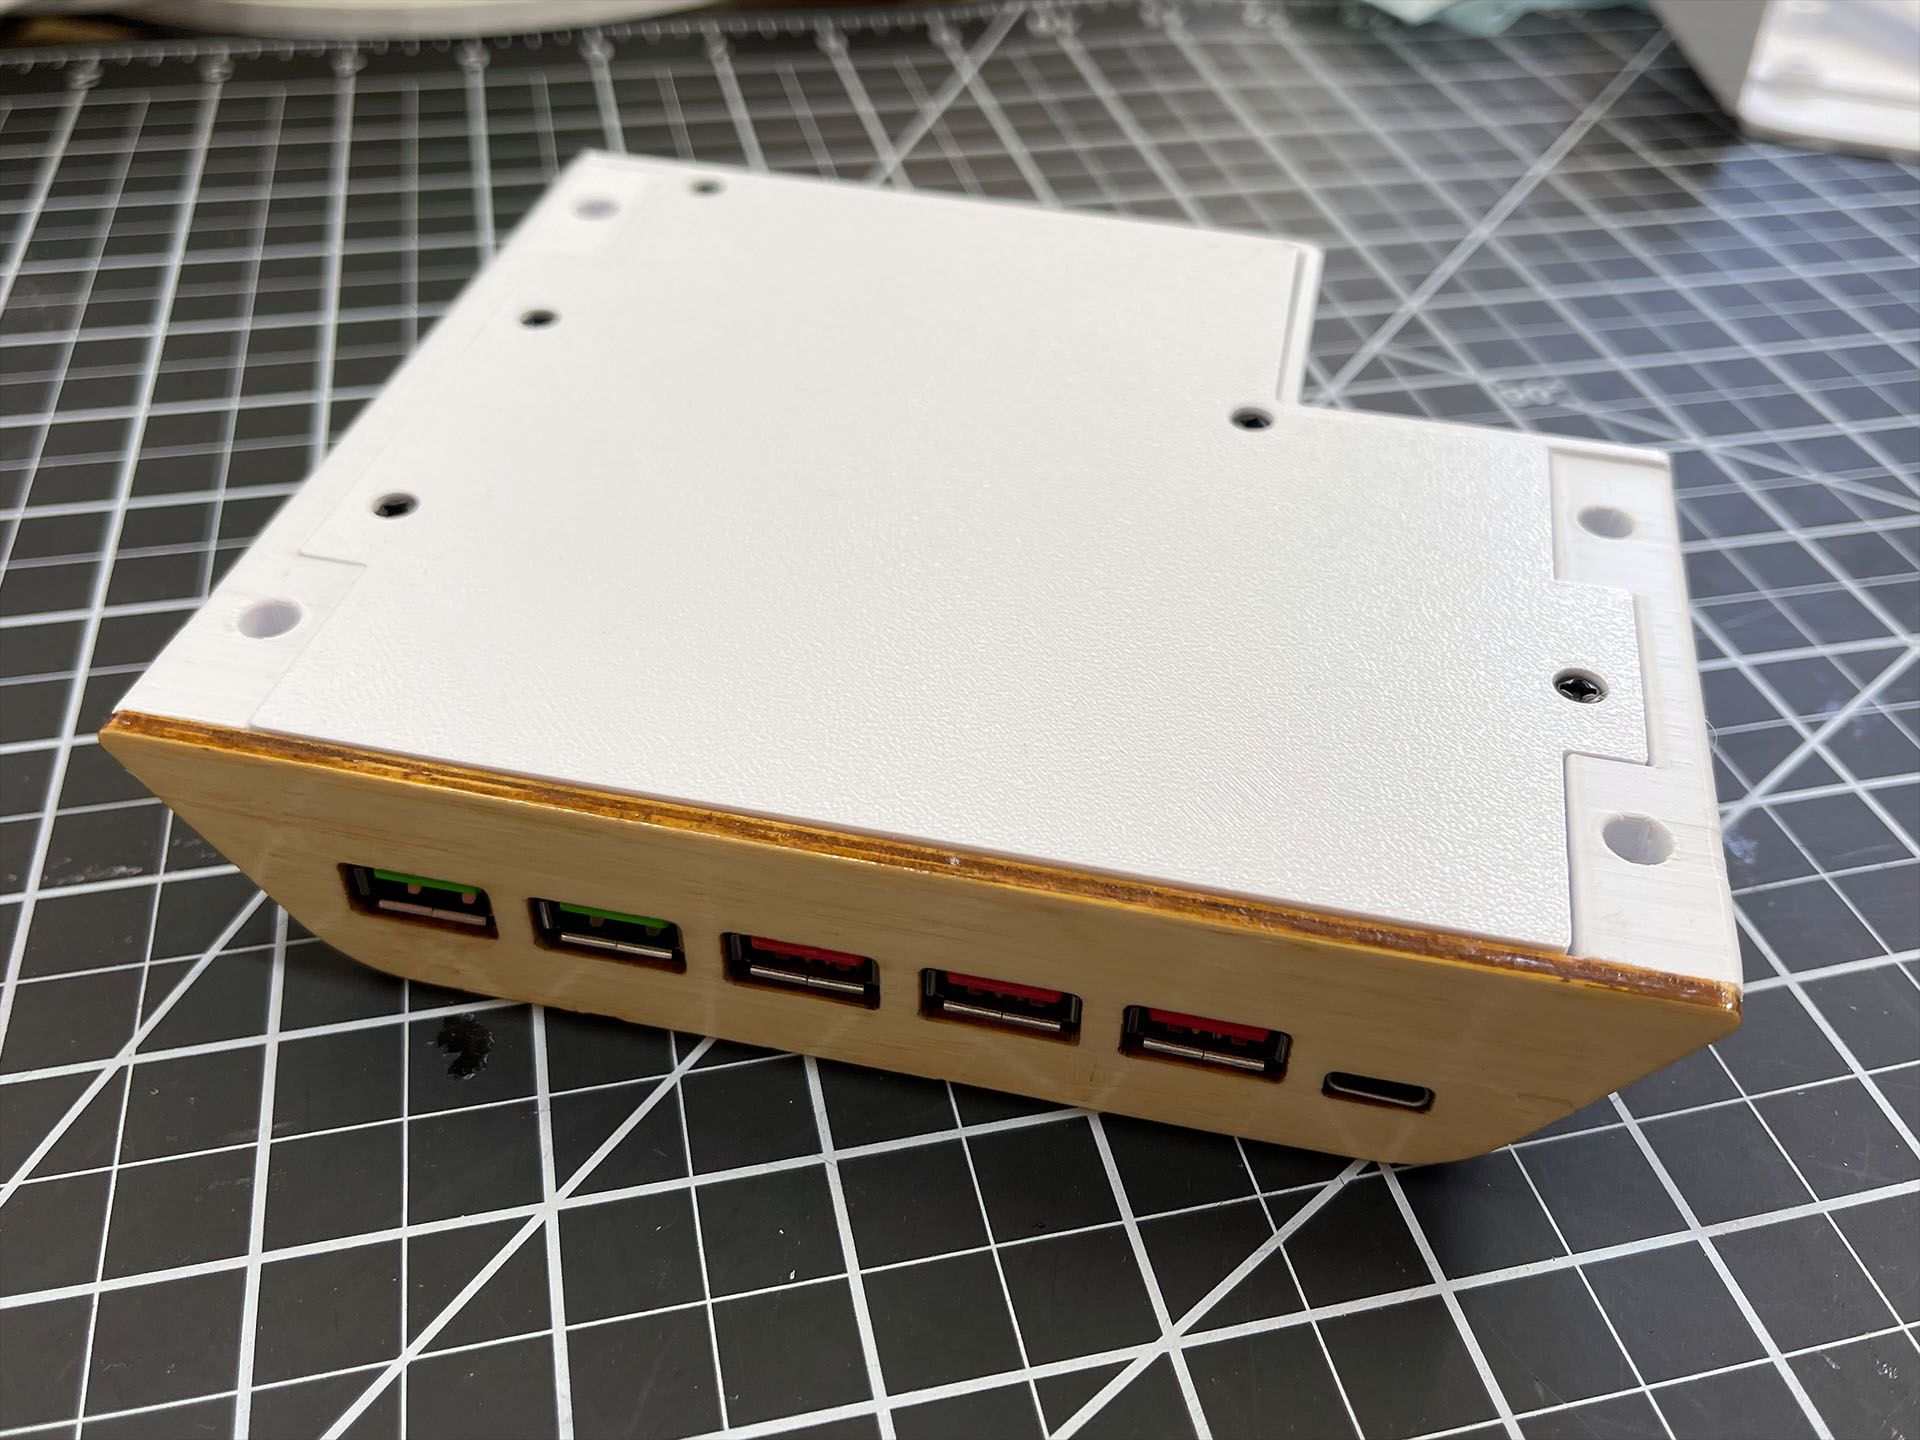
The hub itself is a pretty compact board with three USB 3.1 Gen 2 type A ports, one USB 3.1 Gen 2 type C port, and two 18W QC3.0 type A ports. I took a bunch of measurements of the board and created a CAD model to help with designing the new under desk enclosure.
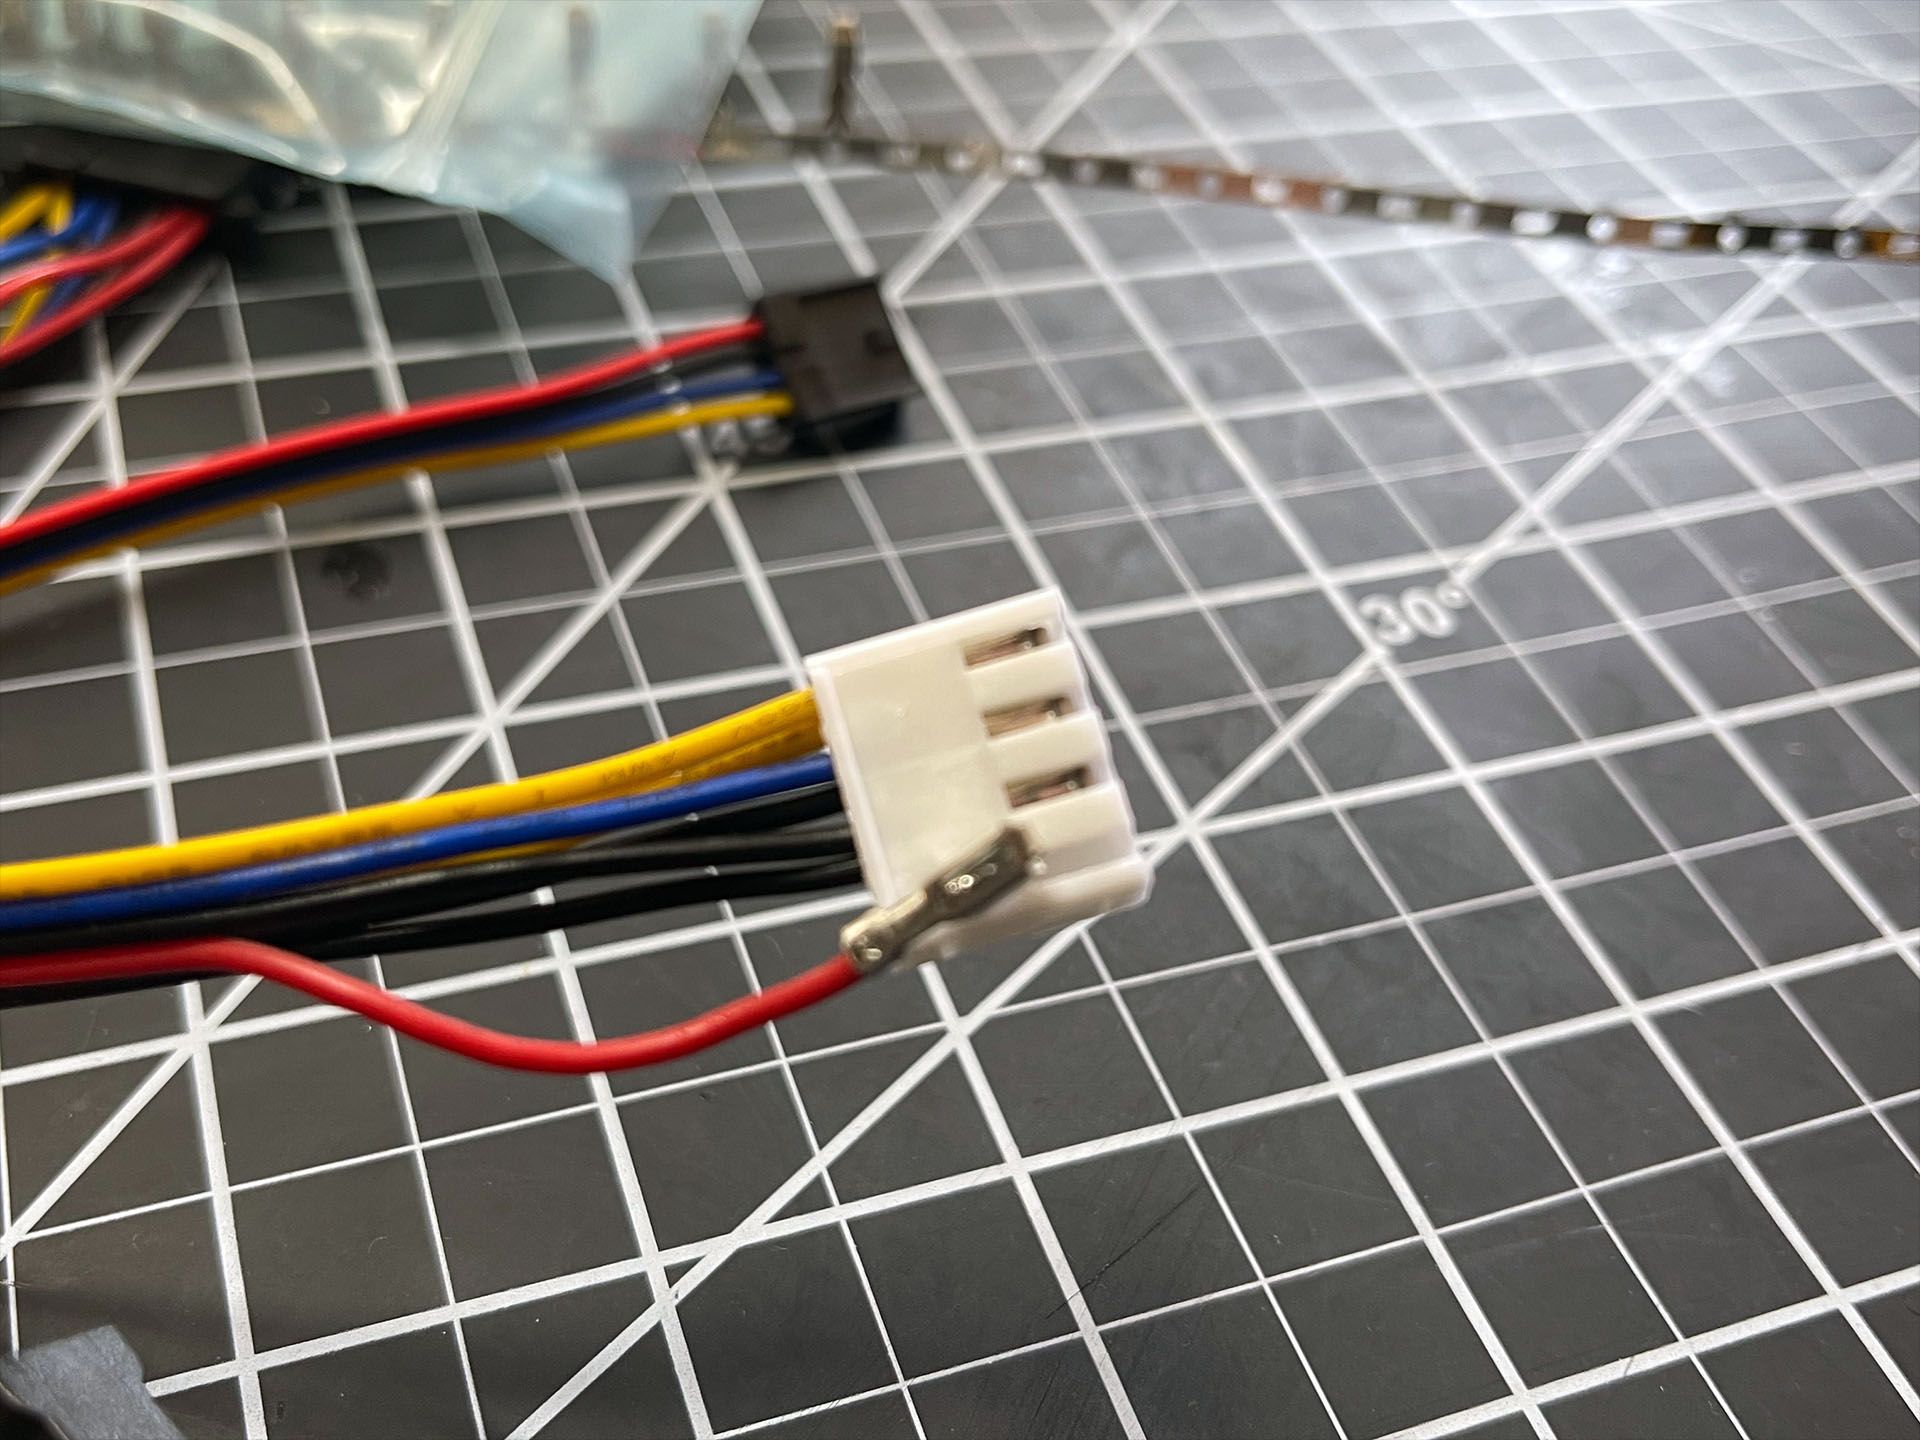
To reduce the bulk of the wiring needed to power the hub from the PSU, some cable rewiring was needed. The power output on the power supply uses a JST VH series connector. The pins can be removed from the connector on the cable and newly crimped pins can be inserted.
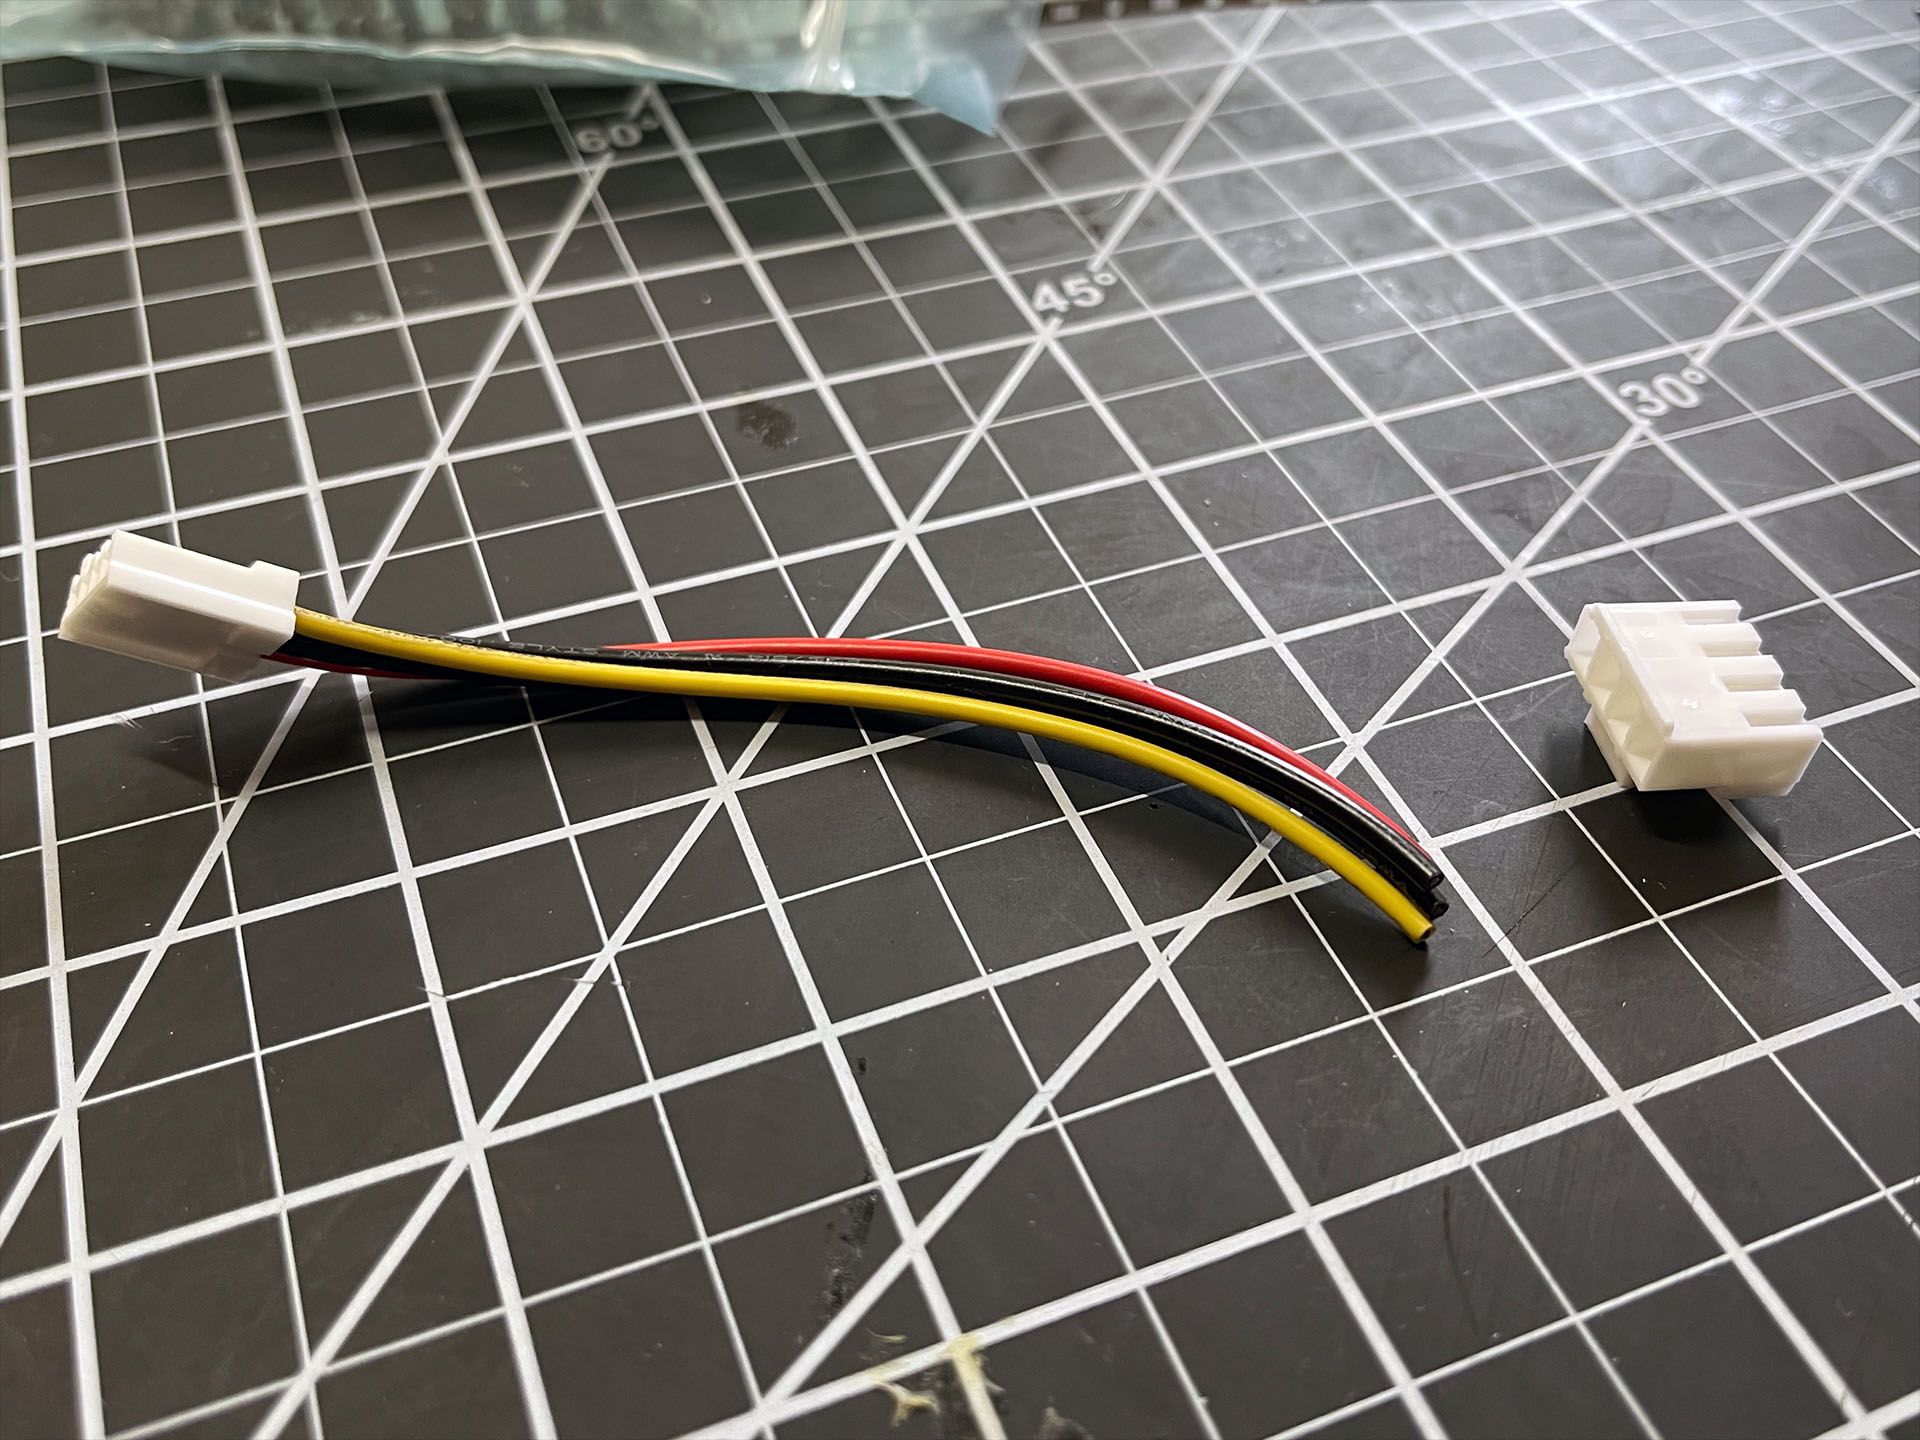
The hub is powered with 5V, 12V and ground via a Berg floppy power connector. I clipped off one end of the extension cable and the wire gauge was just right for the VH crimp pins I had on hand.
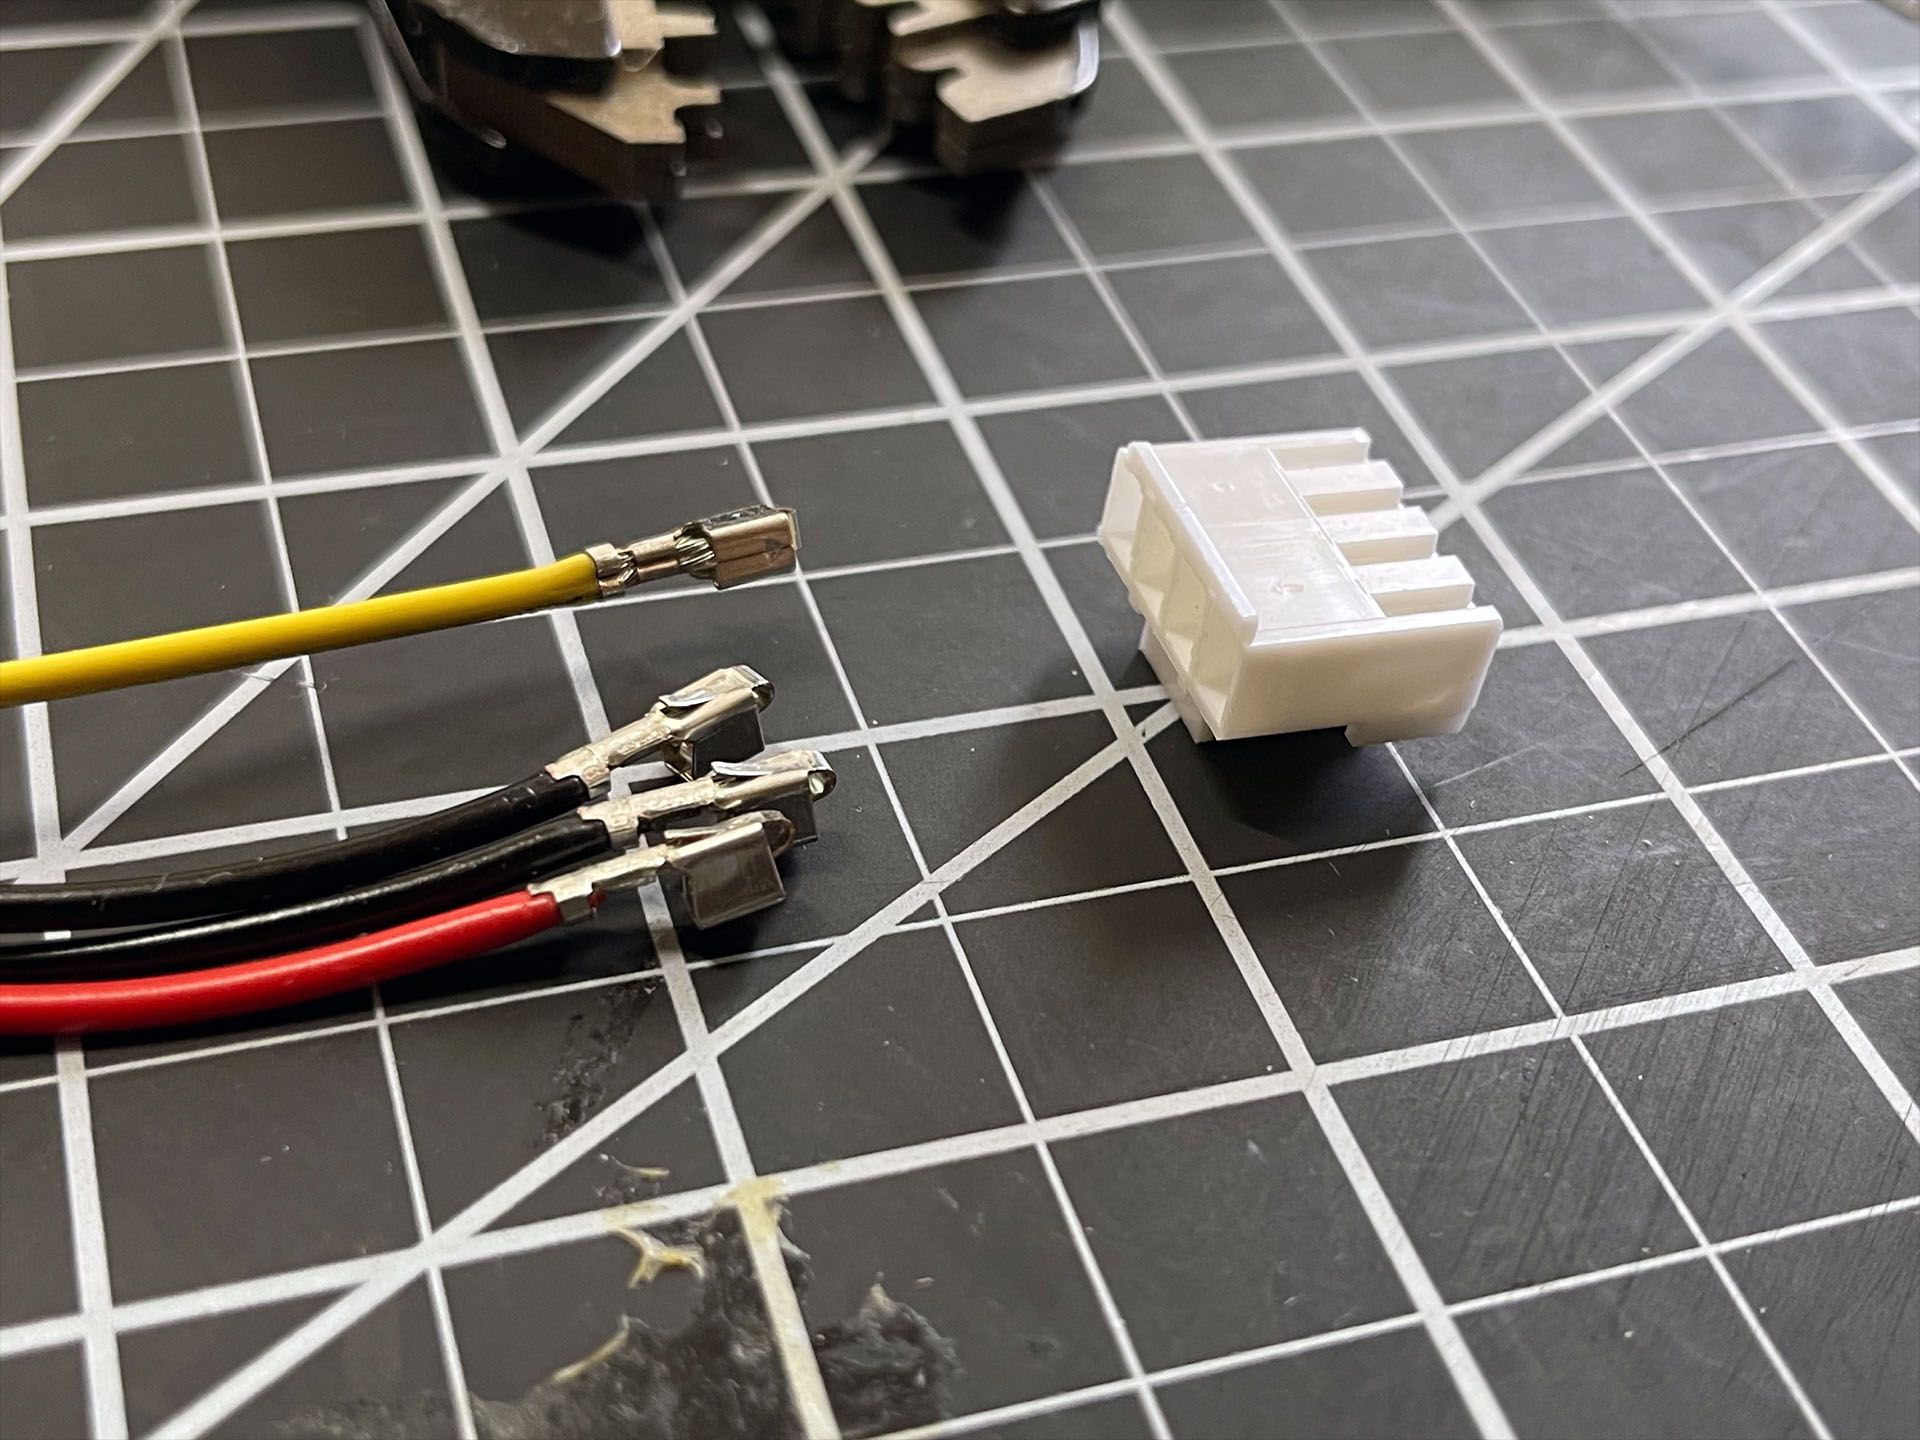
I stripped and crimped on the new VH pins and inserted them into the connector. with pin 1 being 5V, pin 4 being 12V, and ground in the middle pins.
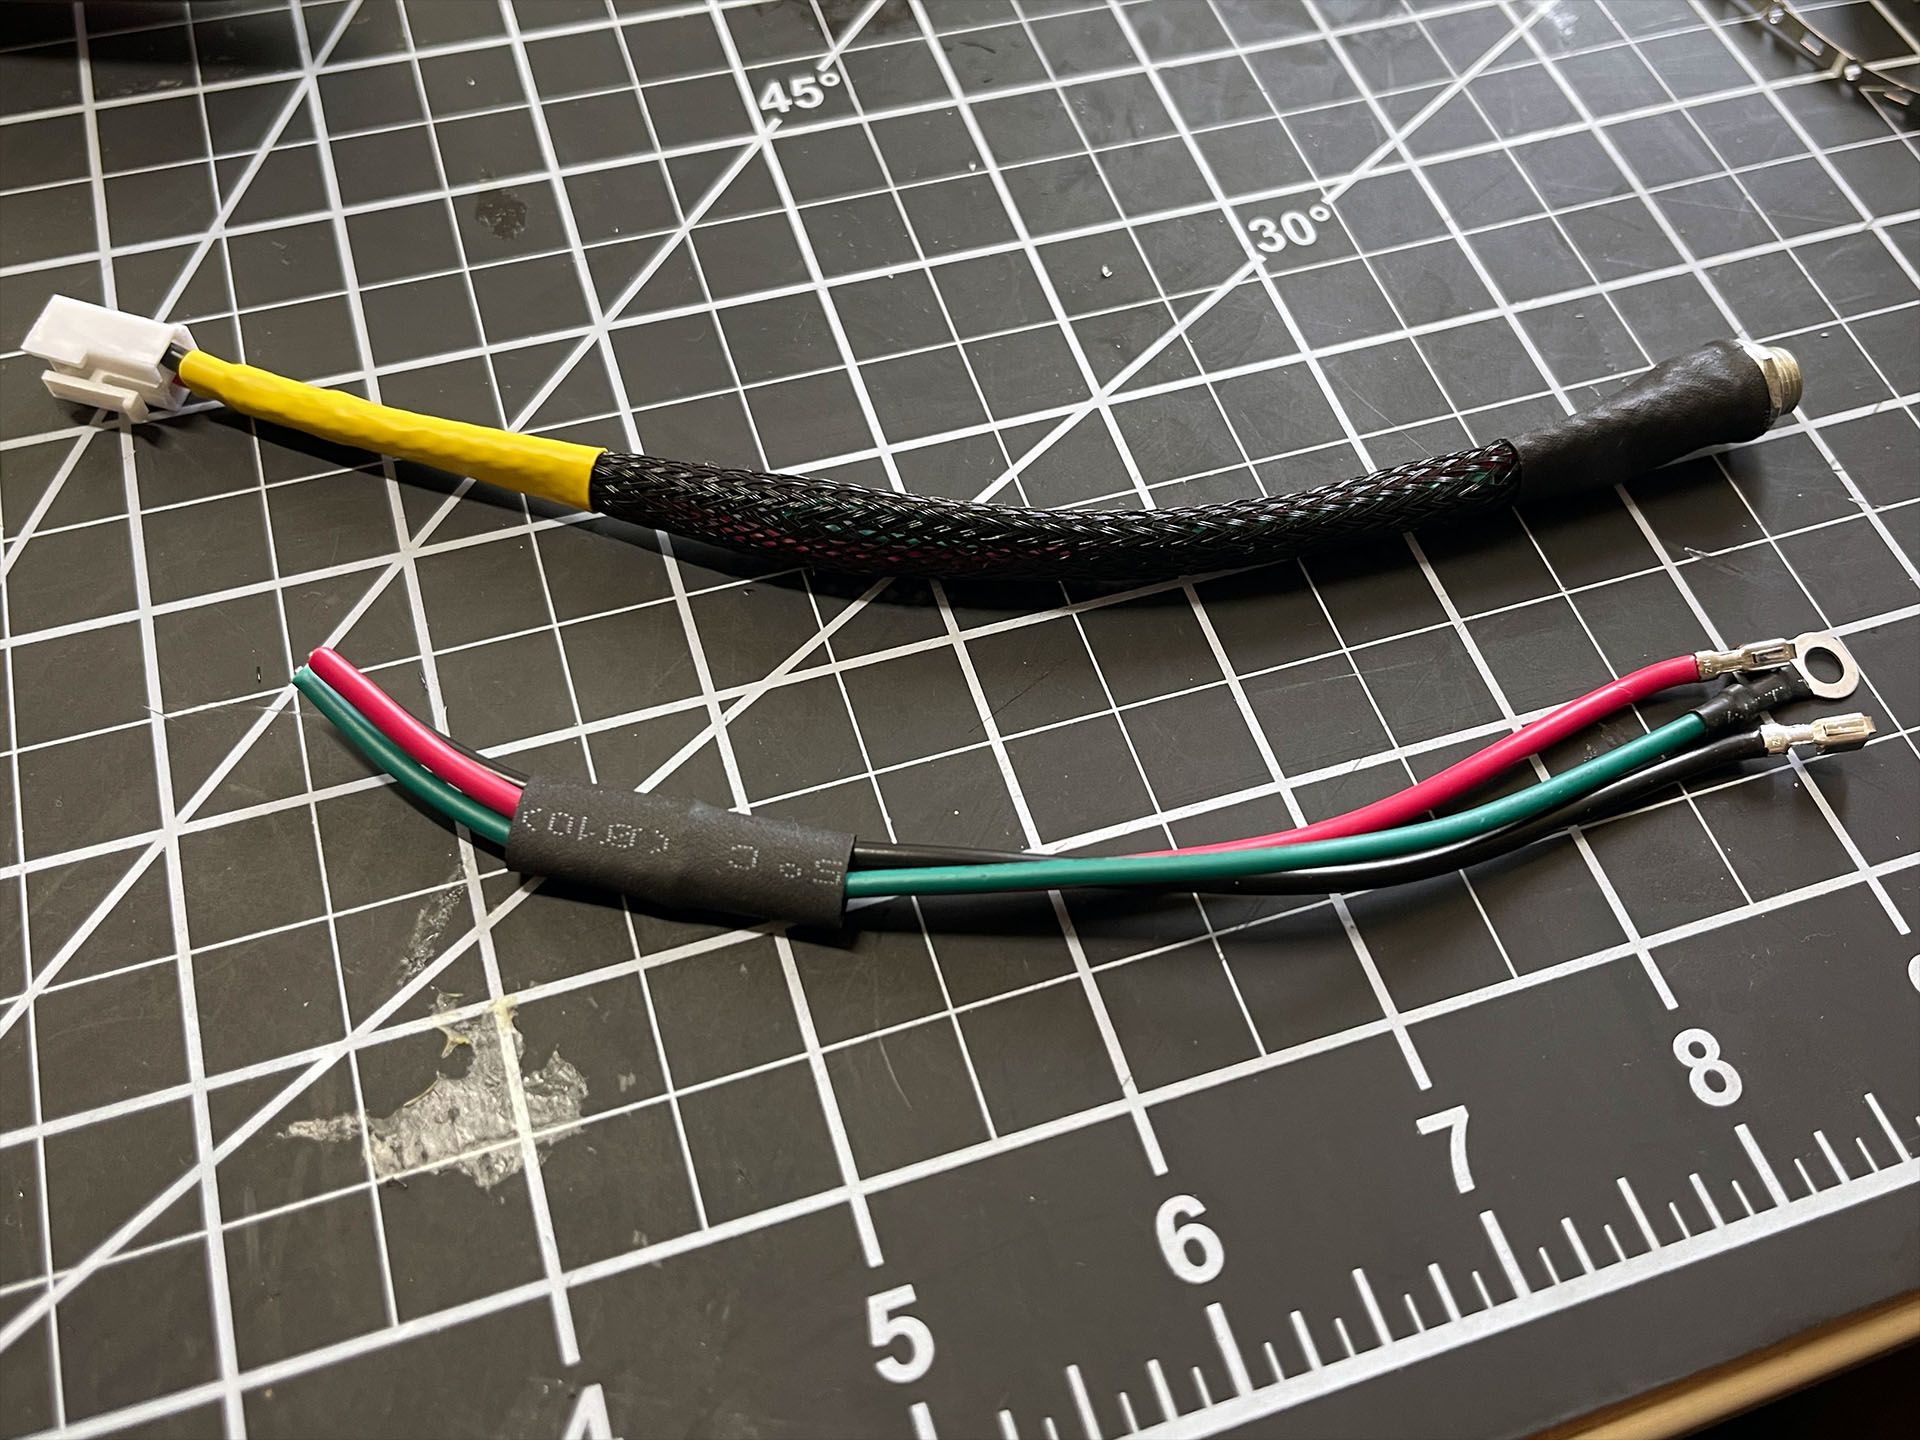
I also reduced the length of the 12V input cable for the PSU.
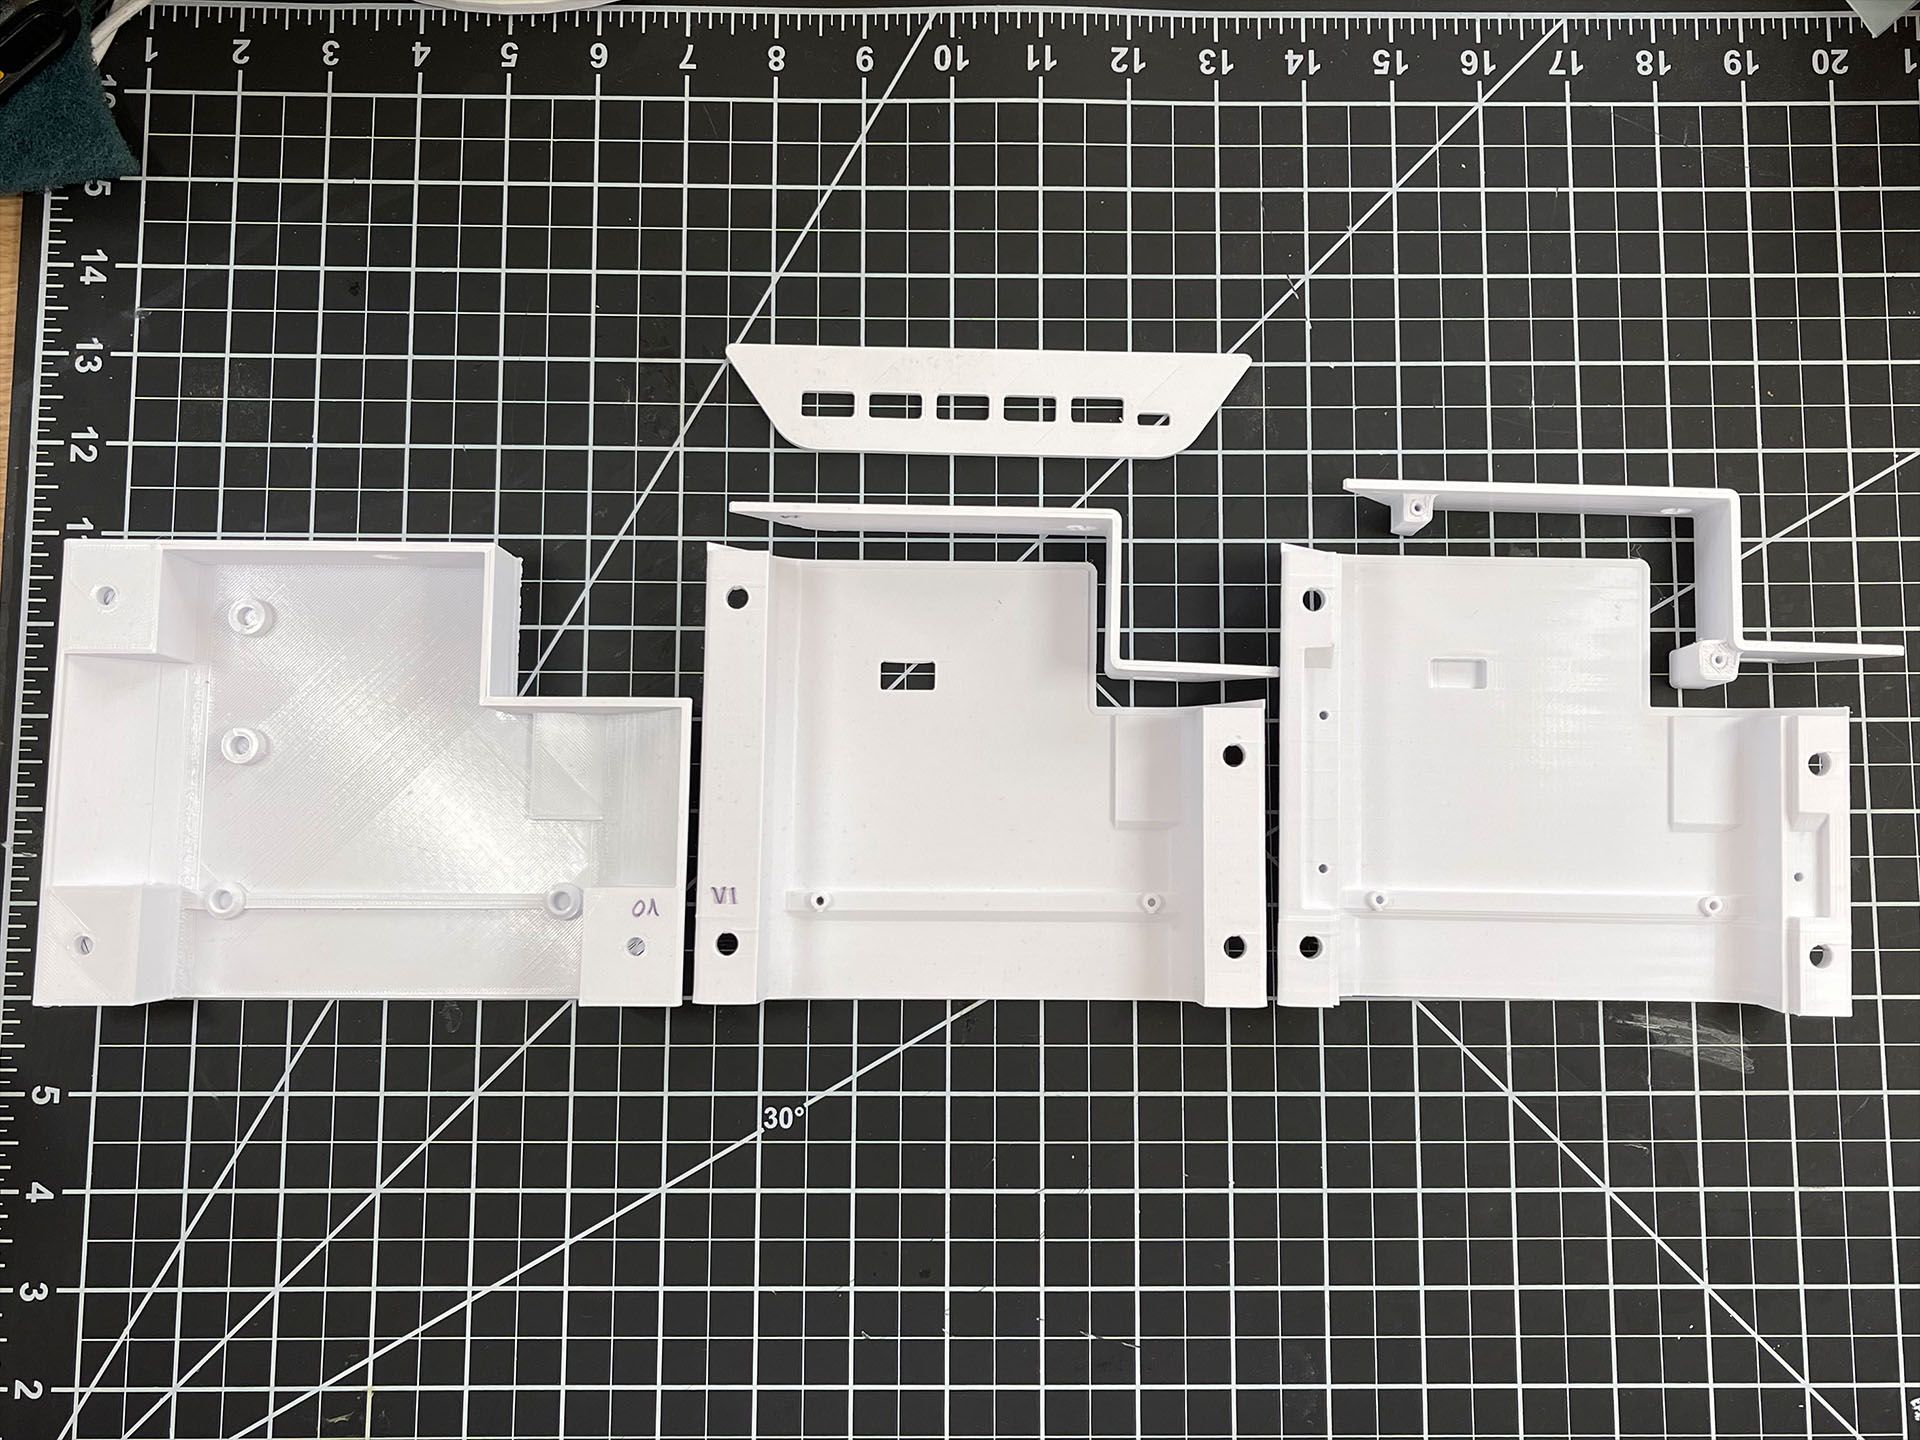
The enclosure design went through several design iterations. The print geometry was more conducive to being three pieces. The geometry was optimized to minimize support material. By making the front face a flat part, it allowed me to choose a different material.
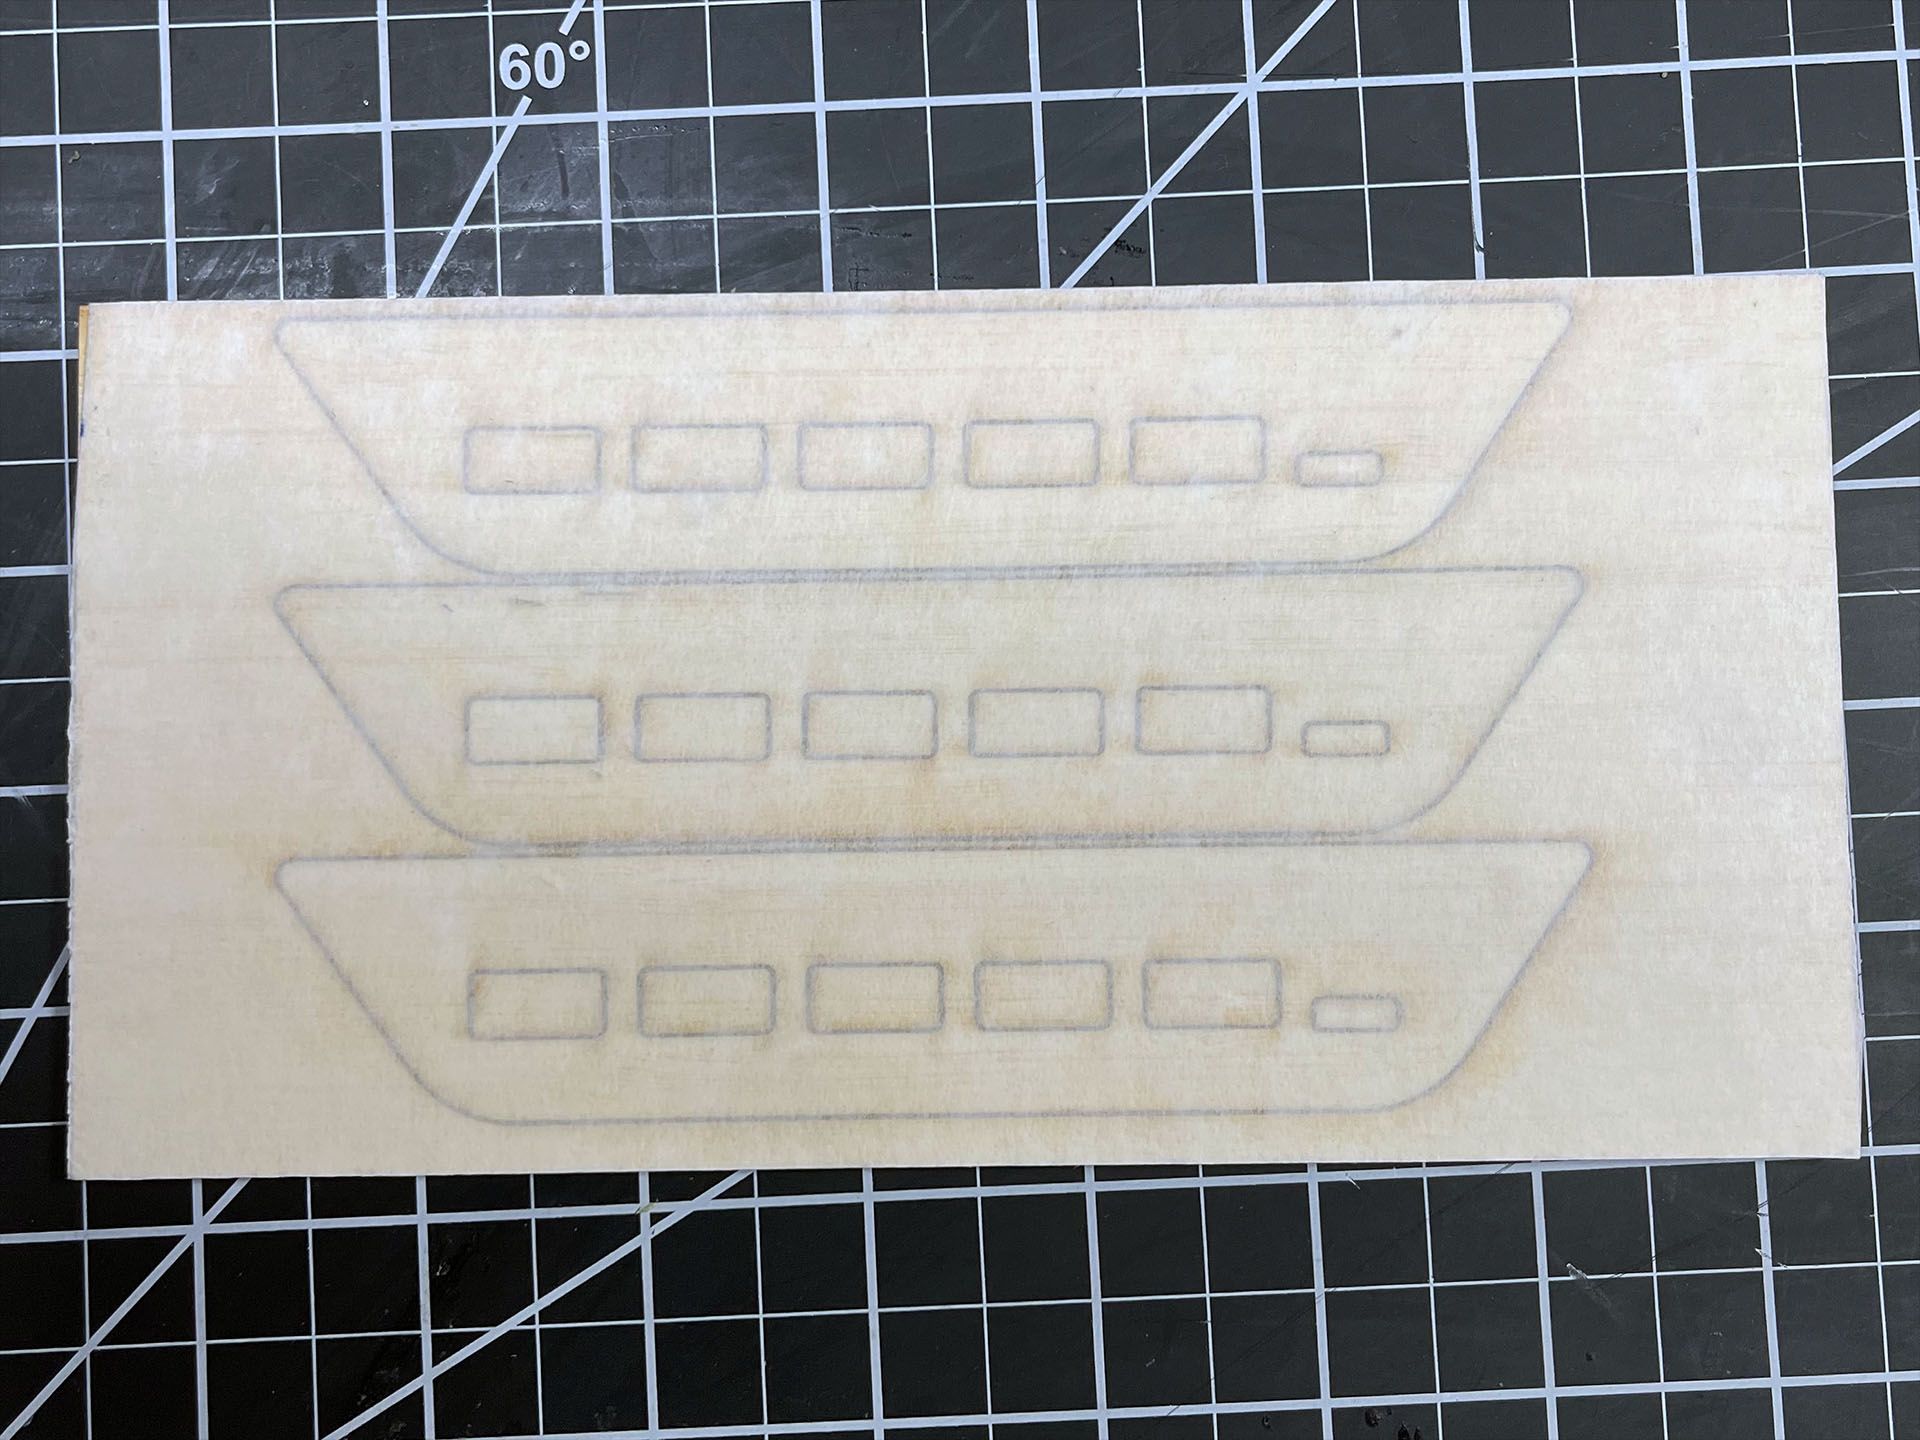
I choose 3mm thick bamboo plywood to match the Fully Jarvis Bamboo tabletop. The face plates were laser cut, then sanded and varnished.
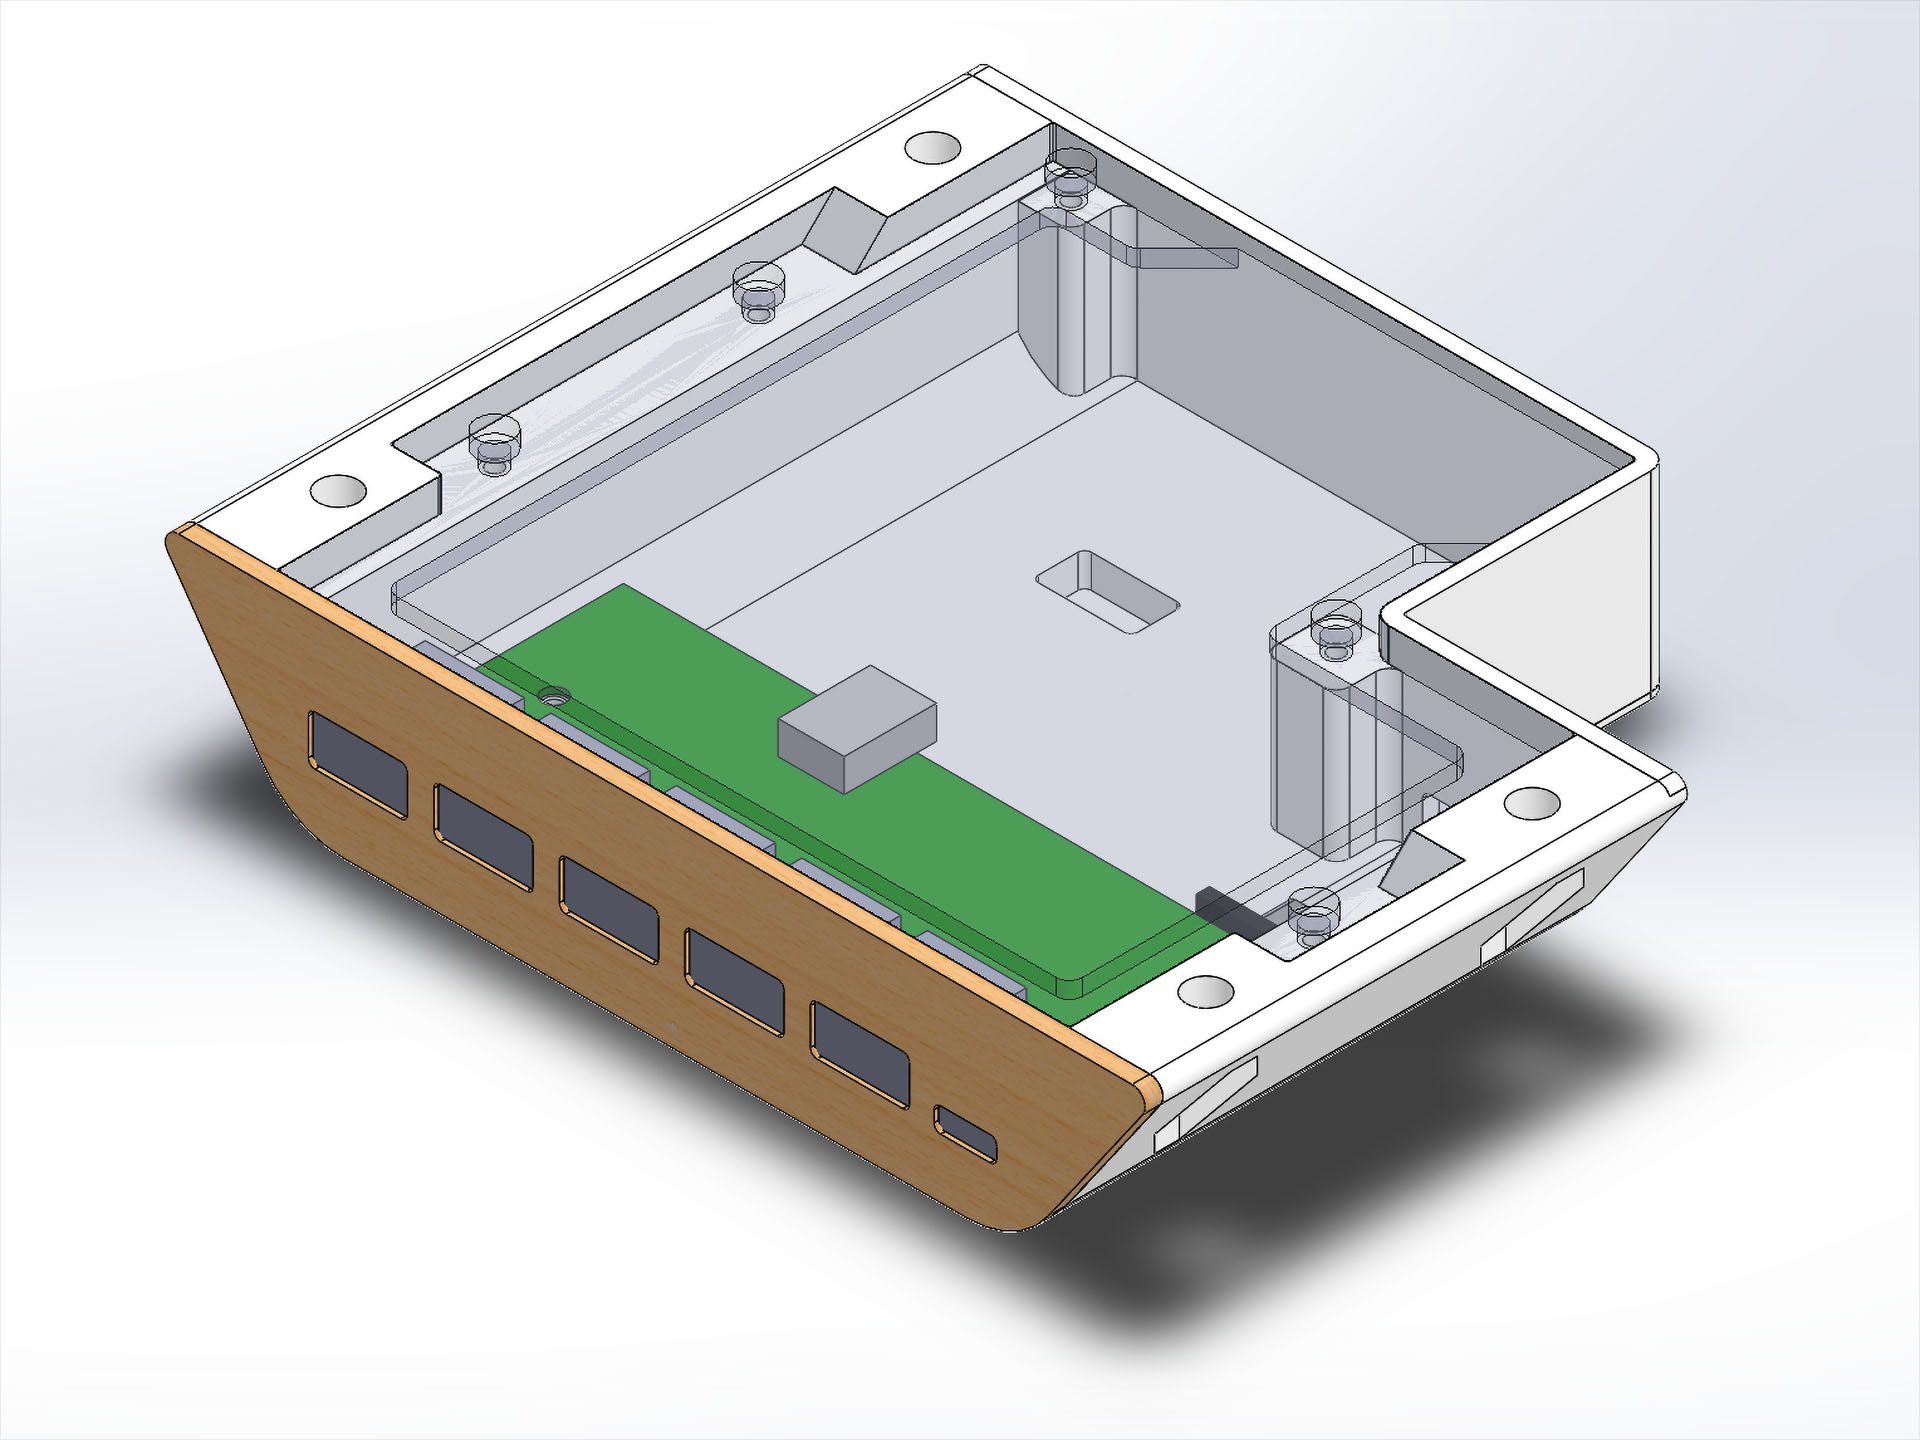
The final design uses M3 x 5mm Phillips head screws to secure the PCB and the top lid to the main body. The small bulge and cutout was designed to fit the ATX connector's latch, this helped to minimize the height of the entire assembly.
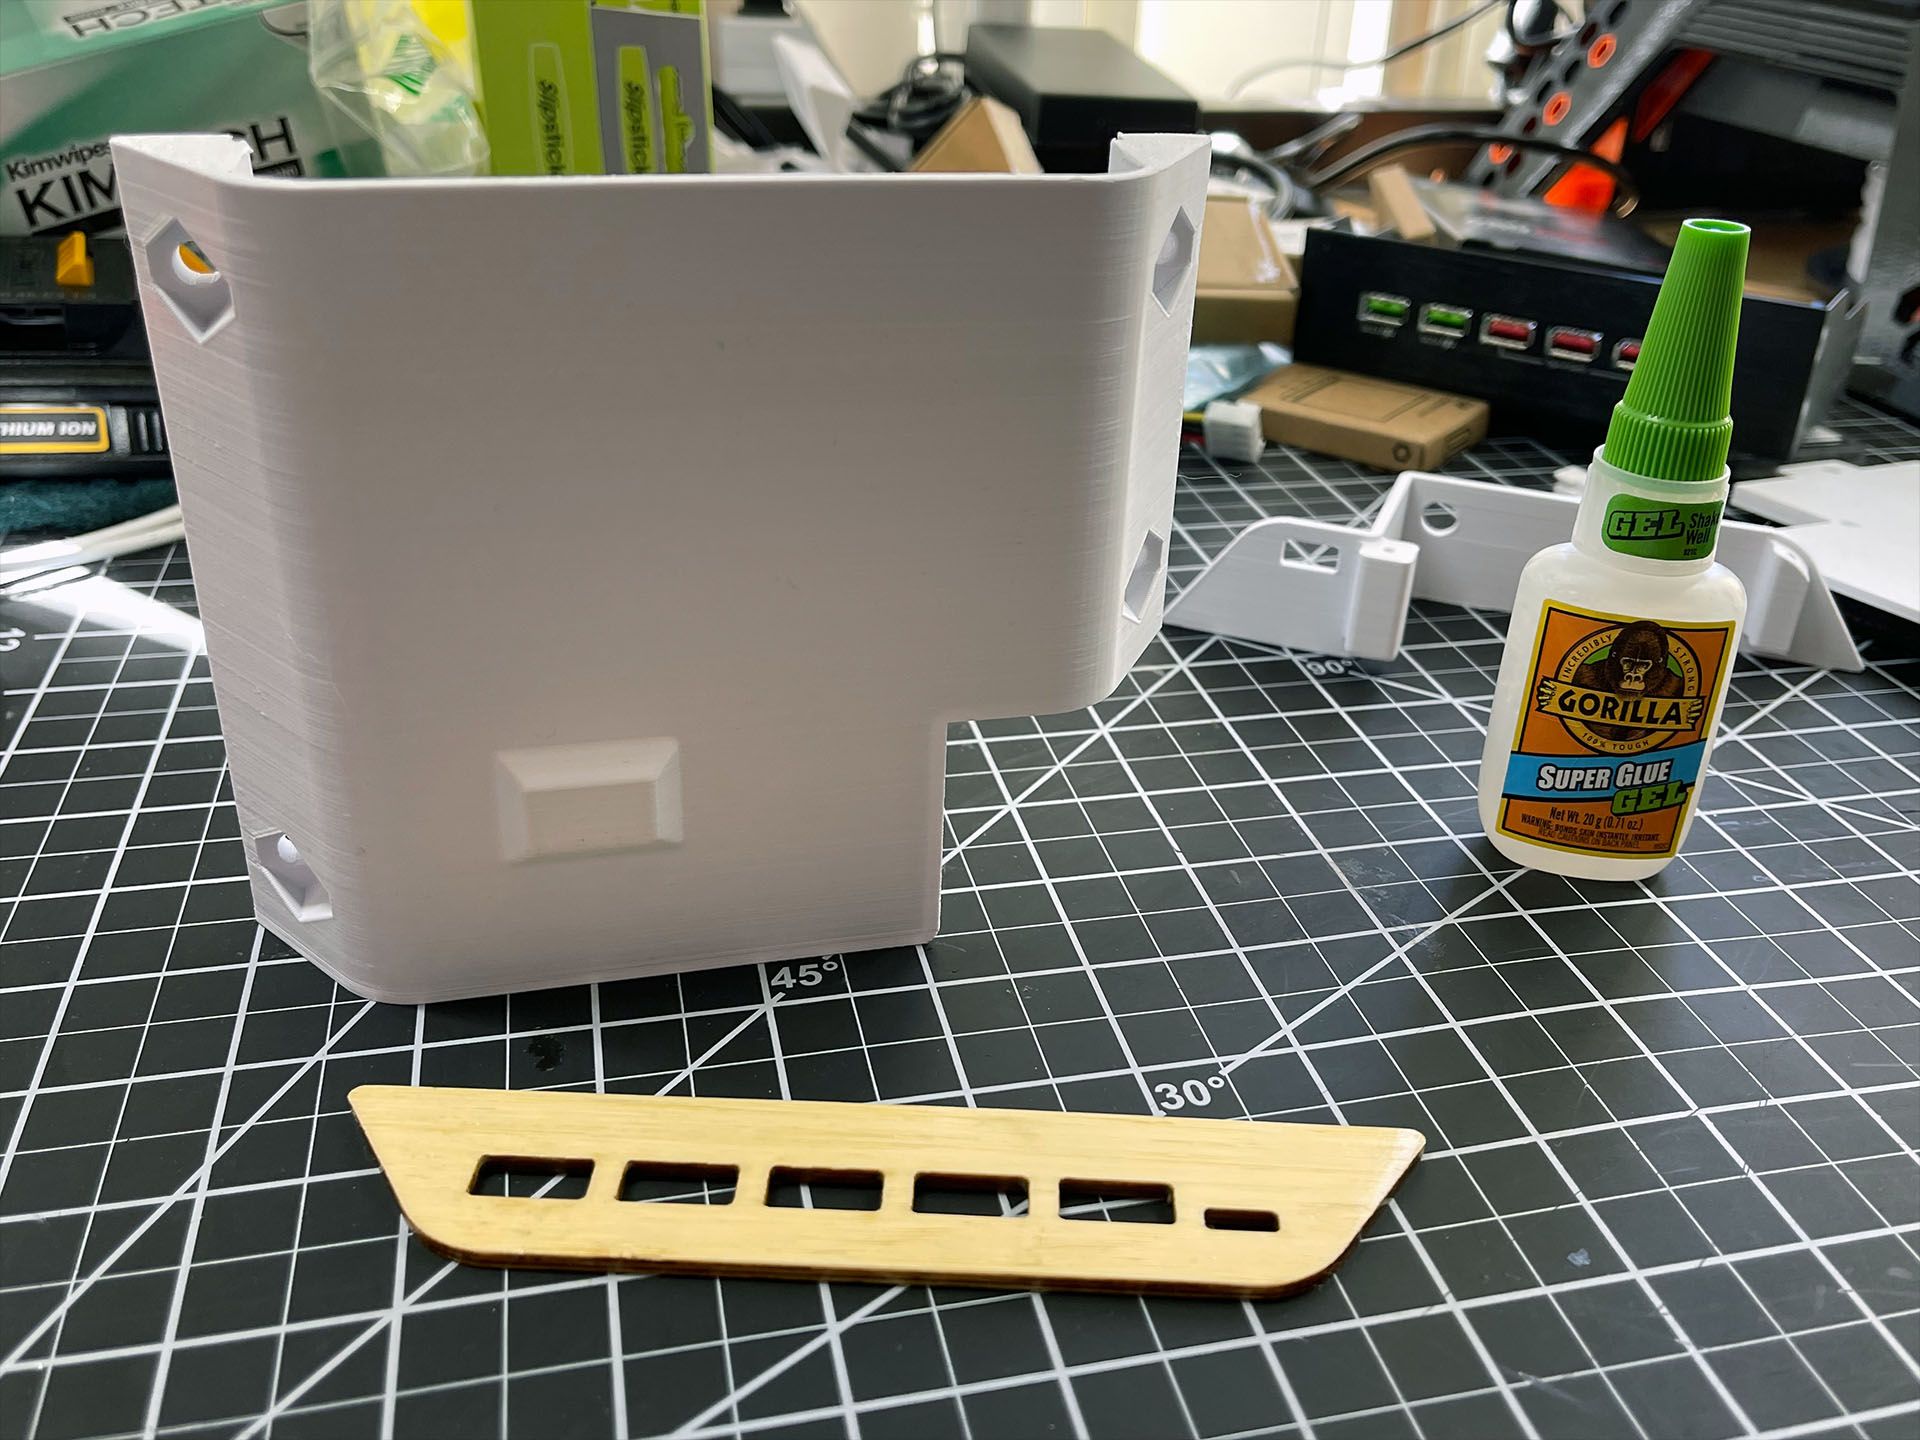
The rear and front face plate was glued on to the main body with CA glue.
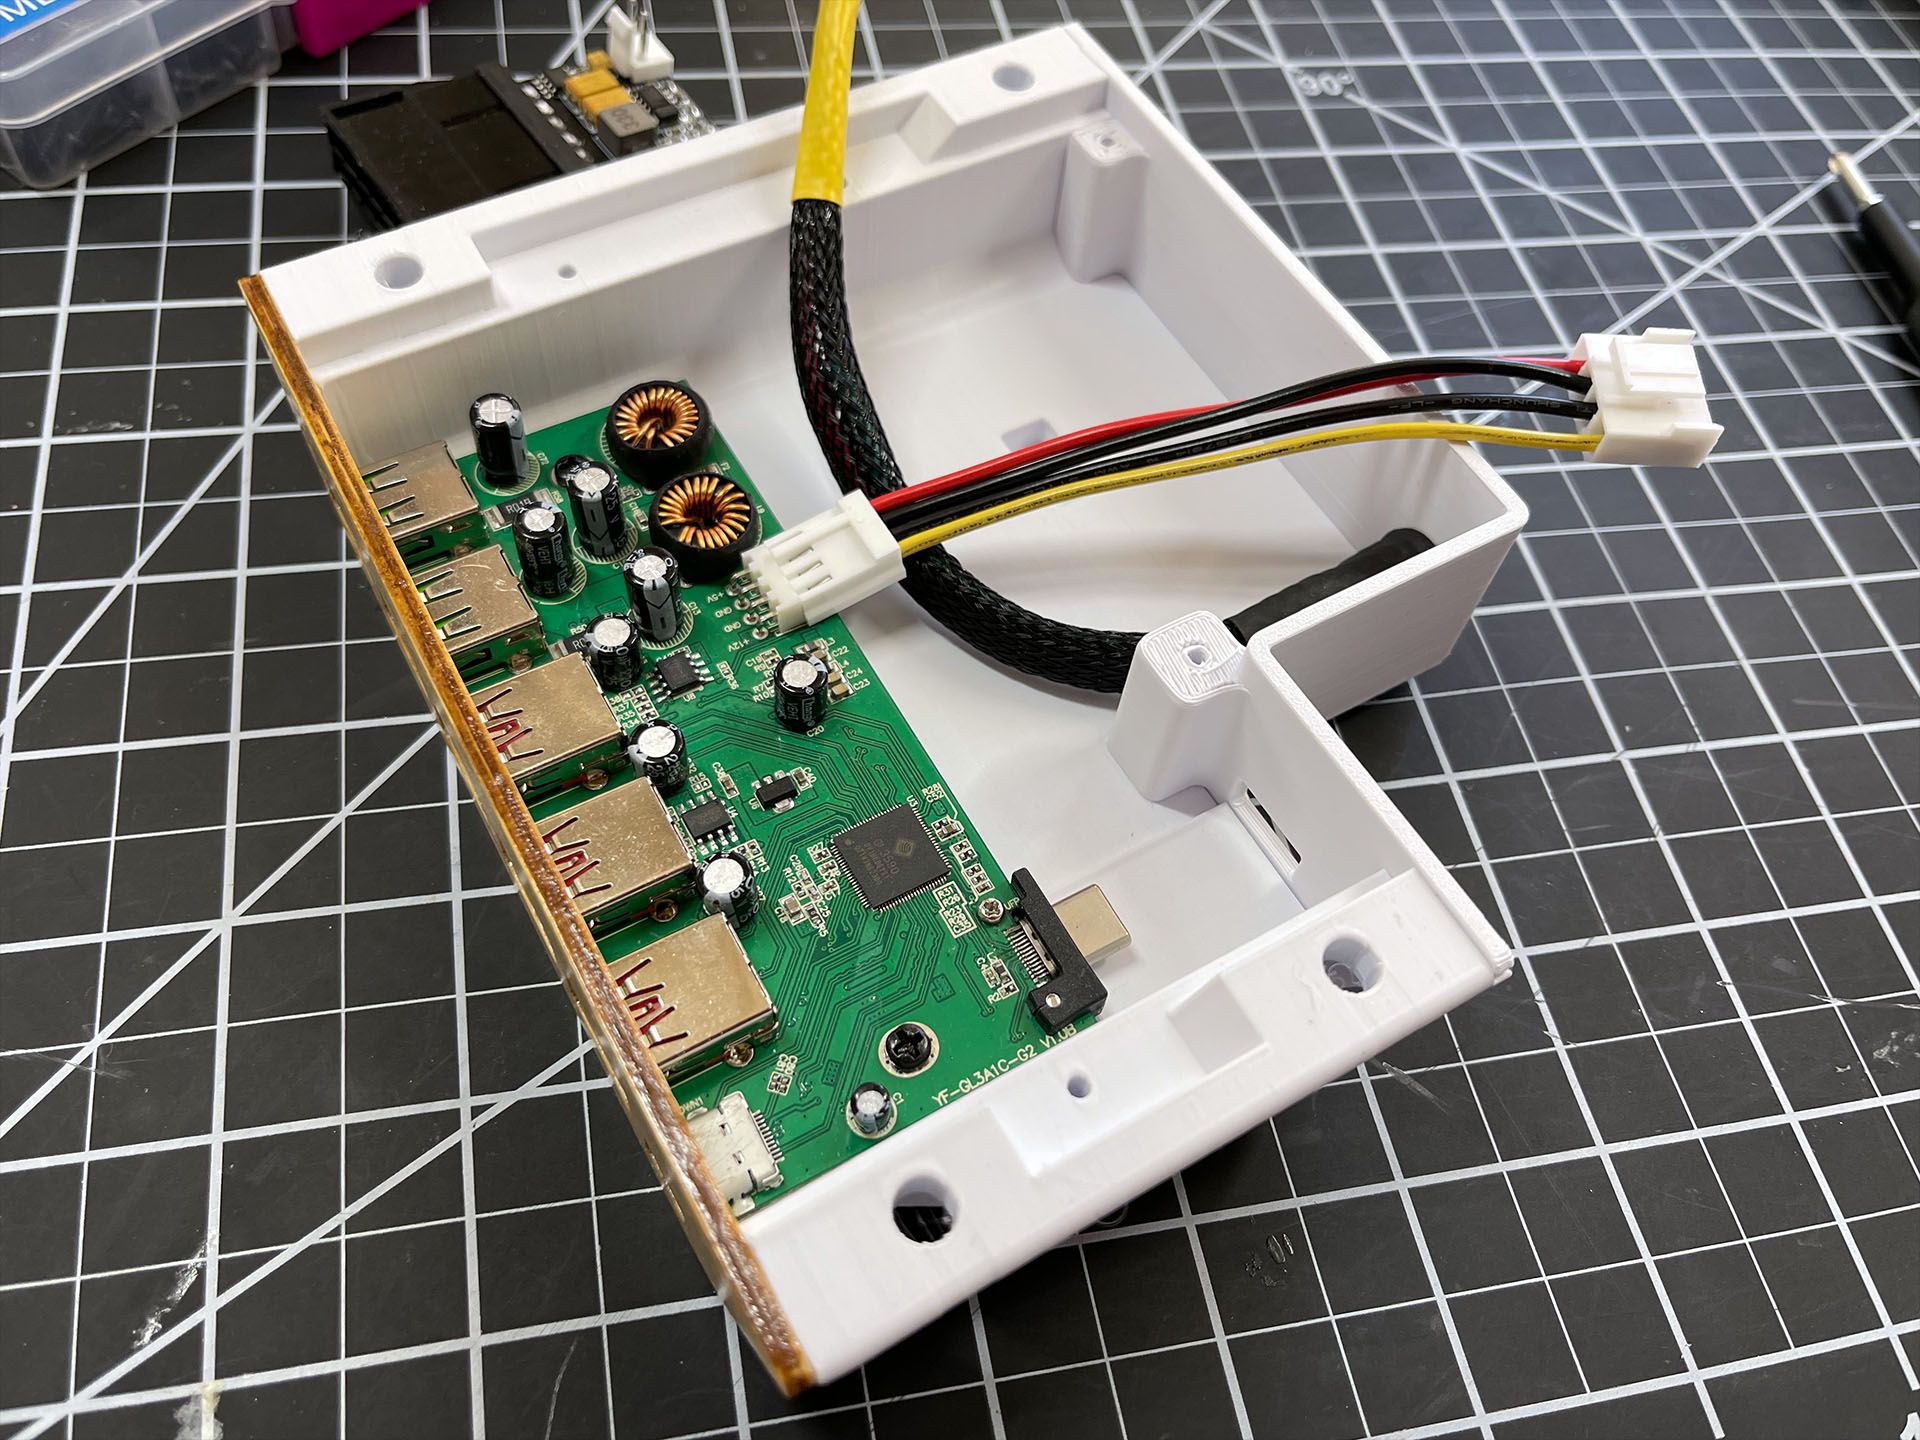
The hub PCB was screwed into place. The barrel connector was secured to rear of the enclosure.
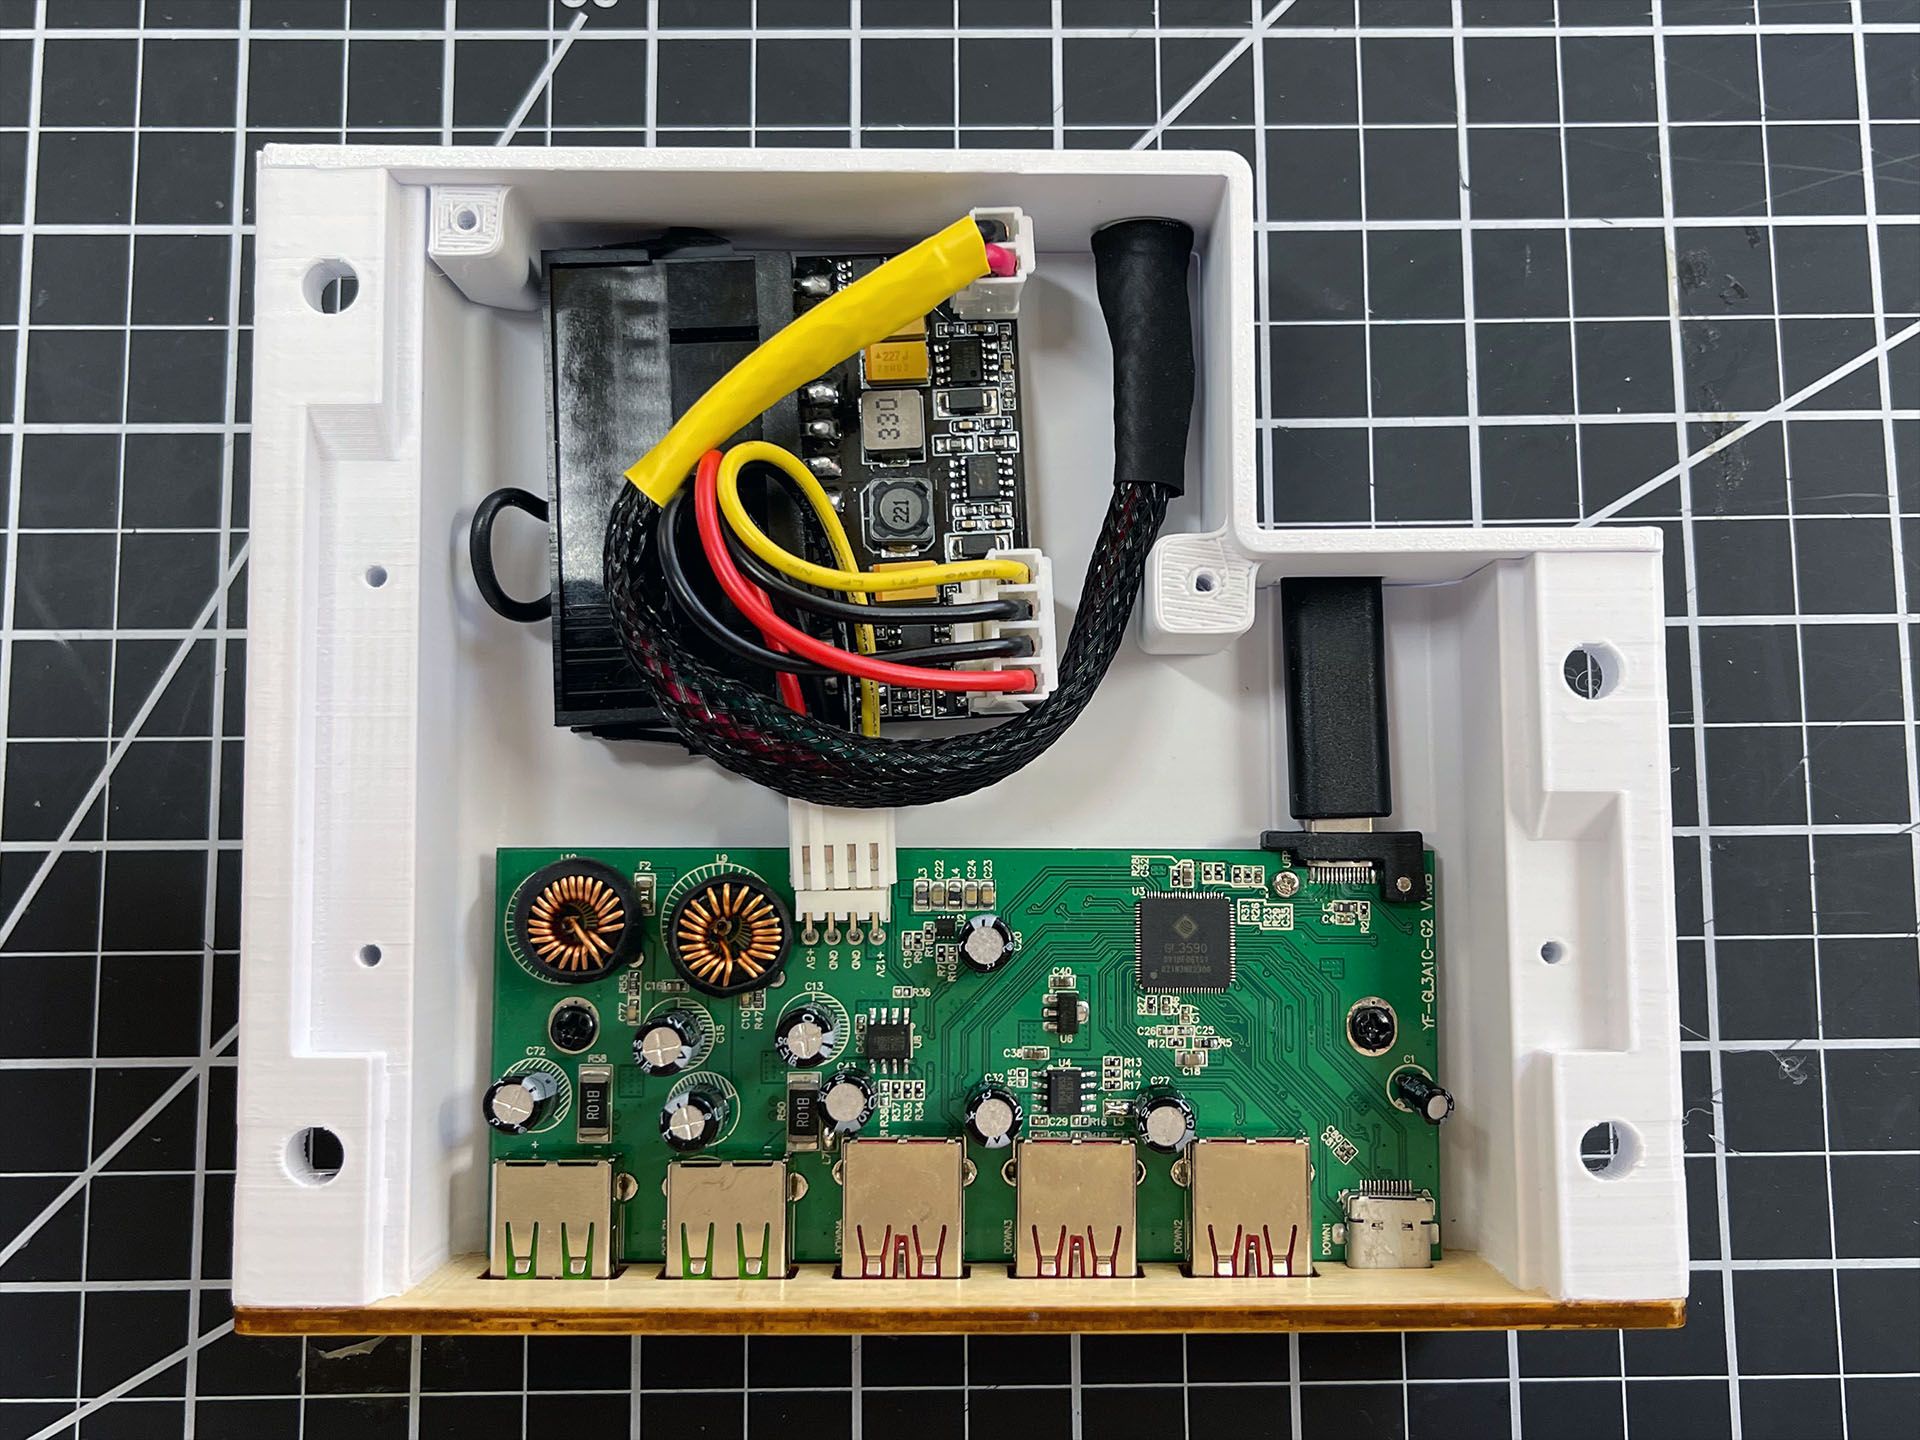
With the PSU installed with double sided tape, the input and output cables can be connected. The type C adapter is used as a extension and to allow a regular type C cable to plug in.
With the lid closed, the assemble is about 30mm thick with the small bulge adding just 4mm to the thickness.
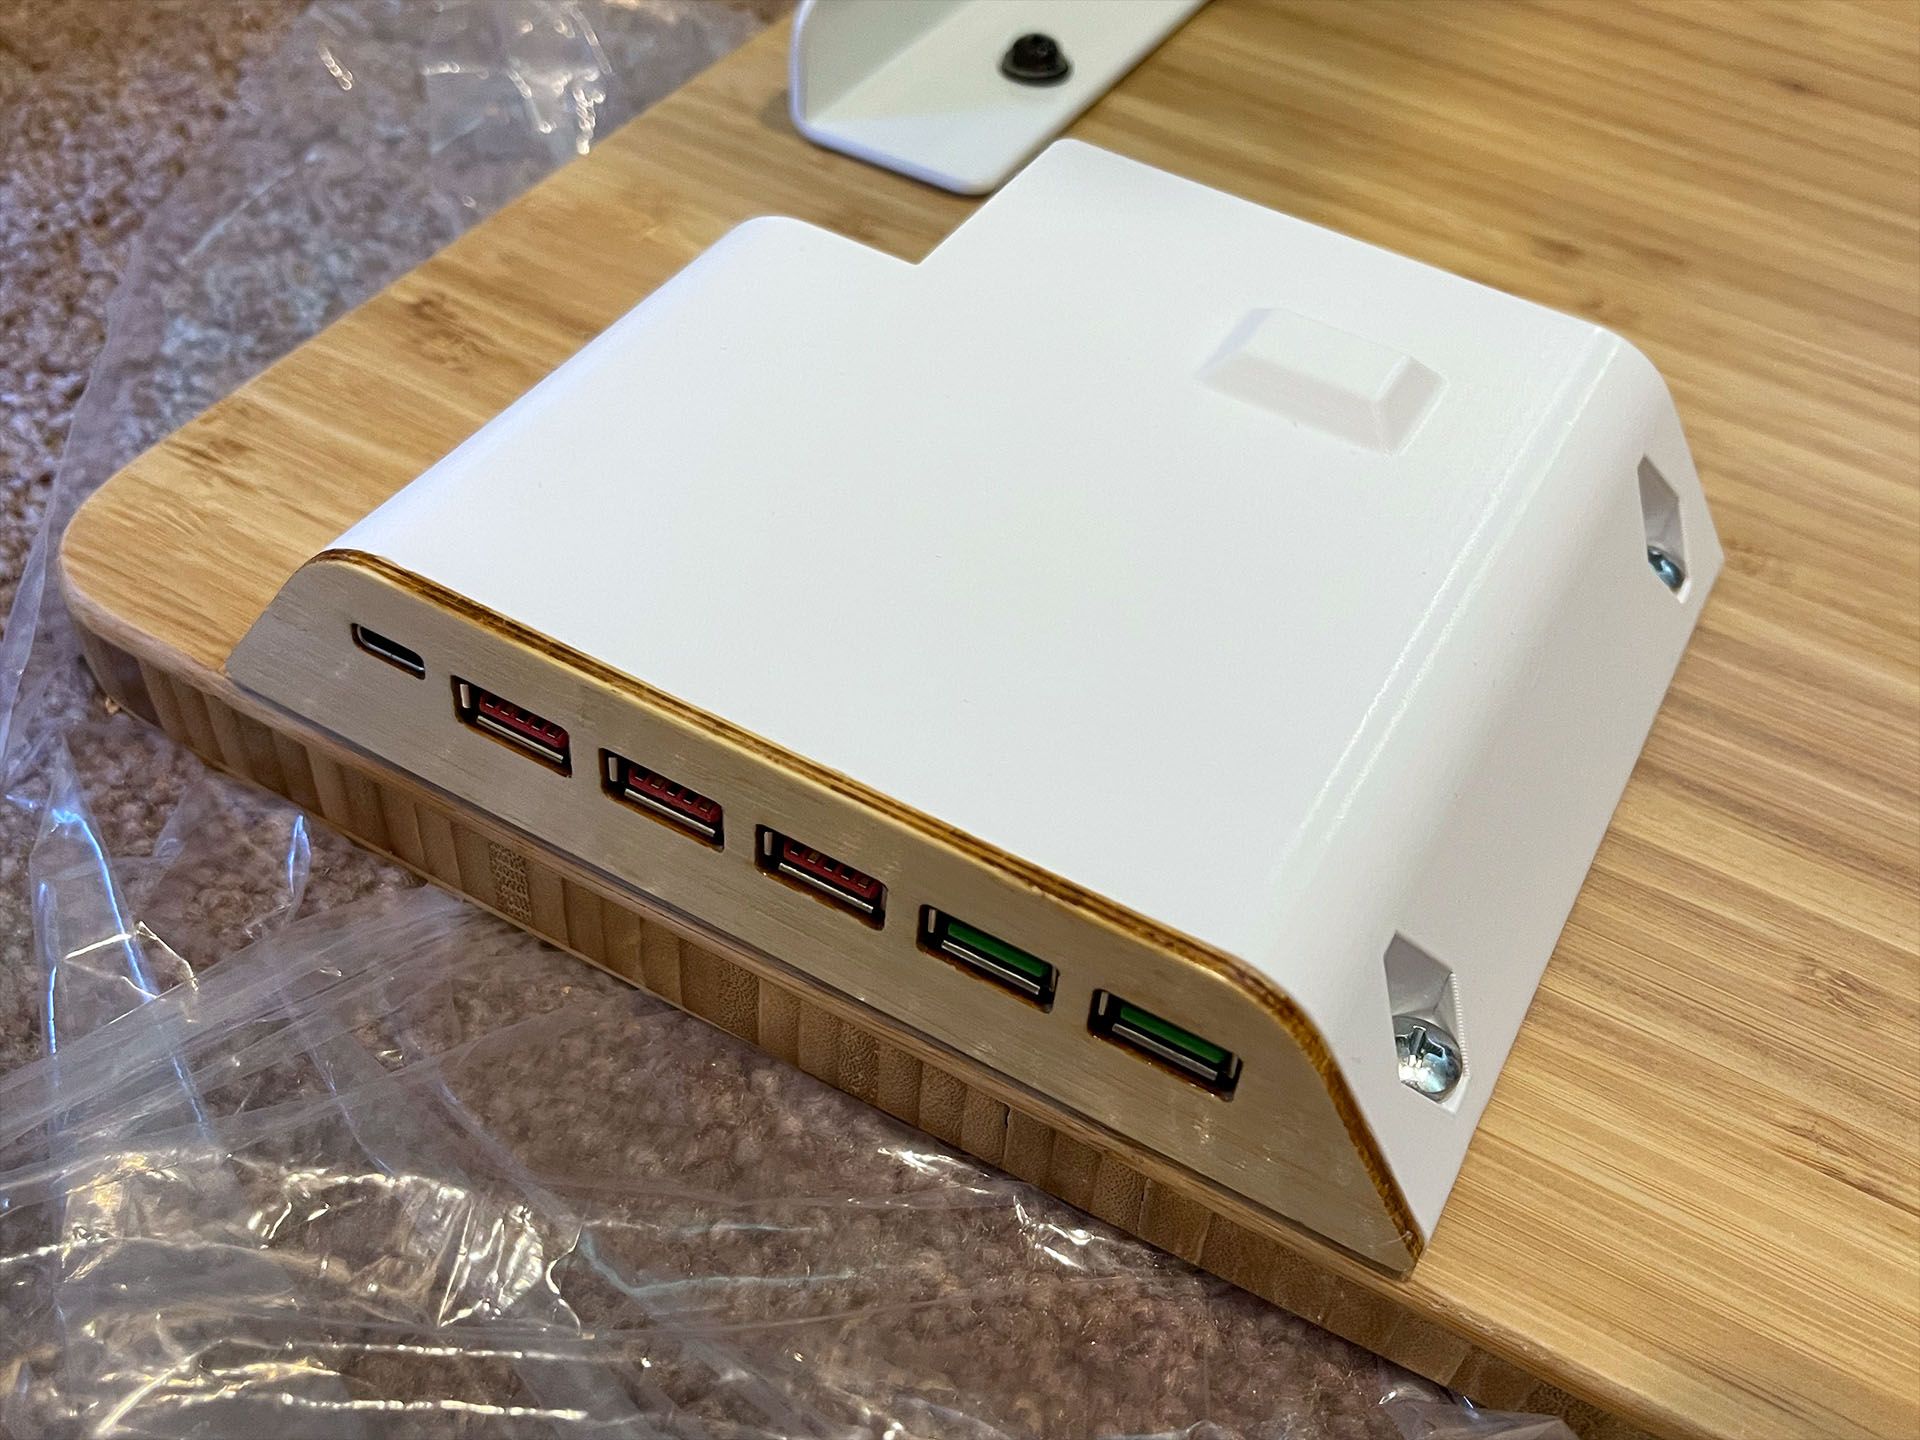
The under desk hub was secured to the bottom of my desk with some wood screws. I ended up using a 10 feet COSEMI Active Optical USB 3.2 Cable to connect the hub to my computer due the length of cable management and the fully raise standing desk. Overall this turned out quite well in both performance and aesthetics.