As part of my continuing series on my new desk, this post covers my custom CPU cart. Although CPU holders and carts seem like a throwback to the 1990's and the beige boxes of the era, they still provide a vital function. My current rig is housed in a Corsair Obsidian 450D and needs plenty of air flow from the bottom fans; placing the case directly on the carpet would starve it of the much needed airflow. I also wanted space for my UPS and Drobo to simplify the sit-stand desk arrangement.
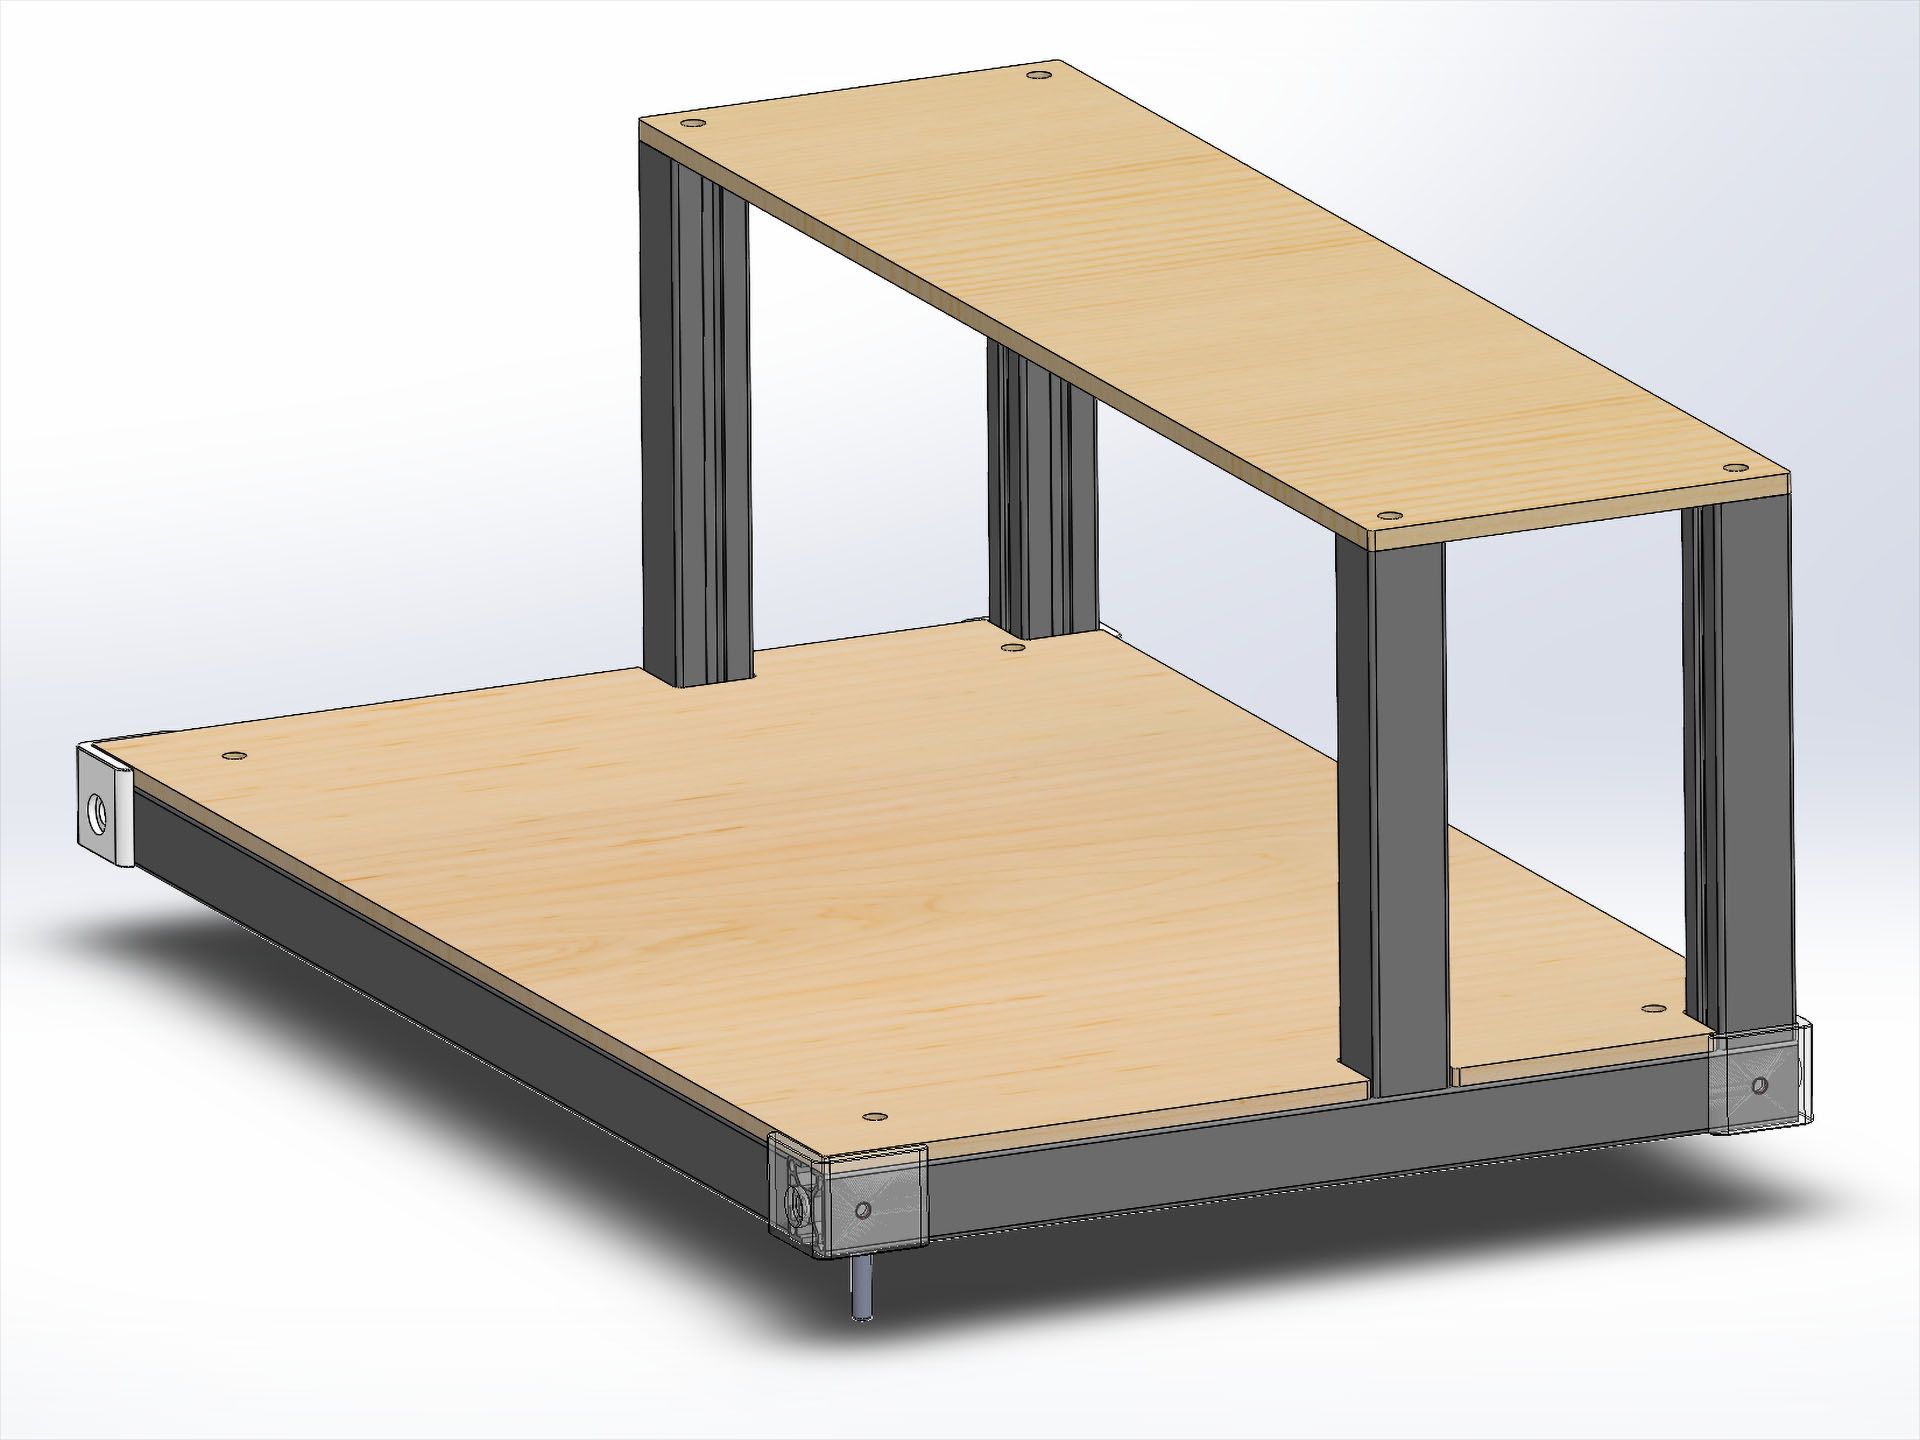
The cart was designed with 3030 aluminum extrusions, laser cut plywood, 3D printed parts, and casters. The extrusions were designed to be assembled with blind joints and some 3d printed parts to hold on the plywood tops and casters. The two tier design allows for better use of the footprint to maximize usable area for the UPS and Drobo.
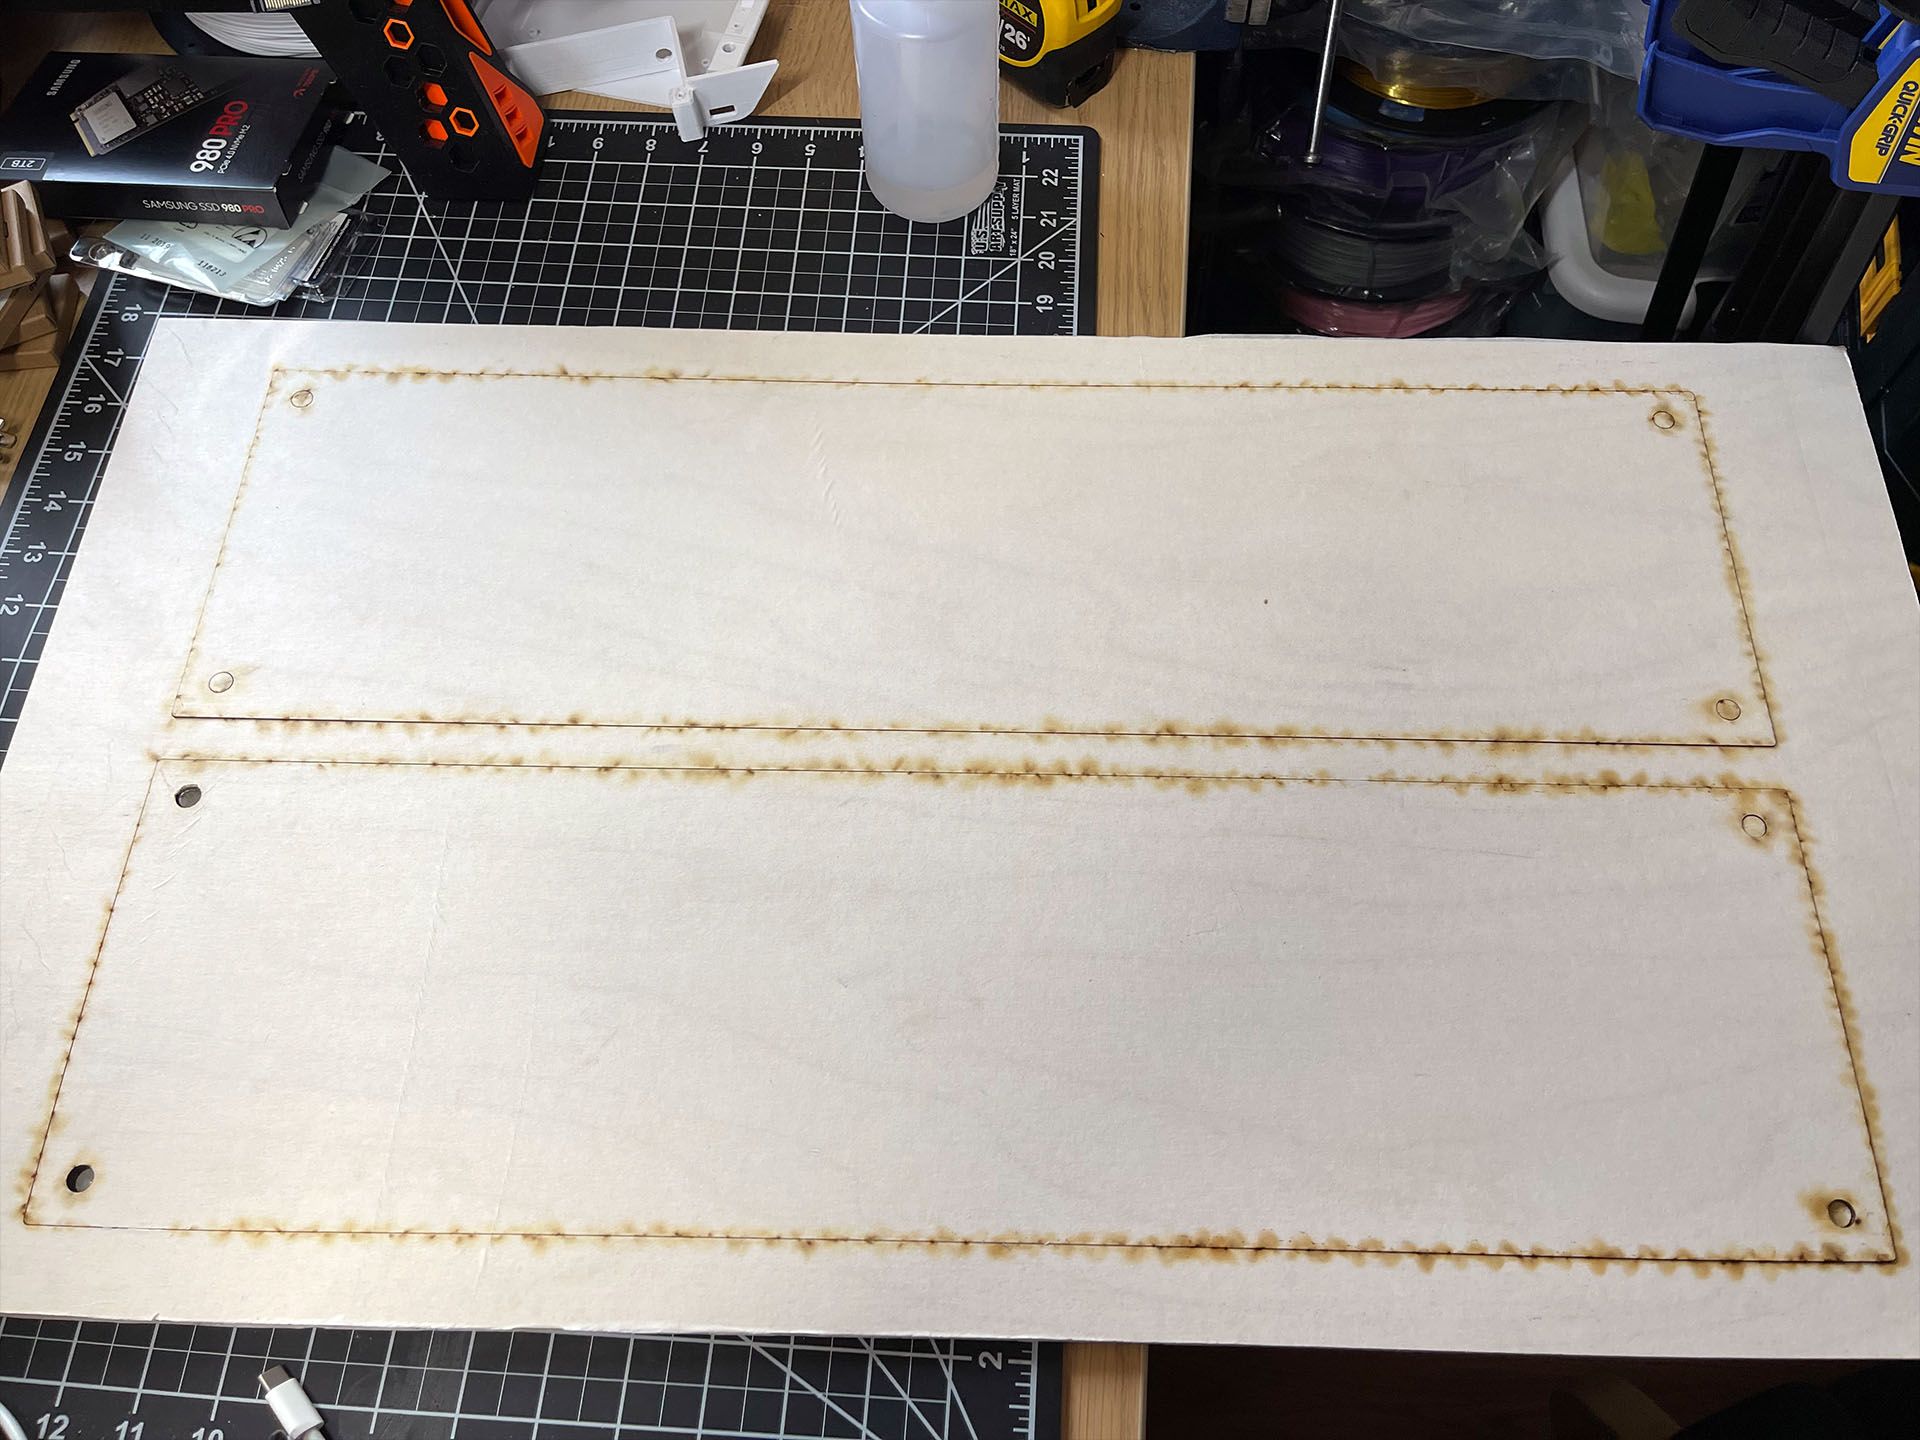
Since 6mm birch plywood was used in the design, I was worried about the stiffness of the upper surface top. I opted to have two pieces laser cut to be laminated together.
The plywood pieces were sandwiched together with Titebond II wood glue and clamped together. I should have used more clamps as the clamping pressure didn't seem very even after the glue dried.

The tops were sanded with 120 and 240 grit before being coated with wipe-on poly. Another pass of 240 grit was used to knock down the grain rise after the first coat. I went thick on the poly with 10 coats to get a nice smooth and shiny surface. The mounting holes were countersunk to allow the bolts to sit flush with the surface.

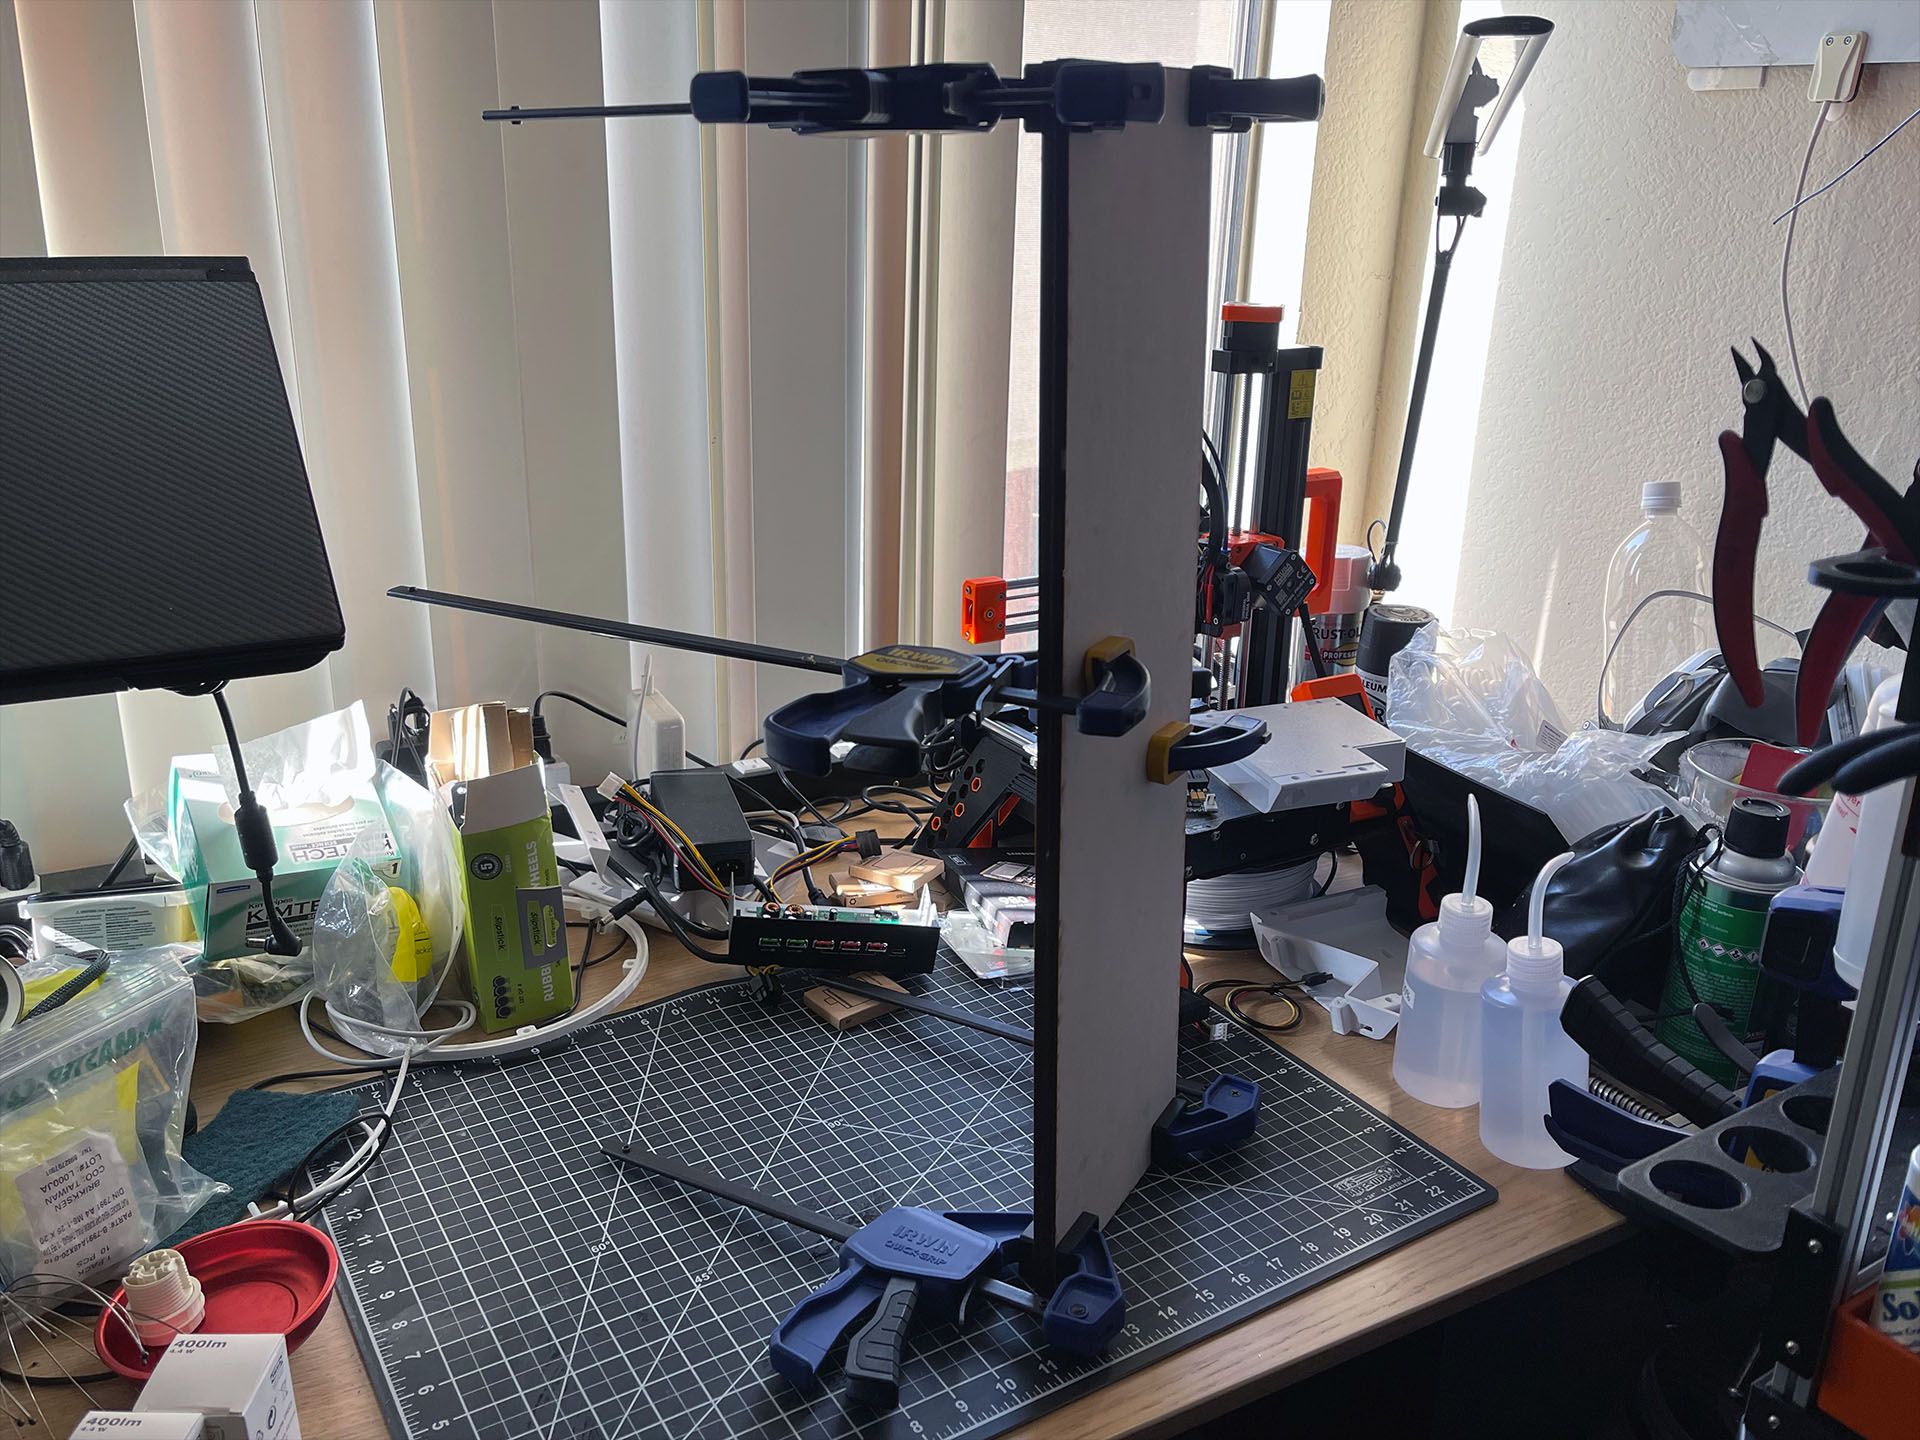
The 3030 aluminum extrusion was cut to length by Misumi. The horizontal section extrusions have a single smooth face while the vertical ones have two smooth faces. The ends were tapped for M6 screws and access holes were drilled.
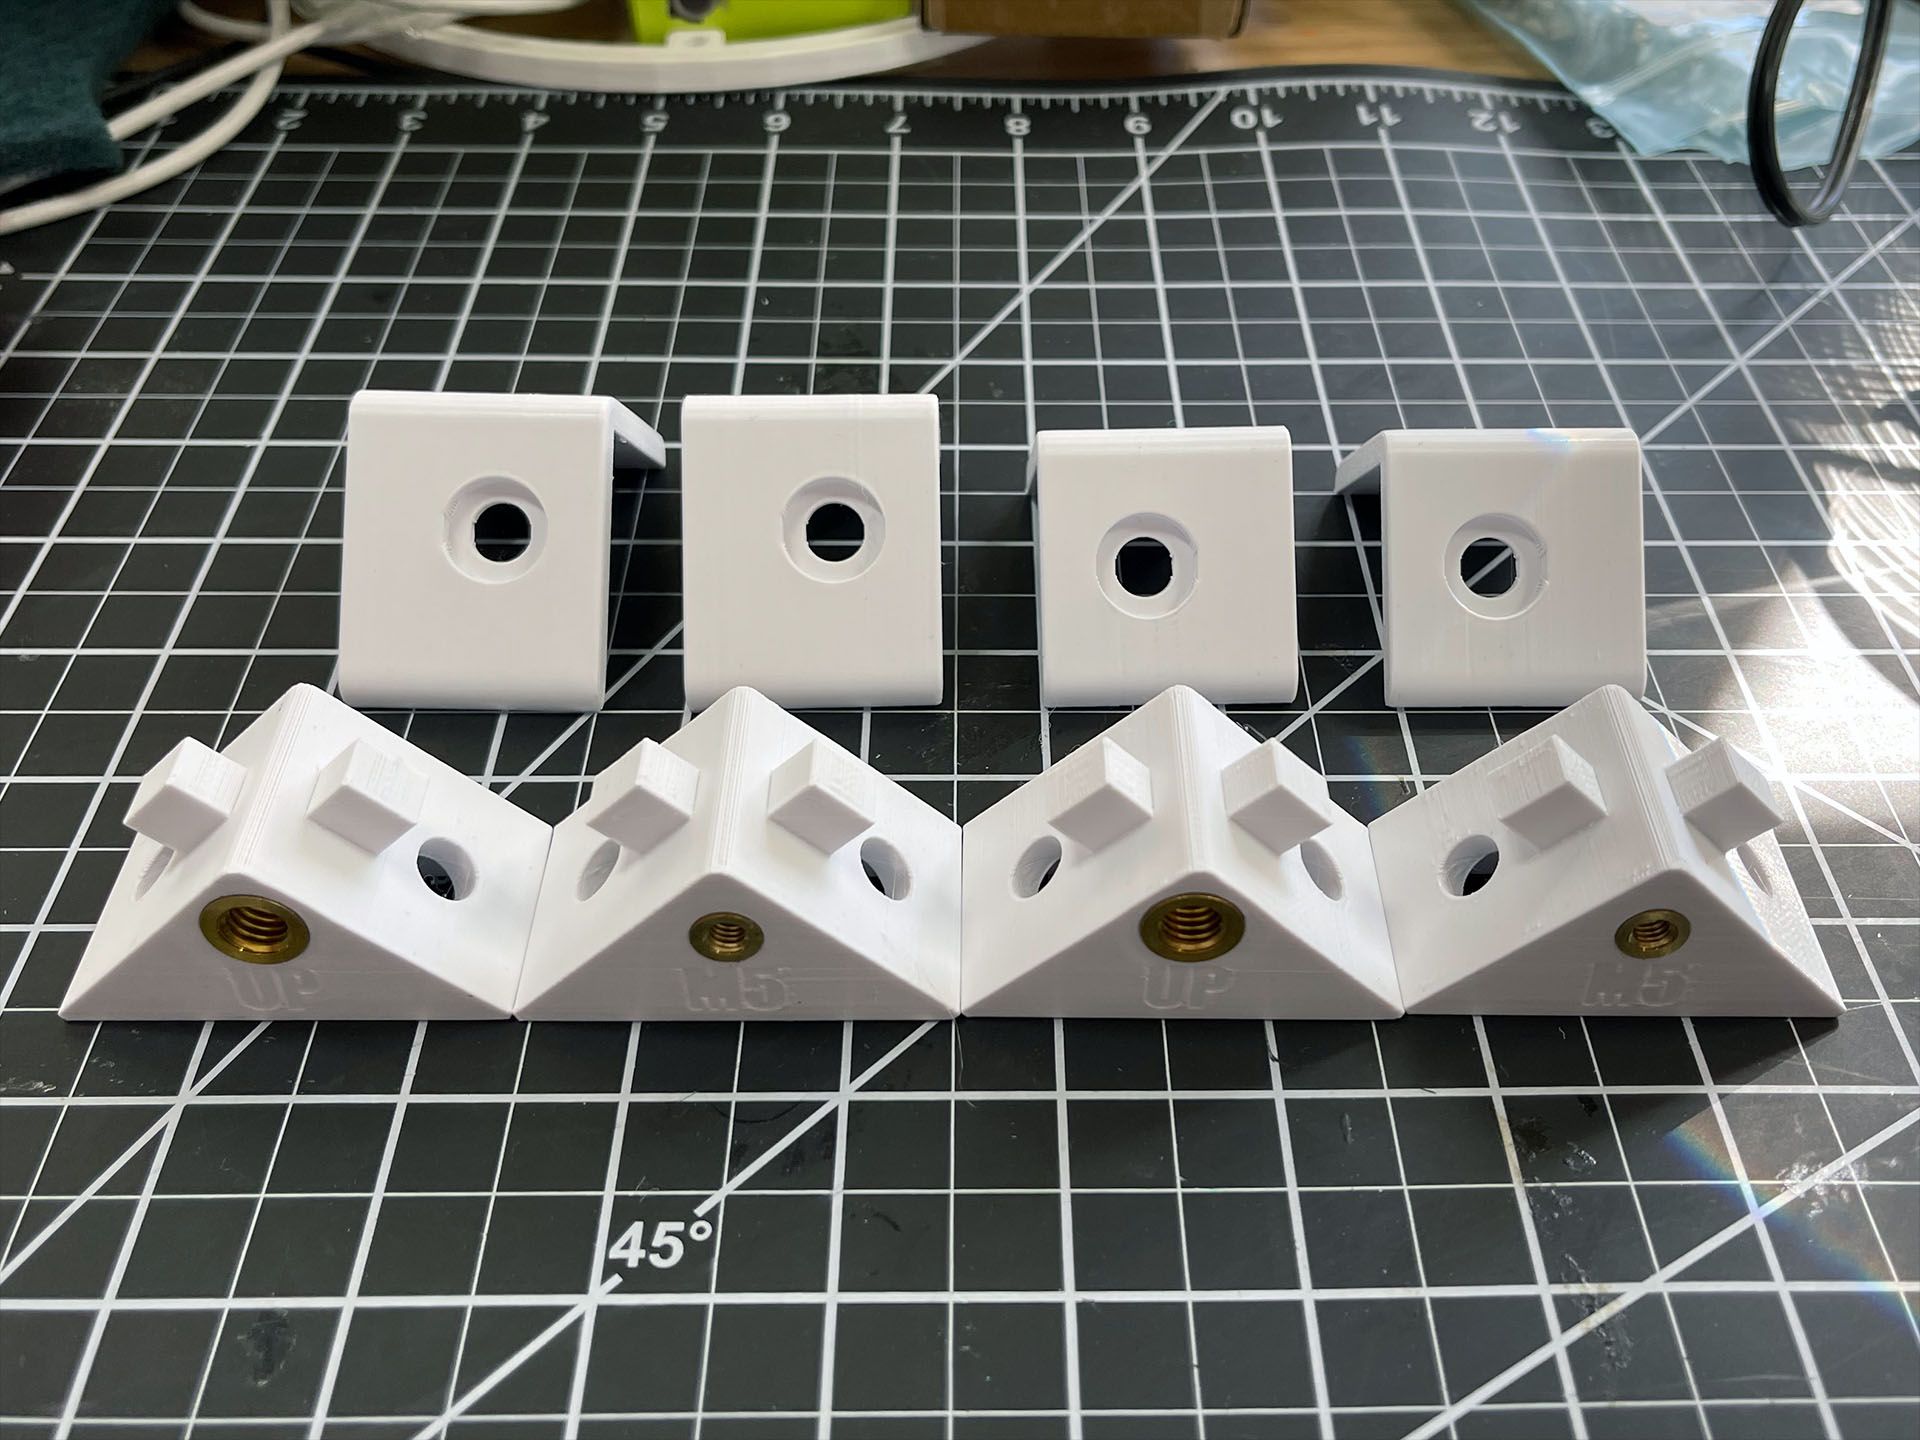
The 3D printed parts were printed in white MatterHackers Build Series PLA. Two types of heat-set inserts were used. The casters used M5 screws while the rest of the assembly used M6 screws.

The corner brackets add rigidity to the frame and provide mounting points for the top and caster. On the bottom face, roll-in T-nuts were used for securing the caster plates and he toppers were secured in place with M6 flat head screws.
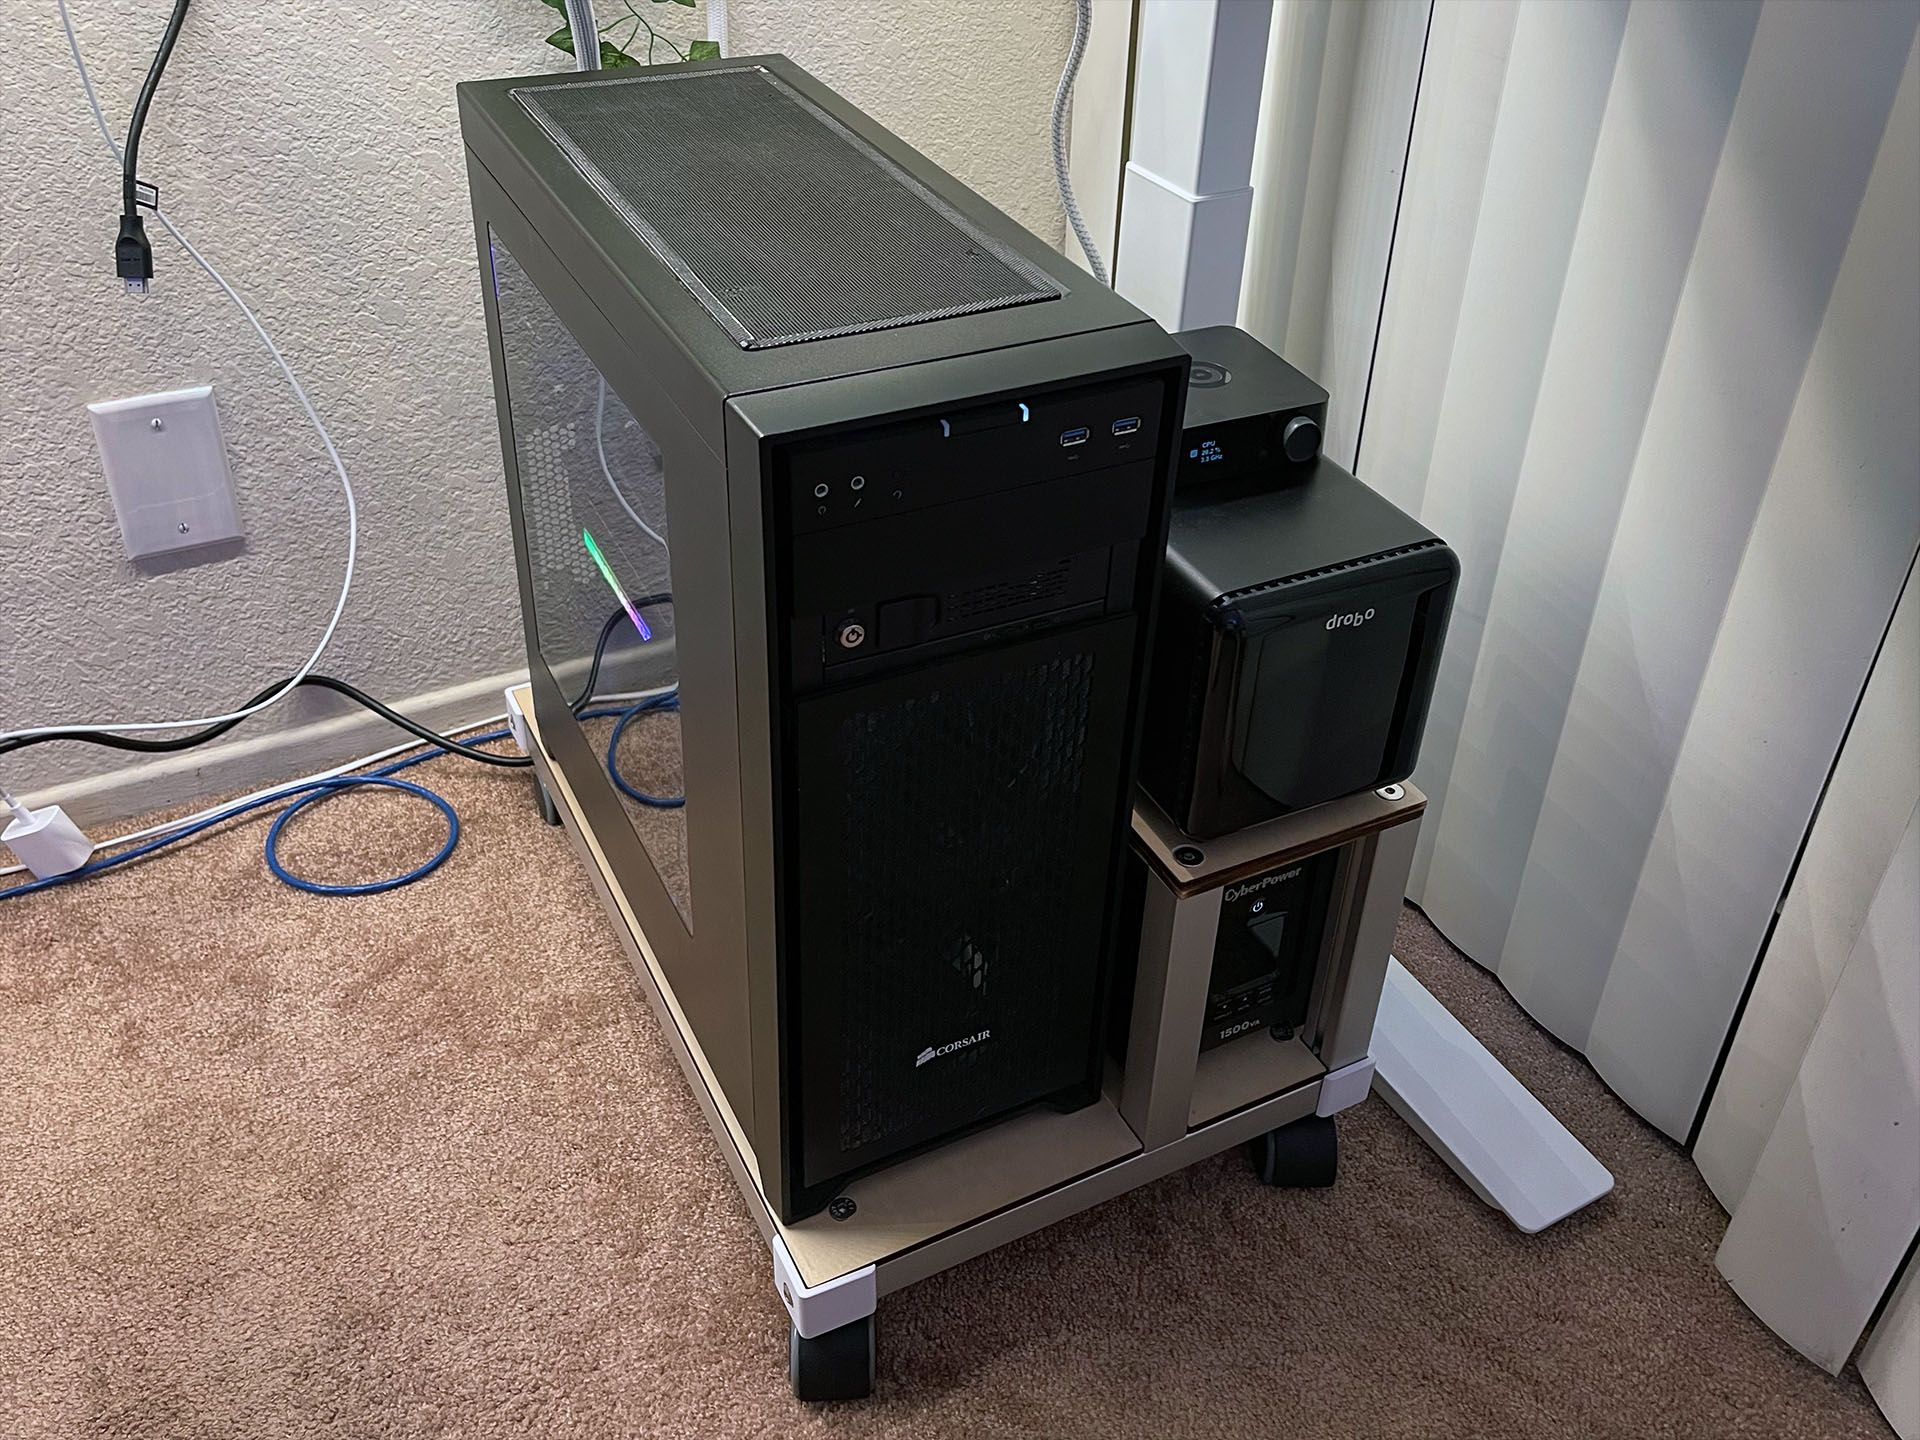
The corner trim prices protect the corners of the topper and cover the ends of the extrusions. The UPS lives on the lower level, while the Drobo sits on the top. The fully assembled cart provides a clean solution for keeping my case and accessories organized.